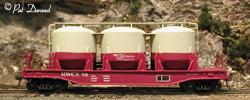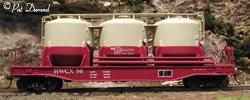


Building the Halliburton Hopper cars
by Pat Durand.
 |
 |
 |
The model is based on an earlier car which had some variation in the support structure. Most of the finer details were gleaned from these photos.
I was given two Concept Models kits, after the original buyer determined they were hopeless chunks of plastic. The resin castings can only be assembled using ACC. I suggest Extra Thick MAXI-CURE. The trucks included were plastic wheeled friction bearing trucks and I replaced them with KATO 31-602 Barber S-2 Roller Bearing trucks to match the prototype. Discard the draft gear cover supplied and use a Kadee draft gear box cover. I used only the tank parts, three hatch covers, under-frame and top deck from the kit. Two pieces of brass ladder stock, four angled stirrup steps, four drop grabs, and four strait grabs, three inches of .020 wire for the end hand rails, some diamond tread for the end platforms, an Athearn caboose brake stand and wheel, a Kadee 2013 50" Galvanized Apex Running Board and #158 scale whisker couplers provided materials to completed the job.
A strip of .020 styrene for the tank wrapper, and a few scraps to make the tack boards, and sockets for the end hand rails will be needed. I had some scale 4X4 angle brass from which I fabricated the six brackets supporting the cat walk. Additional pieces of this angle were used to tie together the three strips of the catwalk.
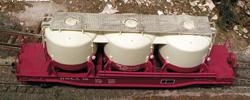
The Kadee Running board is cut into three identical pieces and glued together side by side using "Thin" ACC. Turn the assembly over and ACC the brass angle iron strips across the catwalk using photos as a guide. The six brass brackets were fabricated into U shapes by filing a notch halfway through the angle and bending it at a 90° angle on each end. The ends of these brackets are left long so they can be inserted into oversized holes drilled in the top of the tanks. Then the cat walk is put in place and with lots of kind words it is trial fit and finally glued to the top of each bracket. When all the brackets are affixed then lift the assembly out of the holes and finish glue the brackets to the bottom of the catwalk. Now you can do the final assembly on to the tanks gluing the uprights into the oversized holes one at a time while keeping every thing aligned.
I do like a challenge and if you plan on building one of these "kits" you may consider yourself forewarned.
The tanks in the kit are each in three pieces and measured only 7 ft in diameter, I added wrappers to make them 10 ft, and then had to free form the compound curves on the top and bottom of the side sheets to conform to the photos. The upright cradles cast into the top frame are not placed very accurately. I had to remove two of them and reposition the cradles so I could keep the three tanks in alignment in three planes.
The proper paint for these is Polly S Caboose Red for the bottom and Hopper Car Beige #414388 for the top. The Decals provided are sparse and HWBX should be HWCX at least for the cars that made it to Alaska over the past 20 years or so.
I am pleased to have a fair representation of these unique freight cars in my roster.
Click here for prototype information.