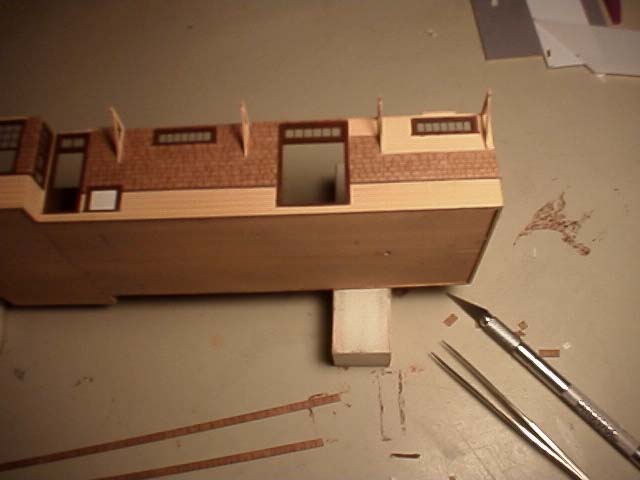
Once the removable roof was achieved, the shakes and corbels could be completed on the first story exterior walls. Five courses of shakes can be placed before the corbels must be installed. Make a cradle out of two pieces of foam rubber to support the structure on itís side. Two 1" X 1" X 3" pieces work well placed between the corbels to keep them off the work surface as you apply shakes between them.
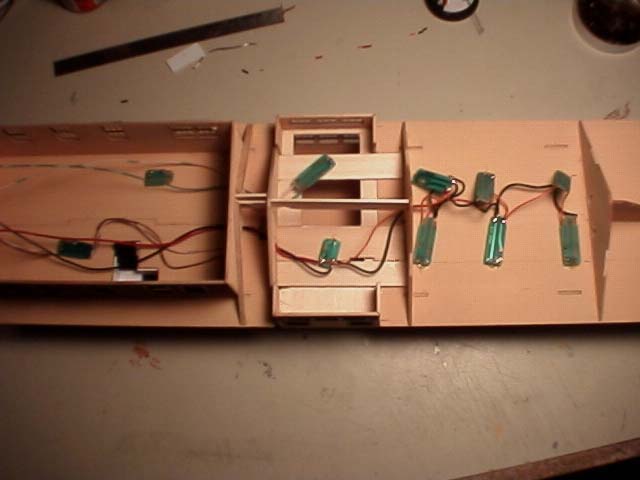
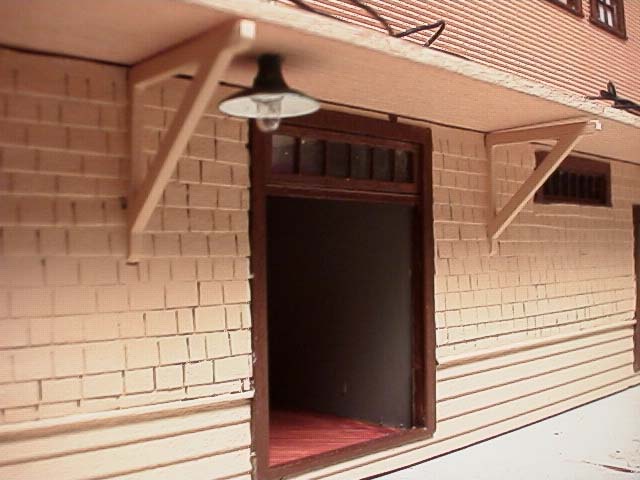
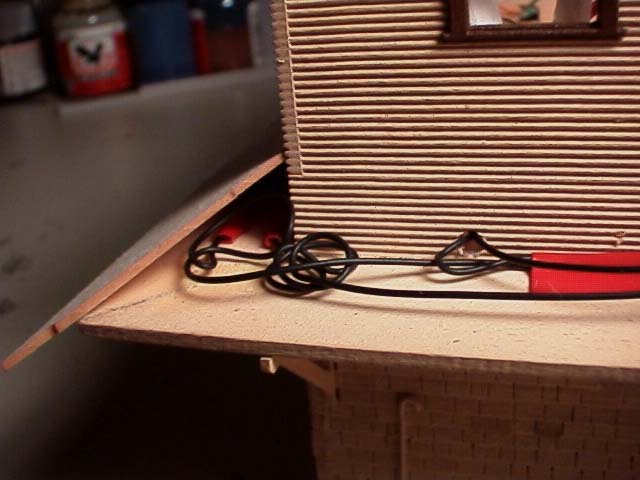
My choice for interior lighting was a series of yellow LEDs salvaged from the junk box. This gives a mellow yellow glow to the interior waiting room and baggage area. A single white LED is in the ceiling of the Operators bay. There are 12 lamps hung under the sofit overhang on the first floor. They were made by drilling out Campbell Scale Models brass lamp shades to accept a 14 volt lamp. The lamp was attached to the shade with ACC and then the shades were painted dark gloss green on top and gloss white in the reflector. Holes were drilled in the sixth board gap on the underside of the sofit as a friction fit for the lamps and they were fixed with ACC. Long leads of the lamps were coiled around a pencil and laid loosely in the space between the sofit sheeting and the roof substrate. This allows for a burned out lamp assembly to be twisted out of the sofit and replaced by splicing in new leads and shoving them back into the opening if ever needed. I run all the lamps in the station on three switched circuits connected to a nine volt battery in the baggage room boiler space. The red tape secures the soldered splices and in turn is glued down to the sofit sheeting to keep everything tidy if it should ever be necessary to pull and prod those wires.
For this discussion "Shakes" go on vertical walls as siding. Shakes are usually rough sawn on both front and back and lap with little gap between them. "Shingles" are usually split along the grain and have a rough surface which sheds water down the roof on a sloped surface. We are using the same media to represent both Shakes and Shingles in this project. Roofing paper usually underlays both of these materials to provide another weather barrier. Lacking that moisture barrier, I recommend you paint the roof substrate before applying shingles to avoid warping the substrate when you later "weather" the shingles. Using alcohol instead of water as your stain vehicle will also help cut down on warping. While doing repeated alcohol stains on my shingled roof over unpainted substrate, I was in a near panic when the substrate began to cup and warp. It dried straight only because I have friends in high places.
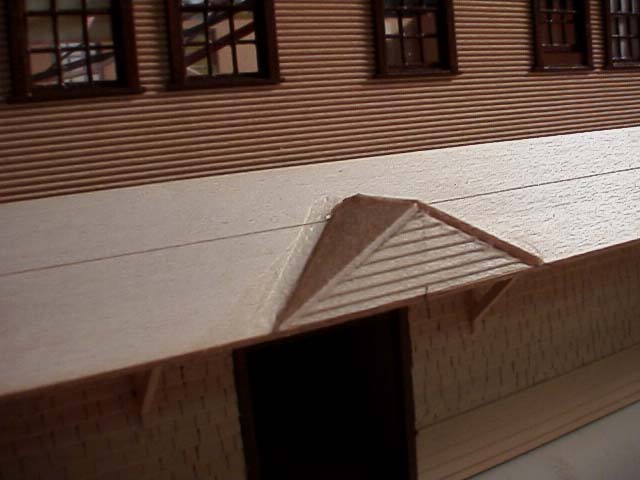
Roof sheeting can now be applied and prepared for shingles. Use scraps from around the edge of the self adhesive shingles to cover holes and close gaps in the sheeting. There is enough scrap valley material to install valleys where the freight door dormer is added. This feature is not included in the kit but is easy to make up from scrap. The face of the dormer measures 10 feet wide and 3 feet at the ridge and is flush with the edge of the roof.
Now add the shakes to the exterior walls of the clearstory and paint them as it will be near impossible to do after the roof is added. Trim the top of these walls at an angle to match the roof assembly you will make up in the next step. Do not worry about a gap between the dormer roof assembly and the main roof. Remember we moved these walls up 8 inches and then trimmed them down at an angle for about a 4 inch reduction so this will leave a gap and the tabs will not fit into the slots. This will not be a problem as after the roof assembly is glued in place the gap is covered by the valley material.
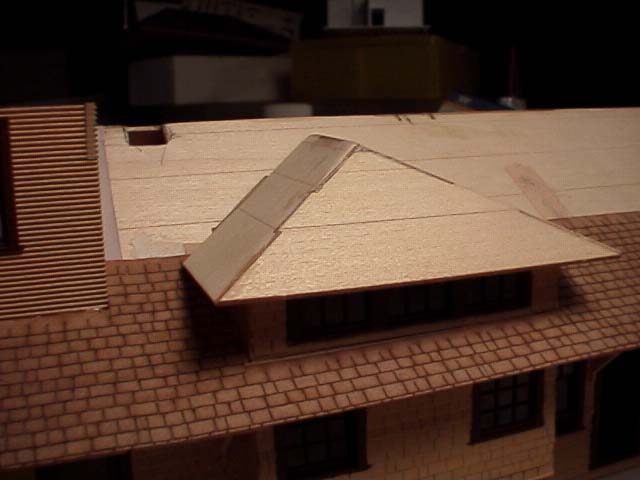
Now assemble and glue the three pieces of the two dormer roofs using the tabs provided for alignment. Dry fit the assembly on the dormer and mark where the dormer roof intersects with the main roof. Before gluing the dormer roof in place make sure you shingle the roof up to this point. After the Clearstory roof assembly is glued and cured, the valley can be installed and shingles extended up the roof just short of the chimney and attic vent door.
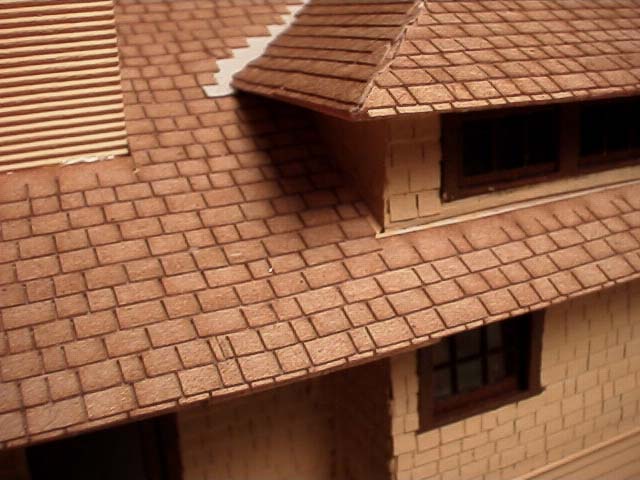
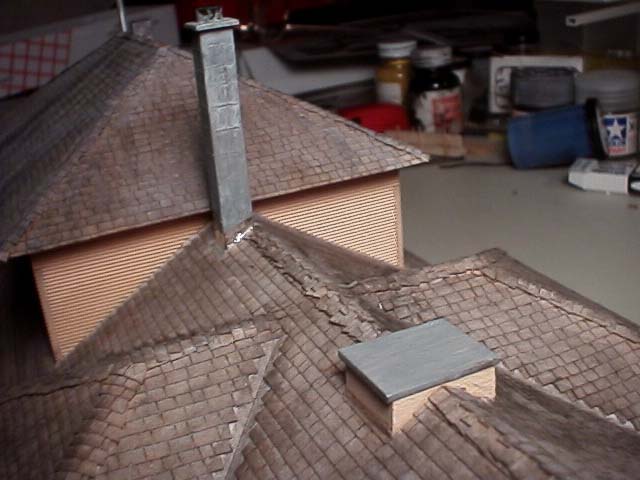
Observe how shingles are placed on a roof and on valleys and ridge lines. The bottom course is usually two layers with the bottom one providing a drip line one or two inches over the fascia board. We will forgo all the flashing that goes between vertical surfaces, siding and shingles except around the chimney where these are obvious.
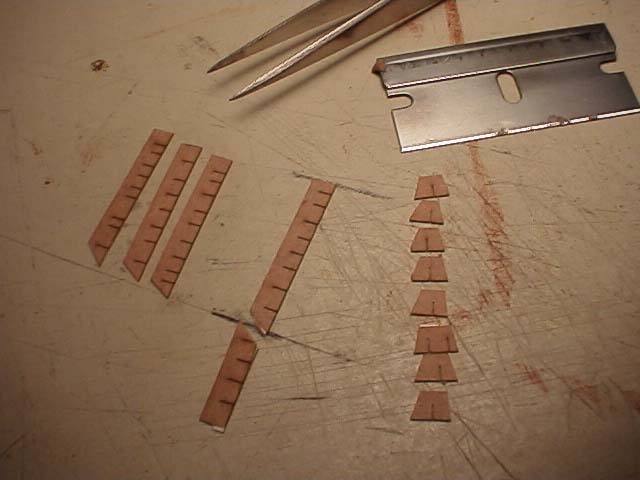
On some roof surfaces, you can cut a batch of shingles to length and speed up the process. Cut 15 or 20 of the ridge cap shingles at a time making sure they are tapered so subsequent shingles cover properly. These start at the outer edge of the roof and follow the ridge to obstructions where they meet flashing.
The attic vent hatch
is basically a box 3 foot X 4 foot set into the ridge of the waiting room
roof. The edge of the vent is 20 scale feet from the wall of the
residence. I made the galvanized covered roof of the vent box hinge
on a piece of masking tape. The metal flashing around chimneys is
just gum wrapper material glued in place.