Building the Red Ball Converted Troop
Sleeper Etched Brass Sided Kit
by Pat Durand.
Building the Red Ball Converted Troop
Sleeper Etched Brass Sided Kit
by Pat Durand.
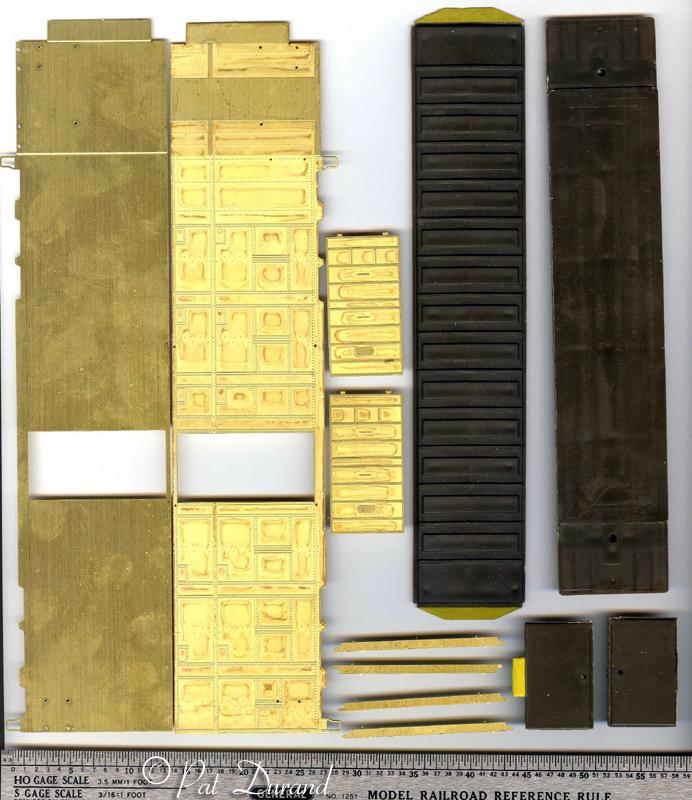
Randy Thompson of Roundhouse Hobbies recently asked me to build up
three of the new Red Ball Converted Troop Sleeper ARR HiCube Box cars from their
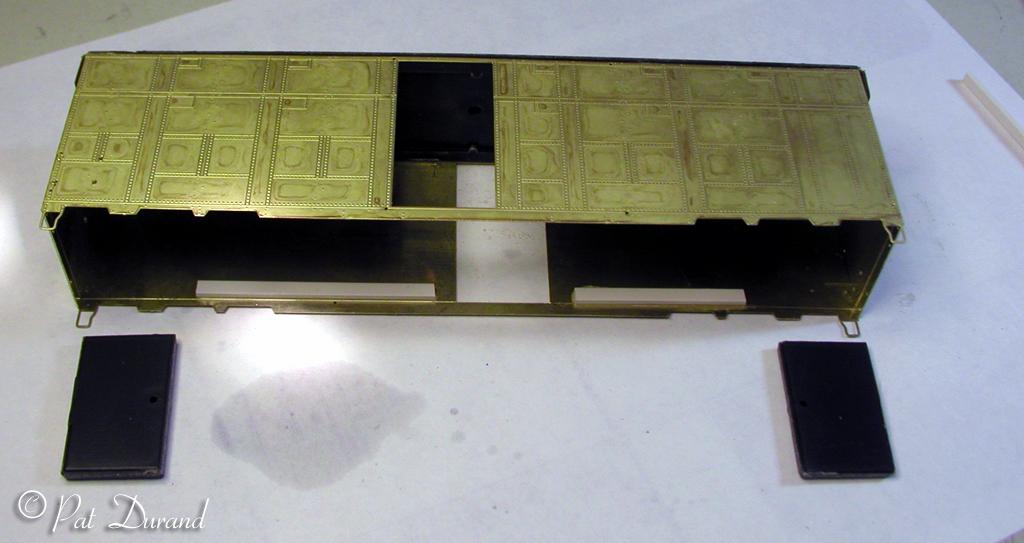
etched brass components. To call this collection of four brass walls with a
plastic roof and floor a kit is a bit of a stretch. Since I had built the pilot
model for Model RR Warehouse, I had all my reference work and parts needed to
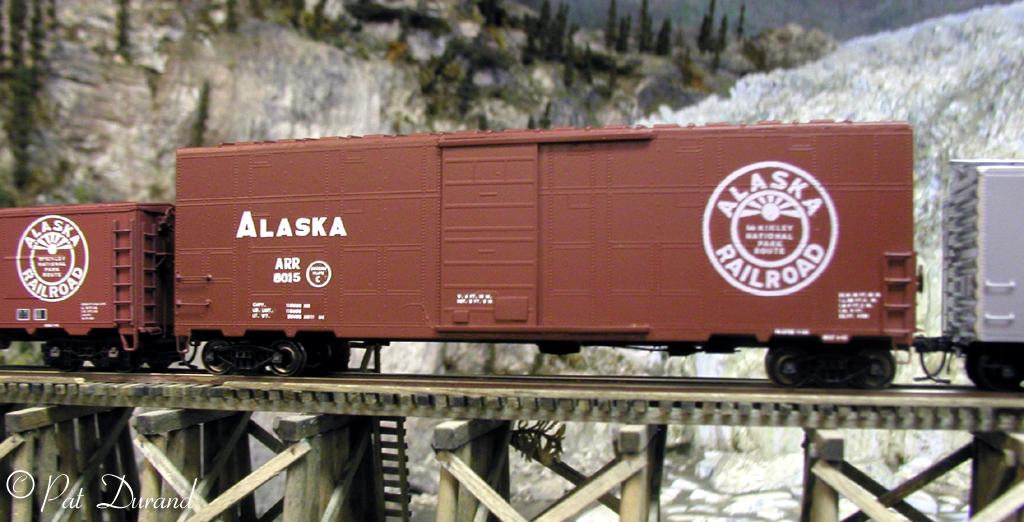
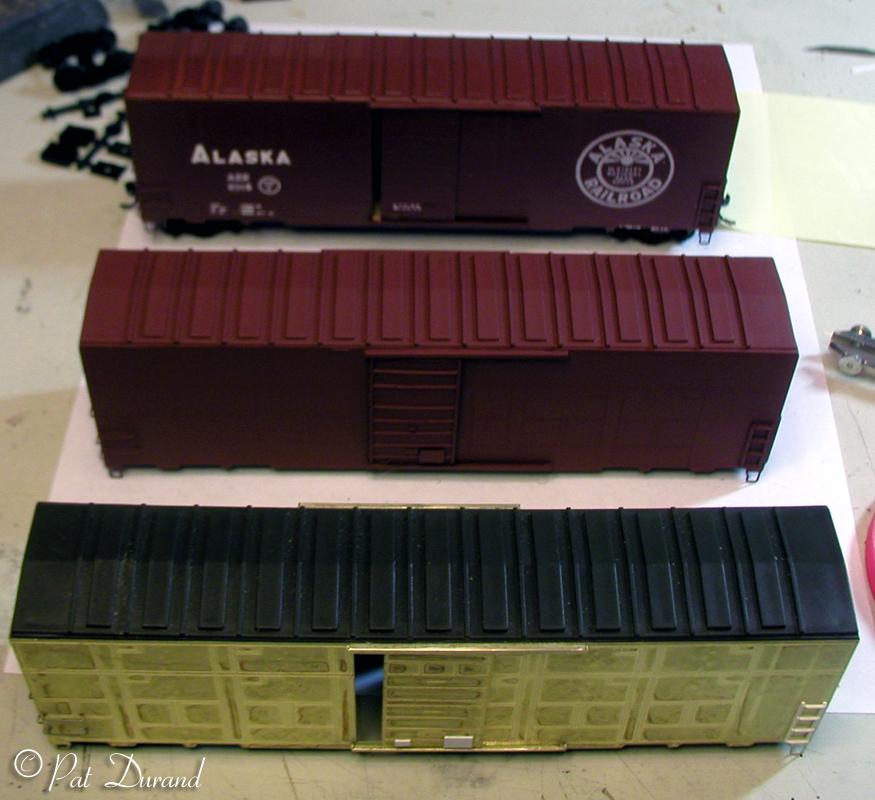
complete the job. Comparing the HiCube to the standard troop box car on the
left and 50 foot box on the right in the photo taken at the Northern Lights
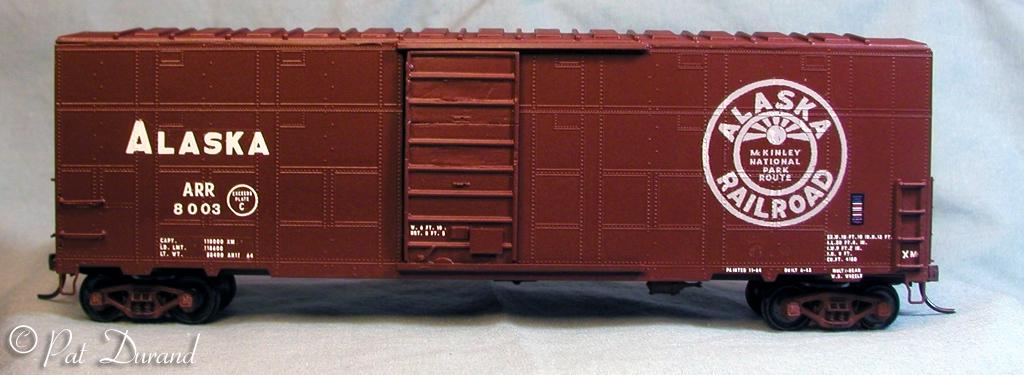
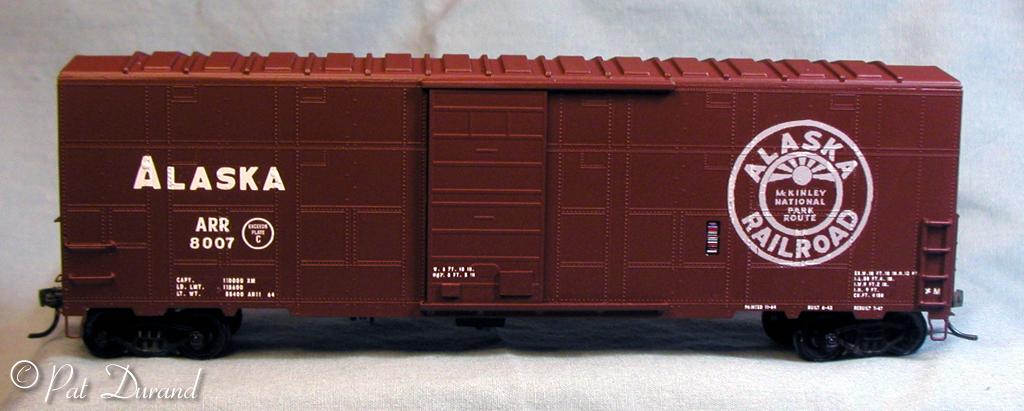
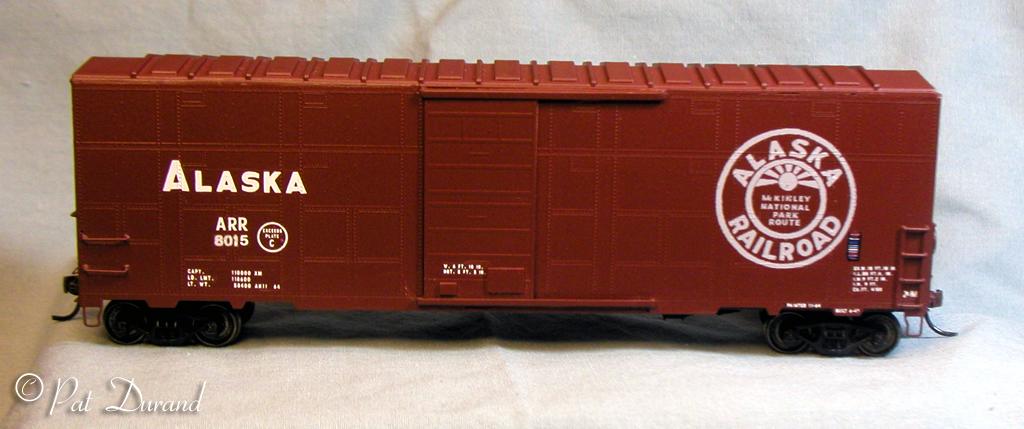
Model RR Club. Three stages of construction are shown
along with the builders photos of three finished cars (8003,
8007, 8015).
The cars were painted and decaled to represent the newly painted prototypes
from photos Randy supplied. The finished project is well worth the effort to
obtain these unique Alaska RR cars. The kits are available from Roundhouse
Hobbies.
[Added 11/29/07] Photos of 8000 and 8001 show a transition from the standard circle ARR logo to the 8' 4" Large ARR Circle Logo. Randy Thompson surmised that after the first car the crew realized the logo needed to be bigger. As the job wore on they got tired of painting the logo in any size and photos of 8026 and 8027 have no circle logo at all. For modelers this gives you some options to obtaining the large logo and some more variety if you plan to build a fleet of ARR HiCube cars.
Alaska Railroad Box Cars
#772-4106 Standard 50 ft
#772-4107 HiCube
Caution: The instructions that come with these kits are for the Express Car versions of the kit and should be used only for general information. Do not follow them step by step or you will have a disaster.
I built the original pilot models of these cars for Model RR Warehouse and relied on first hand research done at the Museum of Alaska Transportation and Industry, Inc. in Wasilla, Alaska. Seven troop sleepers and kitchen cars as well as a conversion HiCube Box Car from a sleeper and a Standard Box Car from a kitchen car are on display there.
Building this "kit" will tax your scratch building skills. Here are some suggestions for completing the job.
Tools:
Parts materials list:
Adhesives:
Paint:
Decal set:
Instructions:
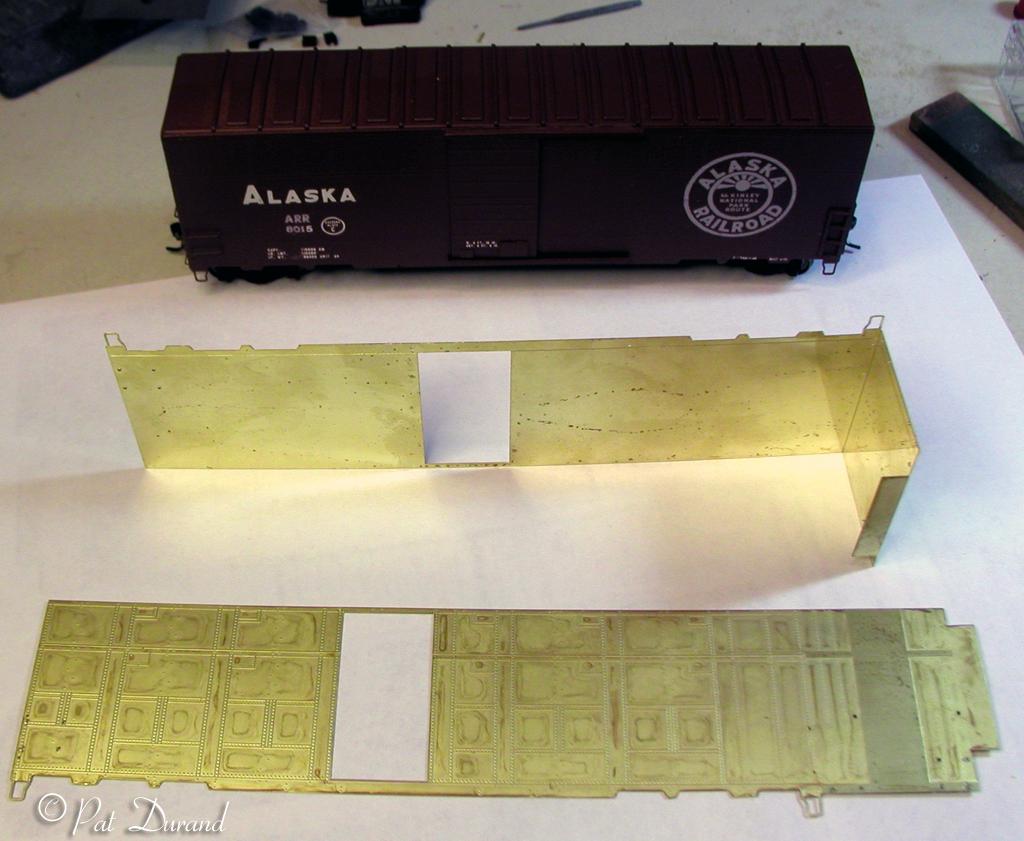
1. Carefully remove the roof, floor and two floor supports from the plastic sprue. Make sure you leave the overhang on the edge of the roof when it is detached from the sprue.
2. Invest in a proper pair of shears for working sheet brass such as the Xuron #440. These will make square even cuts with out bending the adjacent etched brass parts. Remove the etched brass parts from the frets and remove excess material left at the attachment points with a sanding block.
3 The two brass sides and ends are identical so start by taping them together in a stack along with the drilling template provided here. Drill all the indicated holes for grab irons through the stack. The extra original holes left in the sides will be taken care of later. Note: Print the template so your scale ruler matches the template ruler.
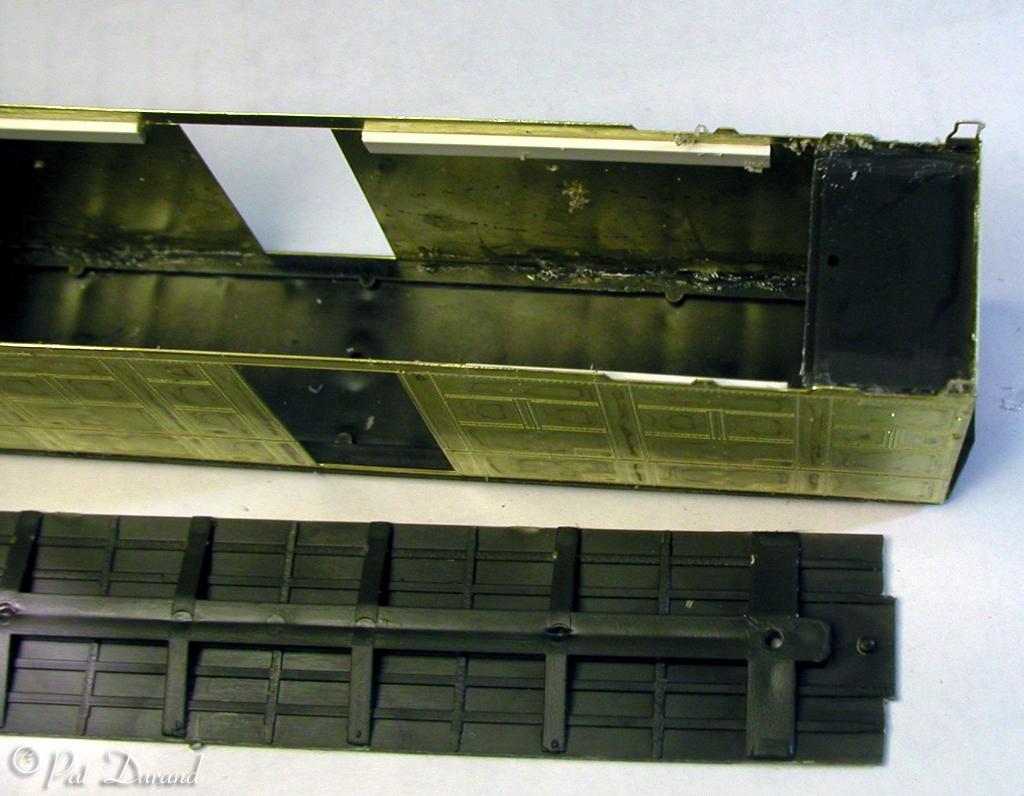
4. Scribe a line with the back edge of your #11 blade against a straight edge on the back side of the etched side and end. The line should be 11 scale inches from the bottom of the side so it is flush with the bottom of the door opening. This will be a guide line for gluing in the floor supports later.
5. Study the overlap of the plastic floor and the two plastic floor supports. Now scribe another line across the etched brass ends of the car about 1/64 inch below the first line. This will be the approximate guide for the bottom of the floor supports.
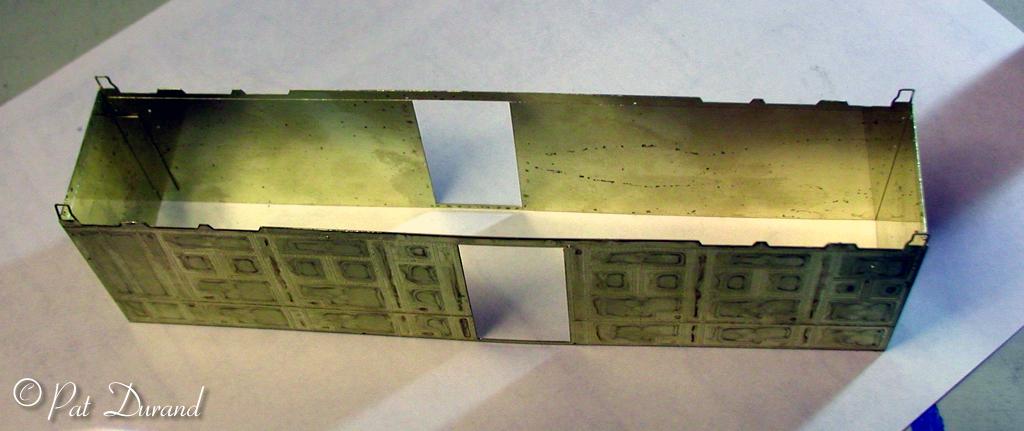
6. Make the folds in the etched brass sides. These bends are easy to make without any tools due to the well engineered etched bend lines. Make sure they are square. Turn the pieces upside down on a smooth level surface. Move the pieces together for a trial fit. The two corners with tabs should come together square.
7. Use the ACC to tack the first tab in place and give it a squirt of accelerator. Then bring the second corner together and tack it brass to brass. The sides and ends should now form an upside down box that is flush along the working surface.
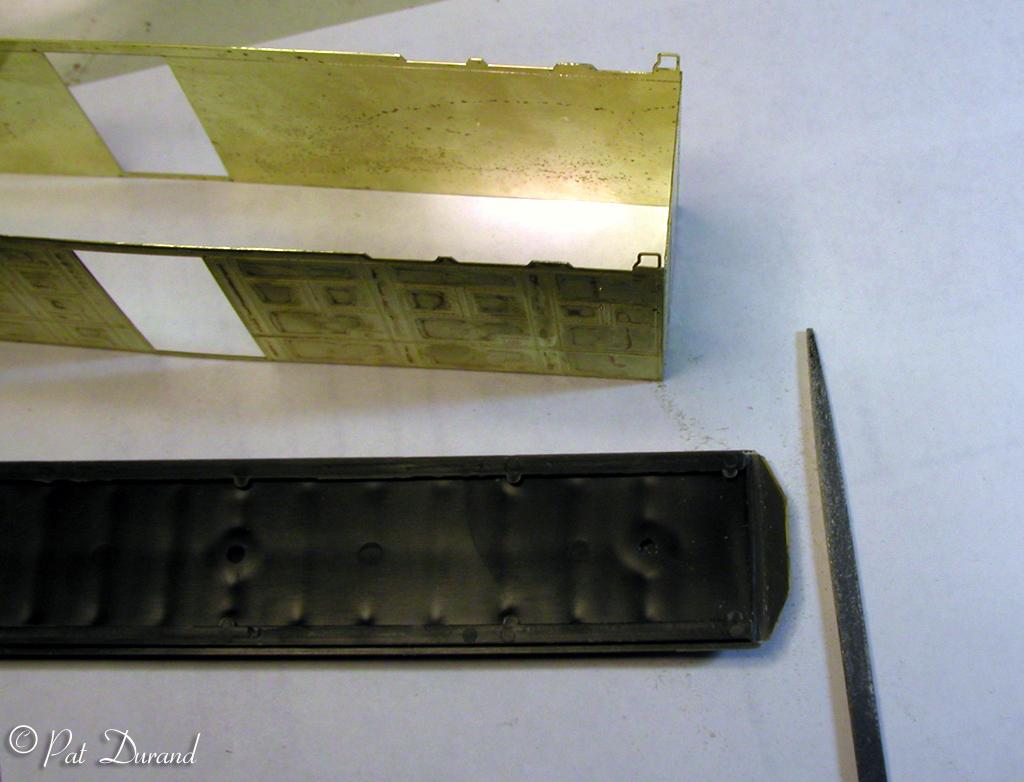
8. The end overhang of the roof extends lower than the side overhang of the roof and will cause a problem when it comes time to assemble the side walls to the roof. At this time take a sharp flat file and reduce the overhang thickness on the end until it is even with the side overhang. It will be paper thin by the time you have it correct. Then remove all but 1/16th inch of the overhang.
9. Now trial fit the roof. This will be a loose fit, so be careful to make sure you have a good fit between the roof overhang and the car side. With the assembly upside down and the roof centered between the ends and side walls tack the walls to the roof with small applications of ACC. Hold the roof and sides in contact until the ACC sets and check each tack for proper fit as you work around the car. When the final fit is satisfactory, then apply a light bead of ACC along the seams and cure with accelerator. (If you find the fit has gone awry then stop. Apply UNGLUE and wait for the assembly to come apart. Clean the parts in soapy water and start over.)
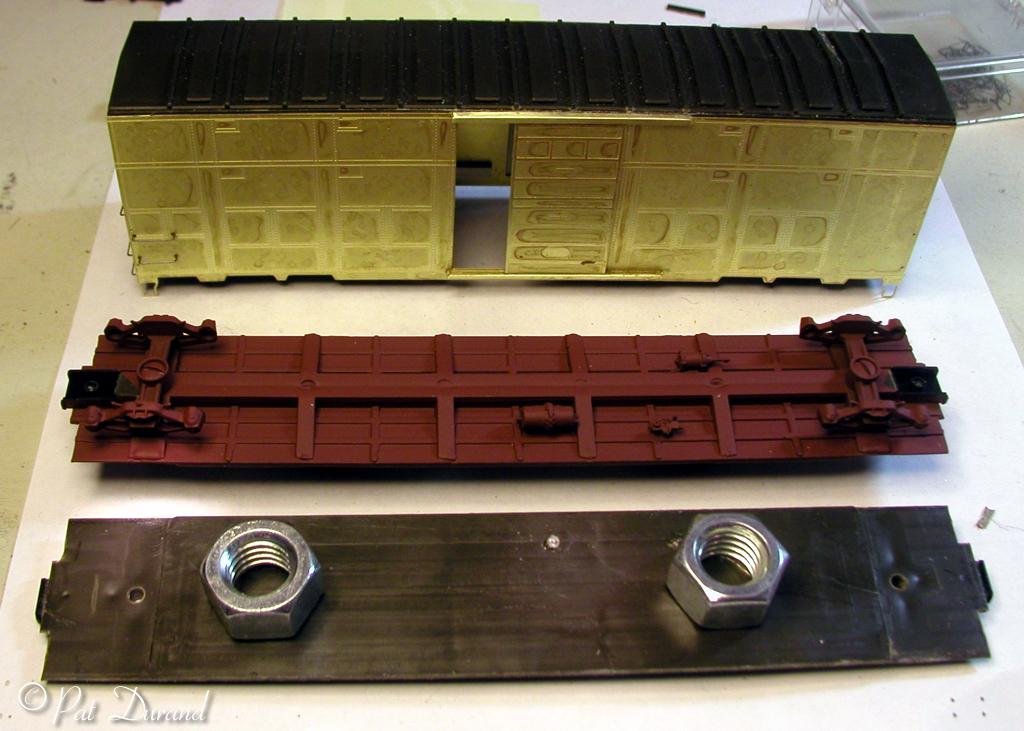
10. Remove the tab from the end of the floor support and lightly square the edges with a course file. Glue a .020 styrene spacer along one side of the floor support.
11. The floor supports in each end of the car body provide the base to which the floor can later be attached with the same screws that hold the trucks on. I use 5-40 Filister head cap screws that fit nicely into the truck bolsters that I use. Attach the floor supports to the car floor by holding them to the floor while you drill through with the tap drill for your bolster screws. Then tap the hole and add the screw to hold the assembly together. You want the finished floor to be flush with the inside door openings and that makes it revel about 1/32 inch of the brass car end when the floor is properly fit.
12. Start by gluing a 1.5 inch long strip of scrap wood or styrene along the top side of the scribe mark you made earlier on the inside of the brass car side. Start with this next to the door and let it run toward the ends of the car. When this cures then trial fit the floor assembly with the attached floor supports. When you are satisfied with the fit, remove the bolster screws and the floor. Carefully tack the floor supports in place and when cured, test the fit of the floor once again. When the fit is good remove the floor and finish glue the floor supports.
13. This is a good time to add the underbody brake rig detail to the level you require. Also add weight on the centerline. I find two half inch nuts attached with Walthers Good do a good job.
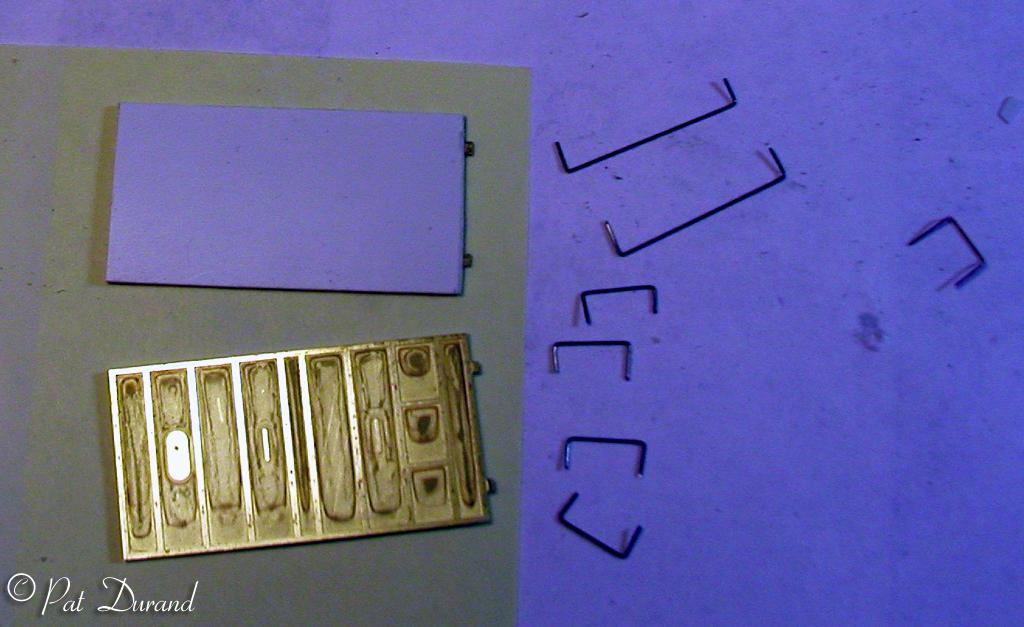
14. Now fold the door runners using care not to twist them. Use ACC to glue the top runner in place after scraping the surface of the brass where the pieces will mate to ensure a clean surface for the adhesive.
15. The etched doors are too thin to be convincing. Sheet the back of the door with .020 styrene and then sand the edges smooth. The doors will still fit in the door track and operate if you are careful. If you prefer to use brass there is plenty of scrap that came with the kit that can be used to back up the doors.
16. With the doors in place and the car body resting on its roof you can now attach the bottom runner. Move the door to one end and apply the adhesive to the runner track at the opposite end. When cured then move the door to the opposite end and secure the other end. Careful does it. If you find this more trouble than it is worth then close the door.
17. Use a piece of the scrap brass from the kit or .020 styrene to make up four tack boards a scale 24" X 18" and two smaller boards 12" X 8" to be attached on the doors and car ends as indicated by your prototype.
18. Make up grab irons from the .010 piano wire. I find this much more durable than brass wire. You will need the following inventory:
In addition you will need 6 ea 21" drop grabs. These are for the end sills at each side of the coupler. When these are inserted and glued from the inside you will need to remove a section of the car floor so the grabs do not glue the car floor in place or interfere with proper fit of the floor.
19. Determine the "B" brake end of the car and attach the brake wheel chain and step per the photos. Note that the brake cylinder will be attached to the floor bottom in line with the brake wheel on the same side of the center beam. The location of the air reservoir and the triple valve vary from car to car so refer to your prototype.
20. Carefully sand or file the roof overhang flush with the car sides and ends. Fill any voids that may appear between the roof and side sheets. Attach the four short ladders at each end of the car per the prototype photos.
21. Remove the floor and then wash the car body in warm soapy water using a soft brush to scrub the surface, removing dust, fingerprints and oil. Rinse in warm water, pat dry with a soft towel and set aside to dry overnight.
22. Paint with your favorite paint and let dry overnight. Apply decals, your selection of dull, semi gloss or gloss coat and a little weathering. I use Krylon spray cans for most of my rolling stock projects if there is a close color match. You can touch up with Polly S or Floquil colors and it accepts various clear coats. Just use several light passes in a well ventilated area or outdoors. A well lit paint booth with a 200/600 CFM fan is ideal.
23. Set back and enjoy a unique model of a special Alaska Railroad prototype that you built yourself.
Click here for prototype information.