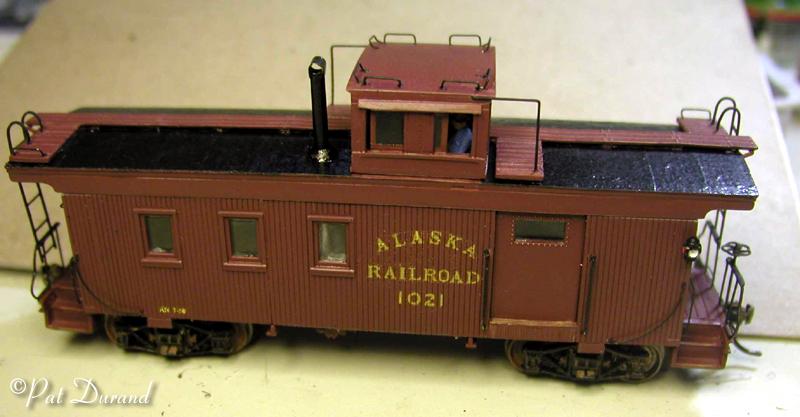
Prior to 1930 most of the Alaska Railroad caboose fleet was equipped with side doors to handle local deliveries for section crews and customers scattered along the right-of-way. The railroad had three rotary snow plows and the old wood frame crummys were not up to the stresses of snow fleet service. The snow fleet required more bunk space so the side doors were eliminated in construction of four new units #1018, 1019, 1020 and 1021. These units were built from the ground up in the Anchorage Shops with steel frames and cupolas. They followed basic dimensions, layout and hardware configurations of other units on the roster. One feature eliminated was the wood tool box under the car. Kerosene lamps provided light, a water tank and sink were installed at the right front corner. A coal bunker and stove was installed near the middle of the car opposite the conductors desk. Double bunks in the rear and mattresses for the bench seats up front provided sleeping accommodation for six. Provision was made at the rear for a chamber pot. These amenities were needed because the snow fleet could be on the road for days at a time. The surviving unit is #1018 currently at the Museum of Alaska Transportation and Industry in Wasilla, Alaska.
In 1949 Caboose #1021 was rebuilt with the installation of sliding doors behind the cupola to create a space for way freight and express. The doors and hardware came from a Troop Kitchen car. Number 1021 was rebuilt for service between coal mines at Healy and Fairbanks on the local coal trains. At that time there was no highway between these locations so folks along the railroad depended on the railroad for local deliveries.
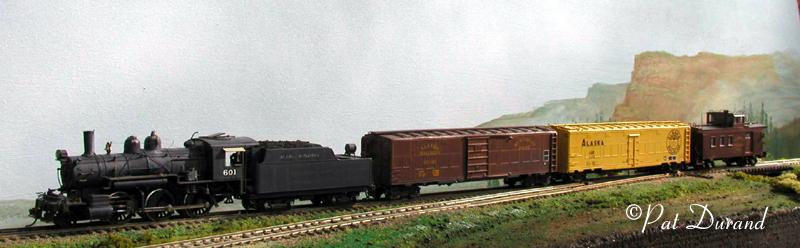
When she was retired is a mystery at the moment. Maybe someone will come forward with that tidbit of information now to complete the history. I do know I saw her just the other day running past the homestead, deadheading East behind Mogul 601.
My model of ARR #1021 is a major kit bash of
the Walthers 30' wooden caboose kit #932-7300. Bob Barrett completed drawings
of these units in the mid 90's and provided copies for my use. Additional details
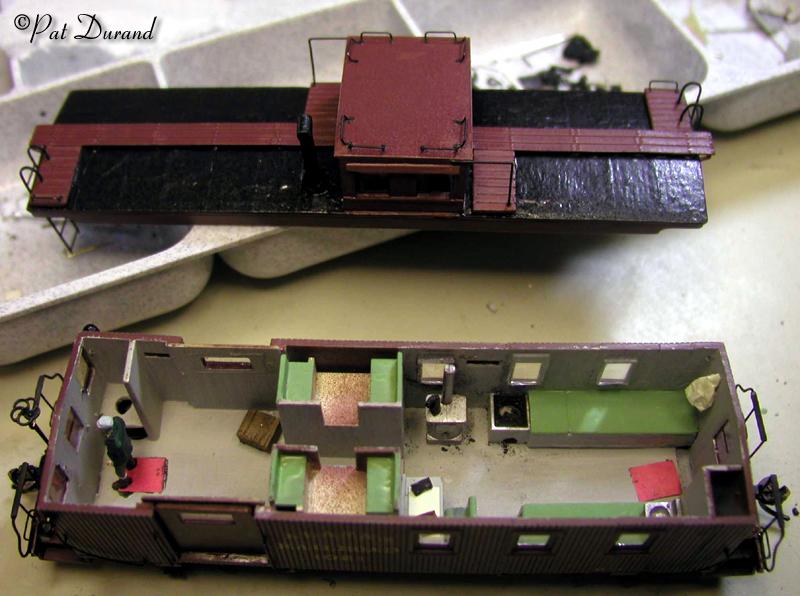
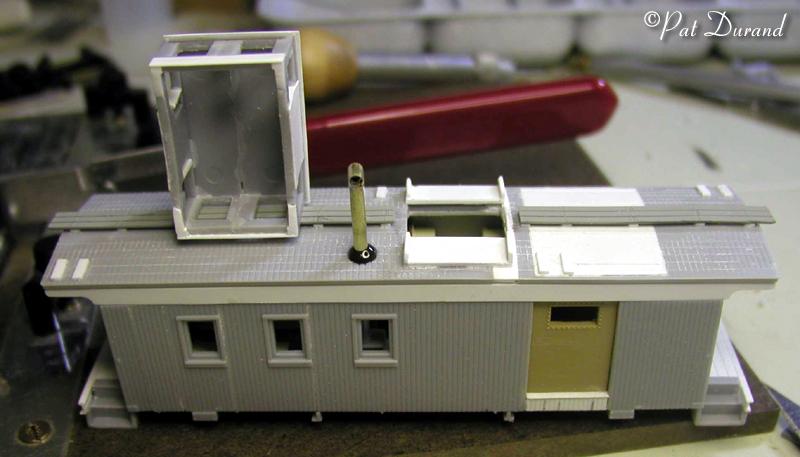
and measurements came from #1018 at the Museum. Photos of the kit bashing show
additions of white styrene parts. The roof
was raised with extended letter boards. The peaked roof was filed into a better
approximation of af the curved section used by the ARR and then covered with
canvas. The cupola was raised, windows expanded and .010 styrene used to sheet
the sides, and .020 styrene made a new roof.
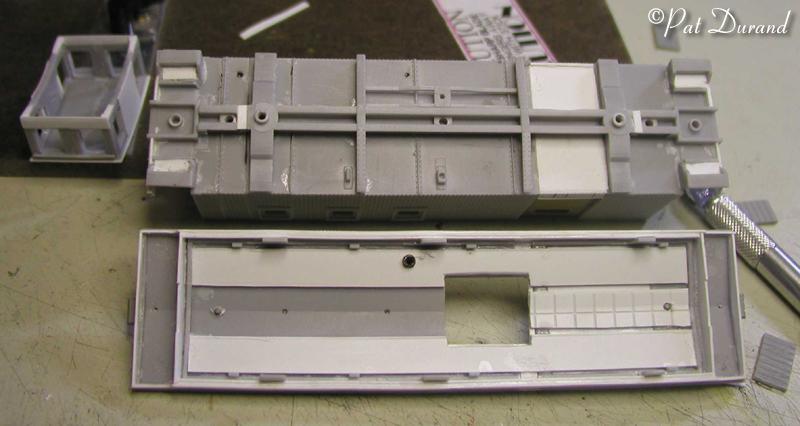
Side doors came from a previously converted Troop Kitchen, of course. The windows
were rearranged by cutting complete sections of the car side and relocating
them. These cuts were made across the entire car and in the process I was able
to extend the car a scale foot and inserted a scale six inches between the truck
bolsters and the ends of the car. This allows for
better operation, eliminating interference with the steps. At this time you
may wish to remove the "bolt heads" from the extreme top of the truck
sideframe as they will cause interference with the body bolster later.
The extra windows were cut in the rear end and doors.
The steps were cut from the end platforms and the top step removed. The remaining
part of the step section was then raised to nearly flush with the bottom of
the door. A section of scribed .020 styrene formed the plank floor between the
steps flush with the door threshold. Scale styrene channel made a new end sill
over the coupler.
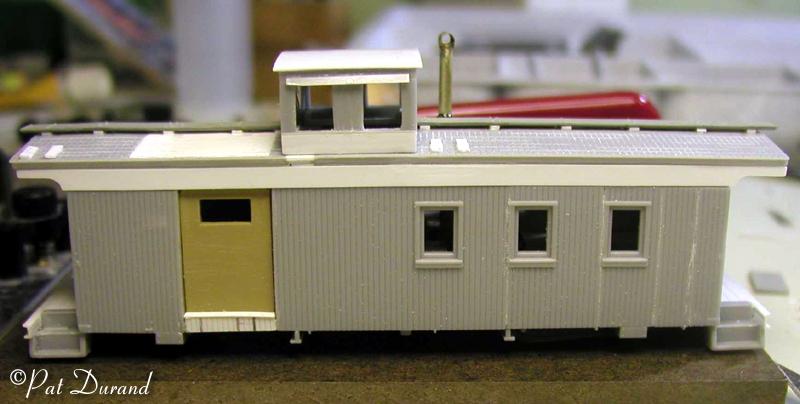
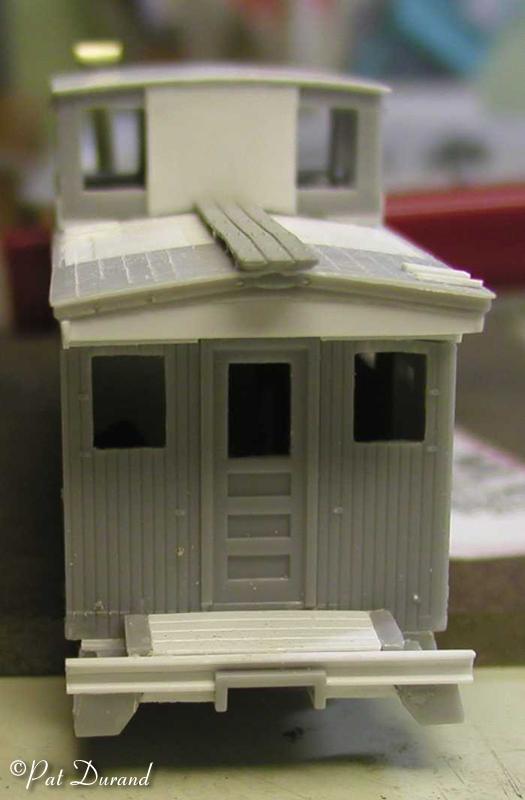
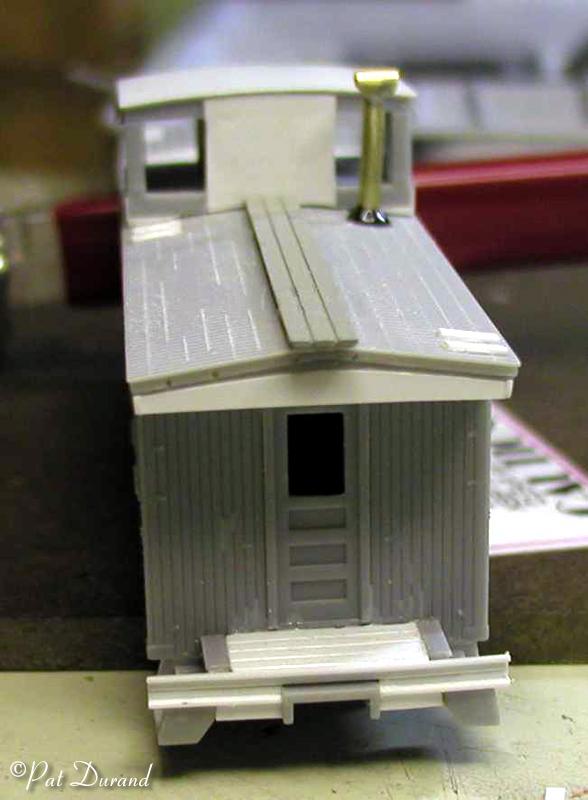
All holes for grab irons, railings and appliances were pilot drilled #80 prior to painting with Mineral Red. Decals were installed and then a semi gloss over spray fixed everything in place. Now the grab irons were installed, several had to be made from .010 piano wire and brass wire. The unique shape of the end platform rails required a four hour exercise with brass wire, brass flat bar, the soldering station and a block of wood. The bass wood block with zona saw cuts became a jig to hold the flat bar top rail, the two uprights and the bent hand grab in place while it was soldered together. All the grabs were painted and then a final coat of semi gloss fixed the finish. A quick down shot with flat finish over the roof got rid of the wet look.
The final step was installation of glazing. The original windows were separated and used in the three openings on each side. All other windows were glazed with bits of packing plastic cut to a light friction fit and then fixed with Super Crystal Clear. Many of these windows needed mullions or frames and these were scribed on the plastic surface with a #11 blade before installation. After they were cured, a very small brush was used to paint these mullions in place with Mineral Red. Use Polly S and the paint should follow the scribe line. If it gets away from you, keep a larger paint brush and clean water handy to blot up any mistakes and then try again. This technique allows you to open windows where appropriate, and get the glazing closer to the surface of the window frames to improve believability.
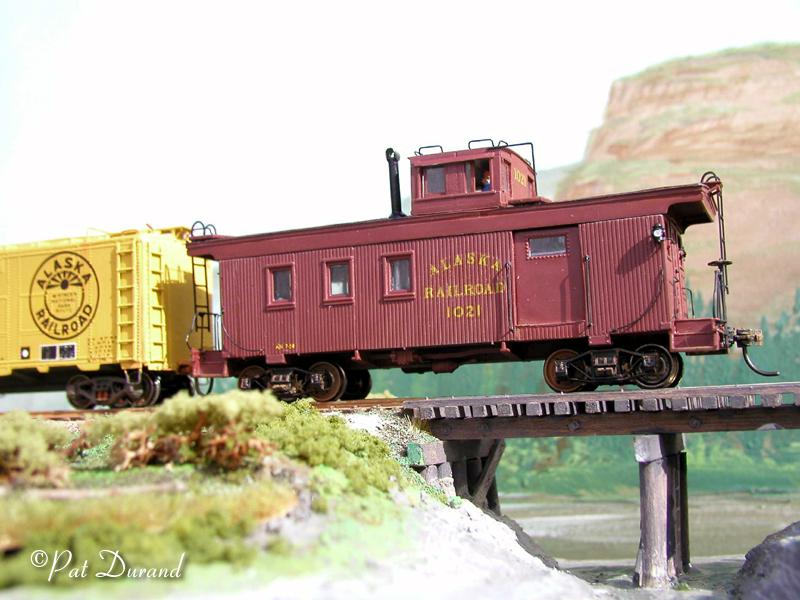
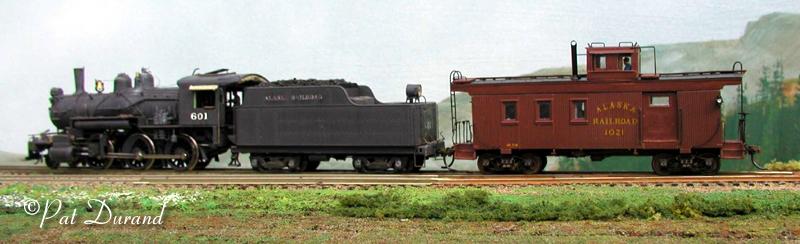
My #1021 will complement Alaska Railroad steamers
and first generation diesels where ever they roam. A typical 1949 local just
ran by the homestead this morning and I caught it
with the Brownie and that new color film.
You'll find a photo of the prototype
#1018 here.