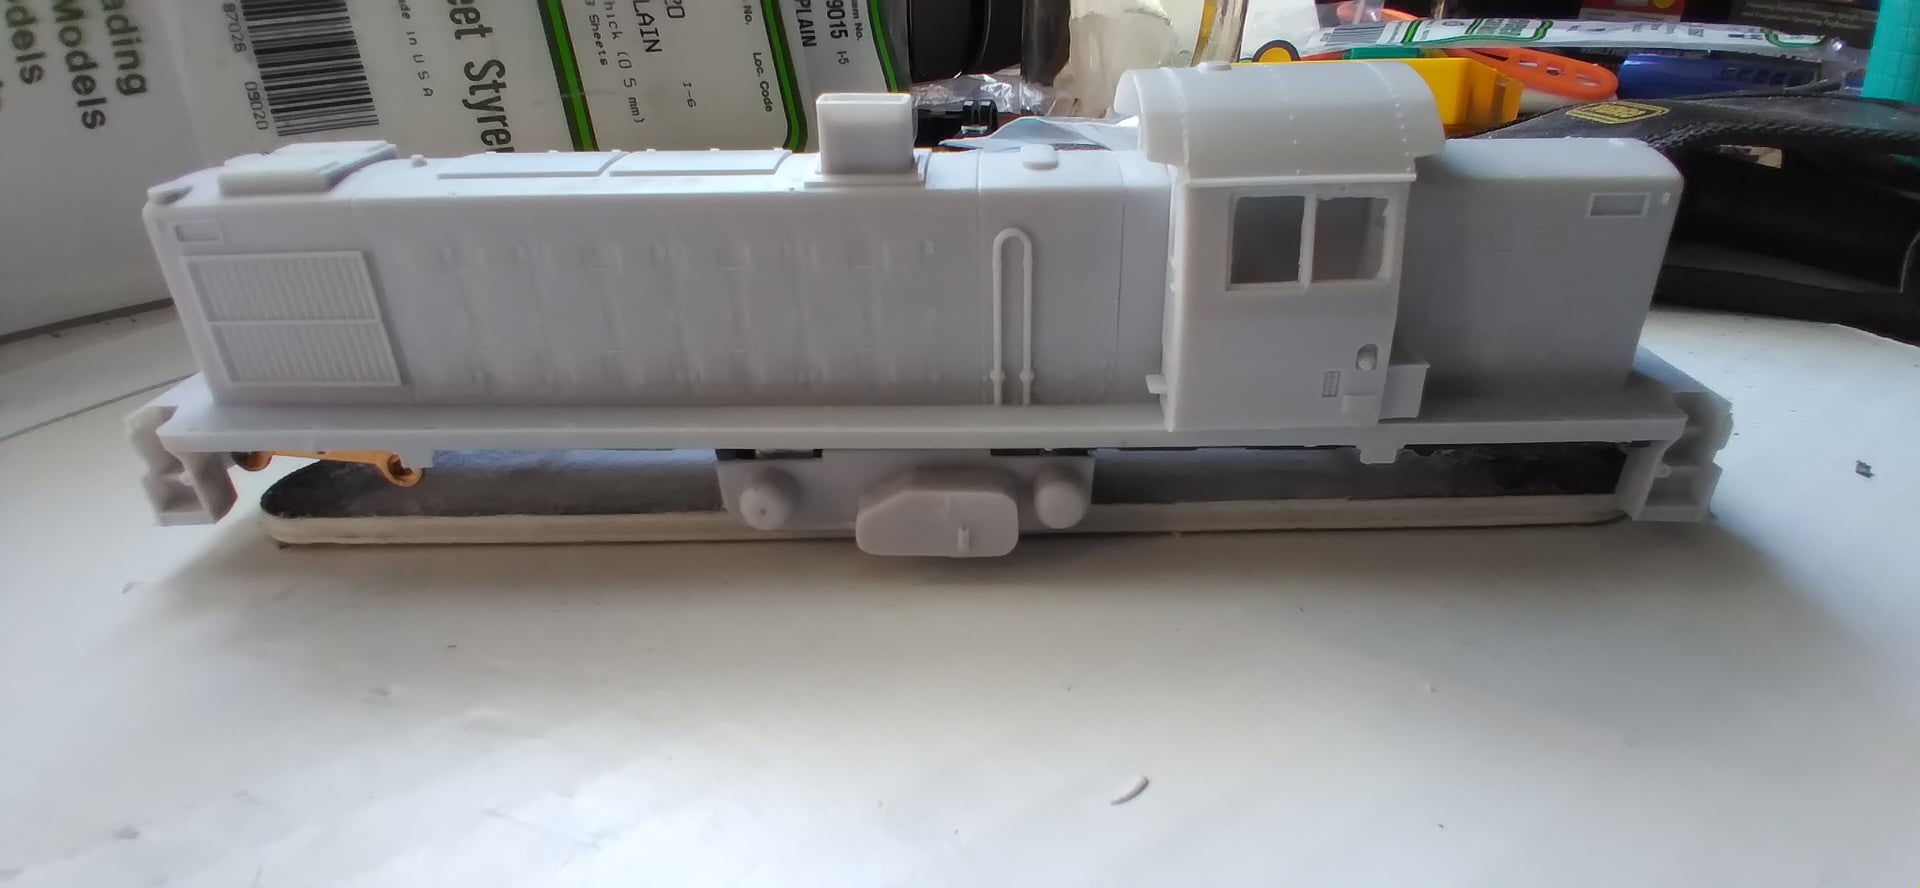
Part 1: Getting to know your ALCO One unique ALCO locomotive type that was used on the ARR was the RSD1. The RSD1 was a wartime six axle export version of the RS1 where the majority of the locomotives built were ordered by the US Army for use in Iran and Russia. ARR received a large number of RSD1 surplus from the US Army following the end of WWII and were in the 1000 class. I assume they came to the ARR in black and not olive drab like the RS units. During their lives on the ARR they wore an RS version of the original passenger scheme and early versions of the black and gold scheme. By 1973 the RSD1 was extinct on the ARR. While HO scale is a popular, there are some pieces of rail equipment that isn’t being made, and the ALCO RSD1 is a perfect example. Recently Casey Durand of Anchorage built and made available cast resin shells of the RSD1.
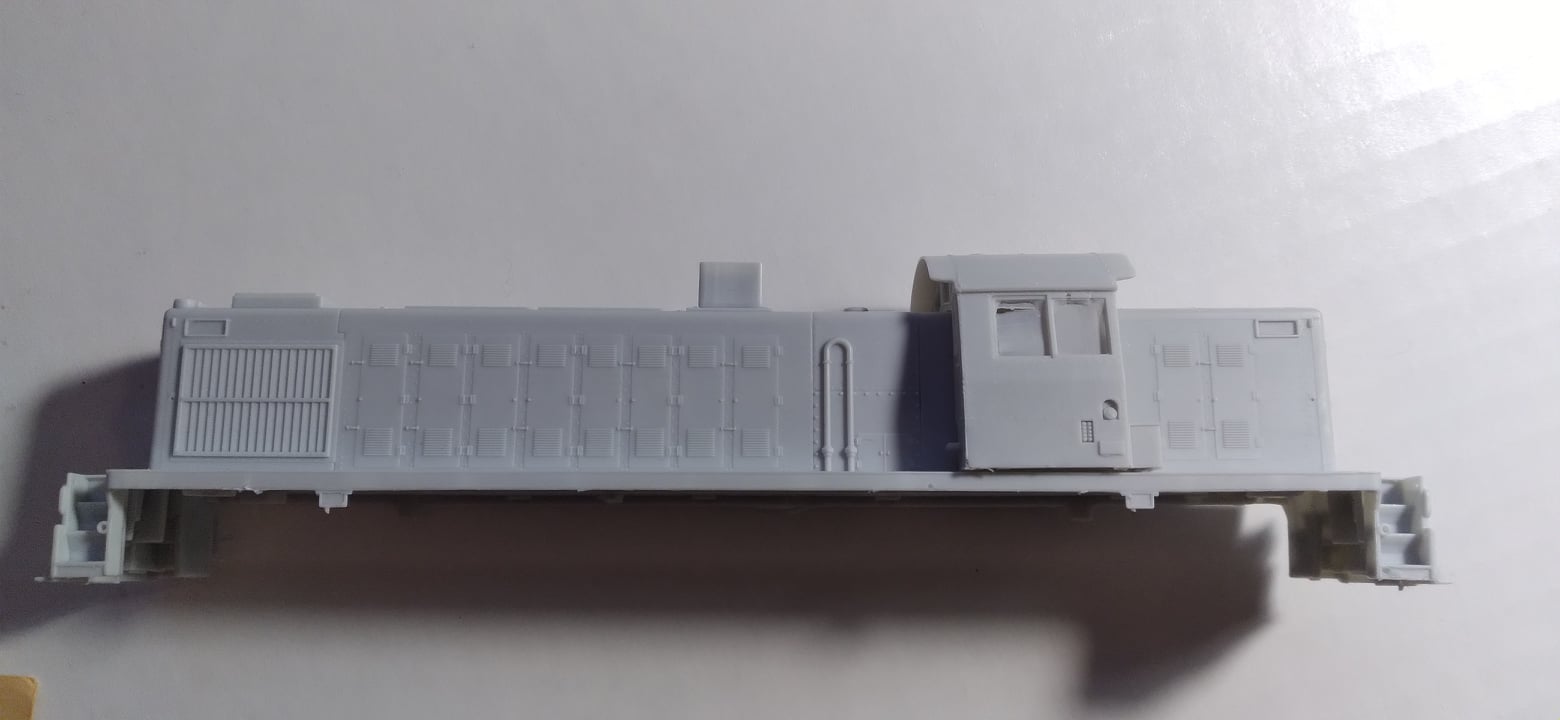
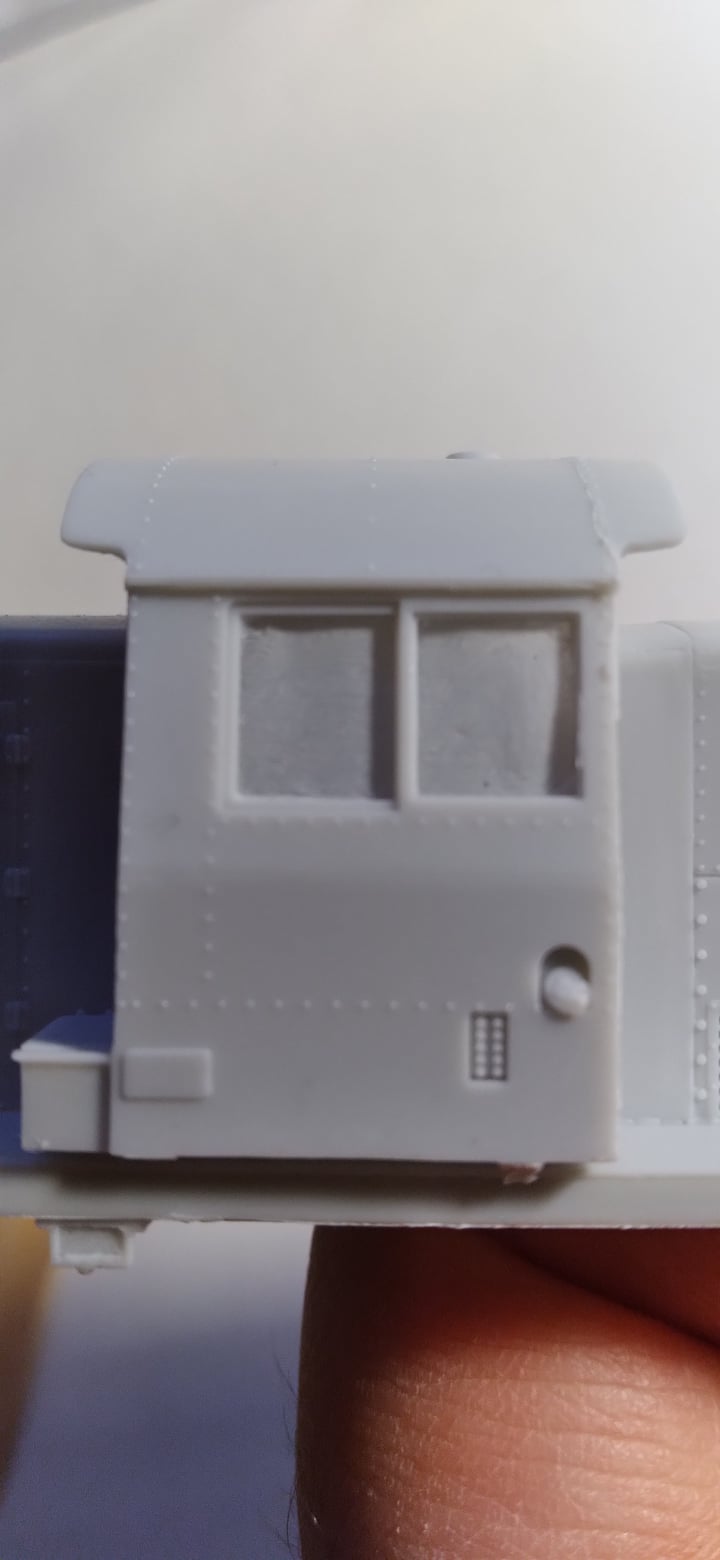
I bought two for now and plan to purchase a couple more to help build up my 1950s fleet. Plus, they are cool looking ALCOs. This series is going to be all about my RSD1 build step by step where I’ll explain what to do, and what not to do. Ready? Let’s go. The RSD1 is in kit form and was built to fit on an Atlas RSD5 chassis. The hand railings from the Atlas model are a direct swap to the Durand shell. An additional kit comes with two pairs of side frames and the fuel/air tanks. The fuel/air tanks are on a “sheet” with one per side, and the Durand side frames directly swap into the Atlas trucks. The shell is nice and clean, good details and already have the holes for the grab irons and walkway railings. There is some thin flash over the windows, headlights, and number boards which is a simple task.
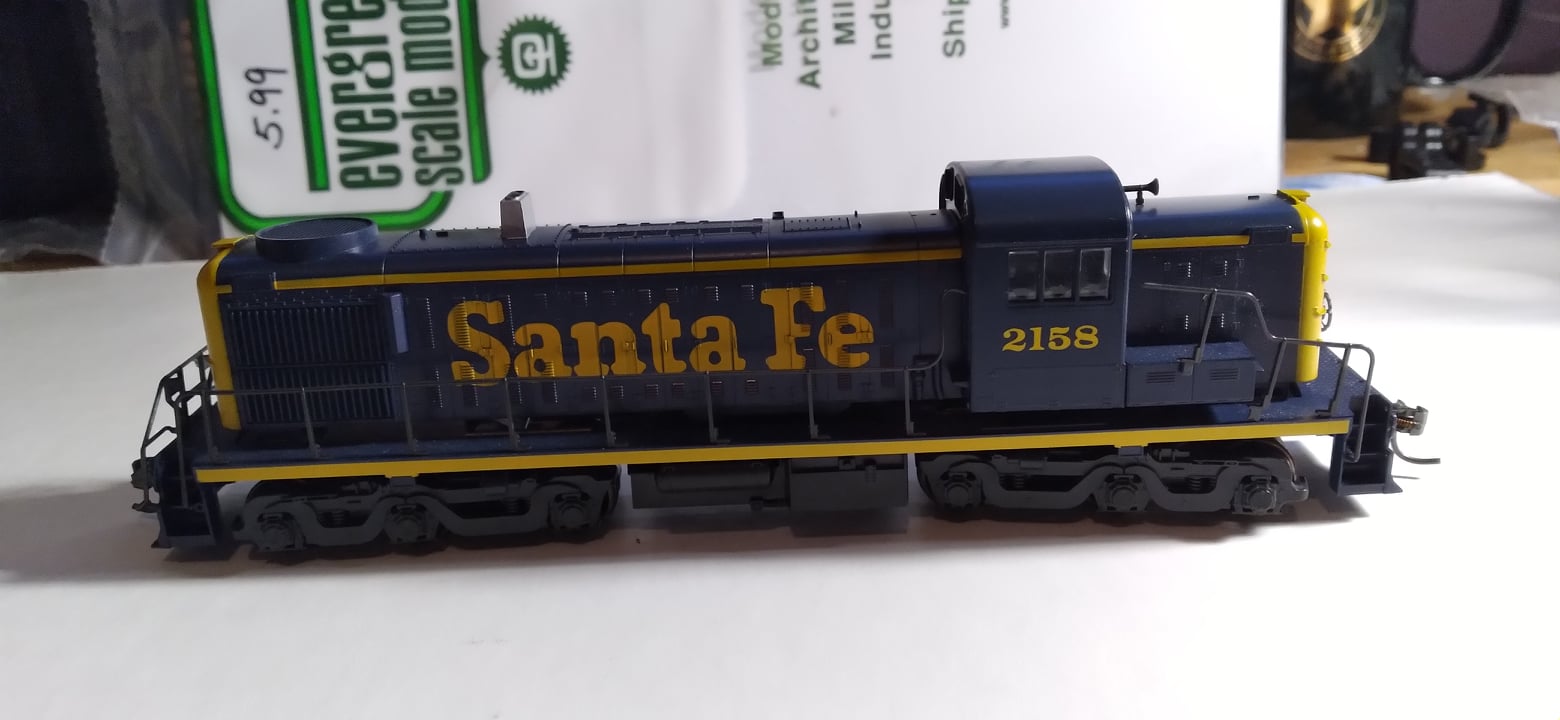
The first thing to do is take a very sharp knife of exact 0 with a new blade. Take the tip and cut the flashing in all the openings. The fuel tanks have flashing holding both sides together, cut away and lightly sand the edges. The side frames don’t need any real cleaning but still check anyway. The next step is to wash the shell and parts in warm mild dishwater. Take a light bristle toothbrush (not pre-owned if you can help it) and brush the shell and around the windows. This helps take little cling on pieces of flashing and residue from the parting agent used in casting. Dry it off and set it to the side. The Atlas RSD5 is an older model and to my knowledge is an out of production model, although it’s easily obtainable on popular auction web sites around $50.00 to $75.00 on average, but keep in mind that some are going well over $100.00 recently.
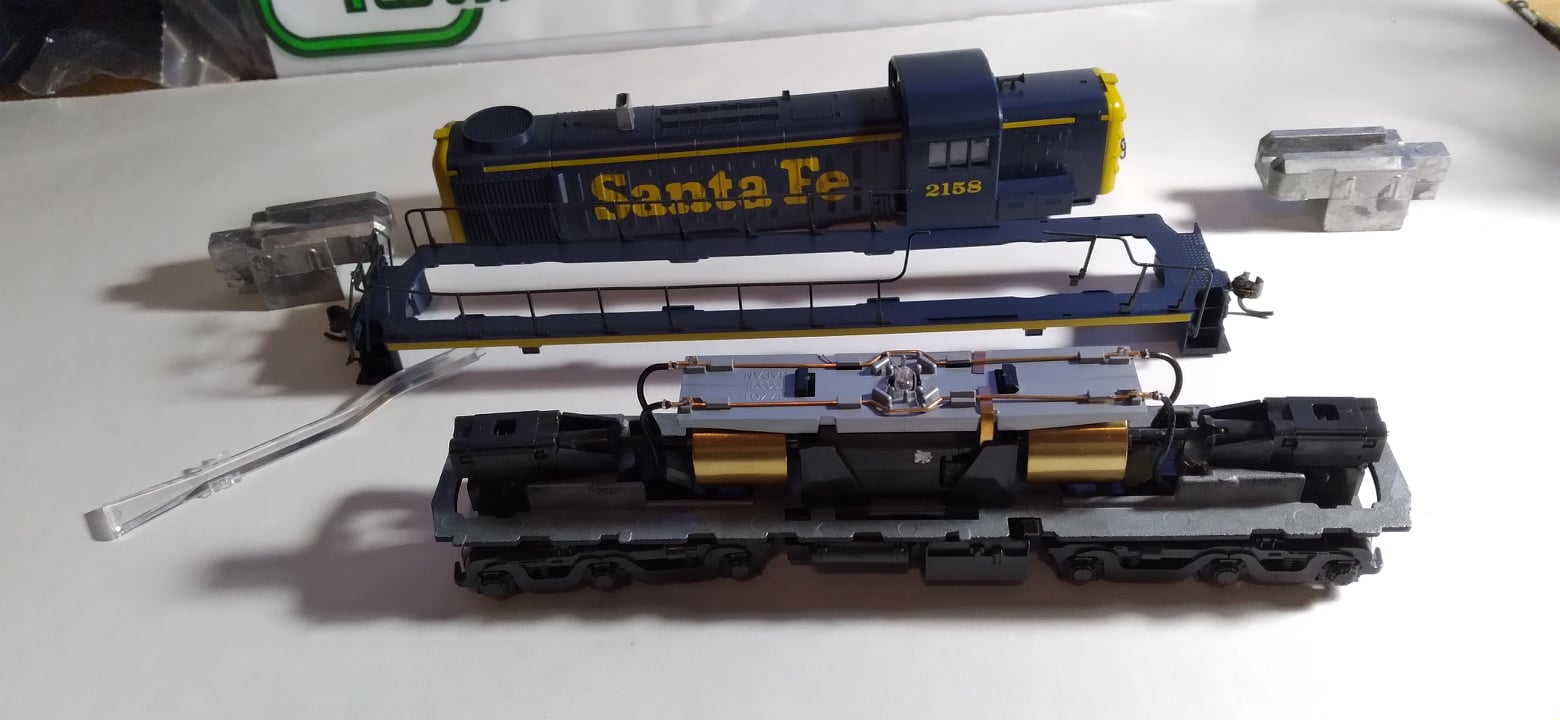
The chassis is powered by a straight up old school Kato DC motor. The RSD5 shell itself is really nice and will be sold later. I unscrewed the coupler pockets and removed all the end railings and walkway railings. I then pulled on the long hood and the fuel tank in opposite directions. Keep in mind the sill and pilots are a separate piece from the long hood/cab/short hood.
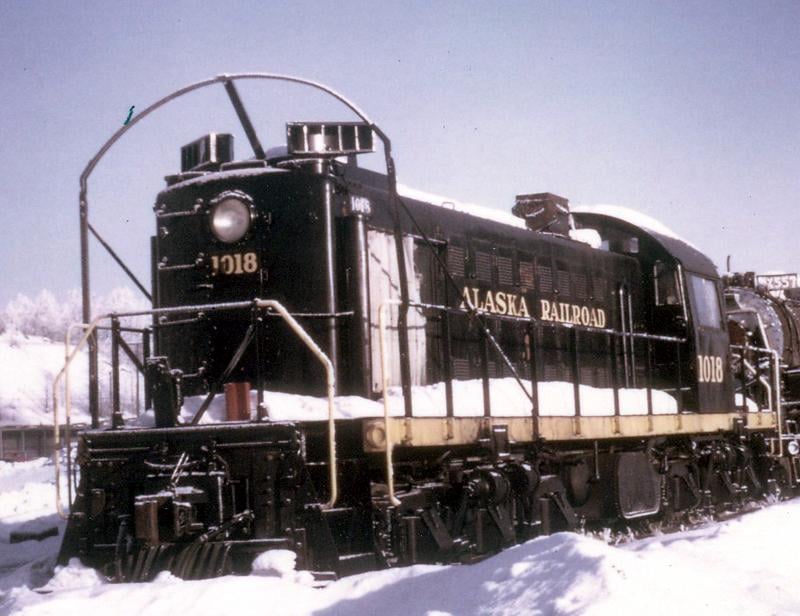
Once you get that done set all the stuff aside for later. Remember the Atlas shell has some glass that can be used and all the railings on your RSD1 shell. (The weights on the ends of the Atlas shell may be used, but at the time of this writing that has yet to be determined.) Take your Durand shell and test fit the shell with the chassis. It is on the snug side but with a light sanding inside the shell, it glides over the side of the motor. Otherwise, the snug area around the motor, the shell fits on the Atlas chassis just fine and dandy. At this point I suggest taking a break from further work and come back another time refreshed. Take some time and find out what locomotive you want to model and figure out a parts list if you need one for your build. (parts list will be included at the end of the series and some part numbers will be mentioned during the build) The ARR RSD1 locomotives stayed pretty much in their original configuration until the late 1950s/early 1960s when they had some changes, mainly being converted into four axle units. The unit of choice became 1018. The 1018 was in service from 1949 to 1965 and was scrapped not long after. It was rare on one way that it had retained its original trucks to the end, and was equipped with an icicle breaker, a feature I plan to model. The scheme is simple and is a good choice to cover any slight happy accidents while figuring out the build. The second one will be a passenger scheme 1012.
In the next part I will discuss taking the Atlas chassis apart and start working on the fuel tank, meanwhile here is a link for you to find which RSD1 prototype you would like to build. |