 |
|
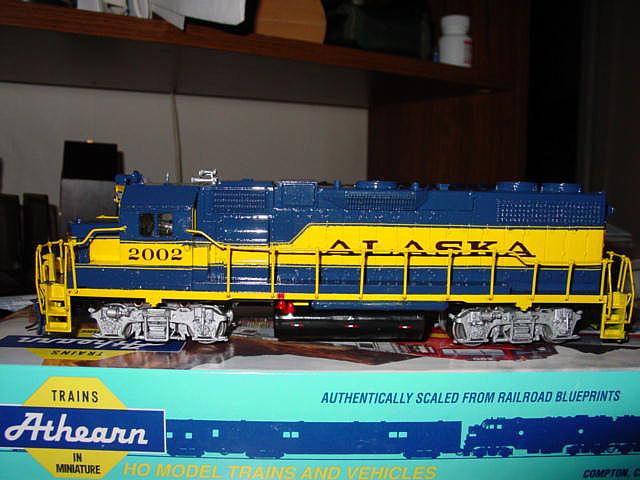
I started with a Penn
Central Athearn GP38-2. Using brake fluid, I stripped the shell, washed
it in dish detergent and let it dry. I used the cutting wheel on my Dremel
to cut off the details on the front of the engine where the plow will go.
I added detail parts such as extra lighting on the cab, and a speaker for
the electronic bell. Then I took it to the paint booth and sprayed the
shell with Scalecoat II White. The next day I painted it Reefer Yellow. |
 |
 |
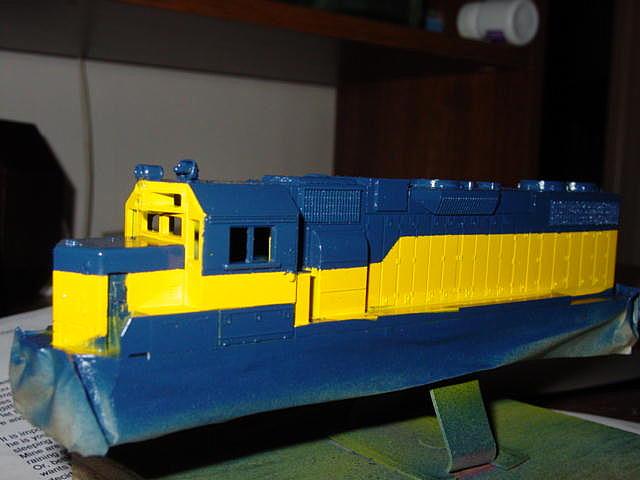
I used automotive grade
masking tape to paint cars. I masked off the top portion of the engine
to to be painted Scalecoat II B & O Royal Blue. At this stage
in the modeling, I elected to take the cab off to paint it . It also made
the painting of the rest of the shell easier . When doing this engine you
need to make sure you use an instrument with a fine point to get the tape
into every crack and crevice of the detail on the locomotive. I used photographs
from John's web site as well as photos provided by Robert Krol. After the
paint dried for 1 - 2 hours, I removed the tape and let the shell cure
until the following day. |
 |
 |
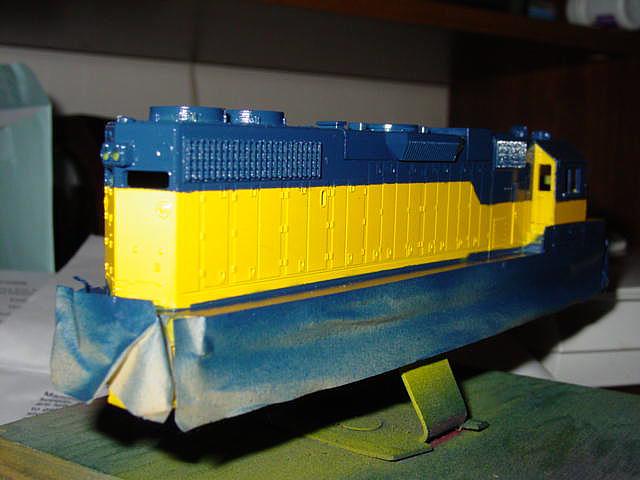
I masked off the bottom of the
locomotive for the Royal Blue making sure that I left the appropriate areas
yellow. I also took my decals and photocopied them to make them look black
and white. This made the pinstripe on the decals look black. I took
the pinstripes that would go on the nose where the yellow would arch down
to a point in the blue. I cut out the area around the copy
of the stripes in a square so I just had the lower nose stripe. Next, I
taped it on top of my masking tape. Using a hobby knife, I carefully
traced the curve of the pinstripes and took off the tape. This gave me
a template of tape to apply to the nose for the next paint job. After spraying
the blue on the lower half, I removed the tape and left it sit until the
following day. |
 |
|
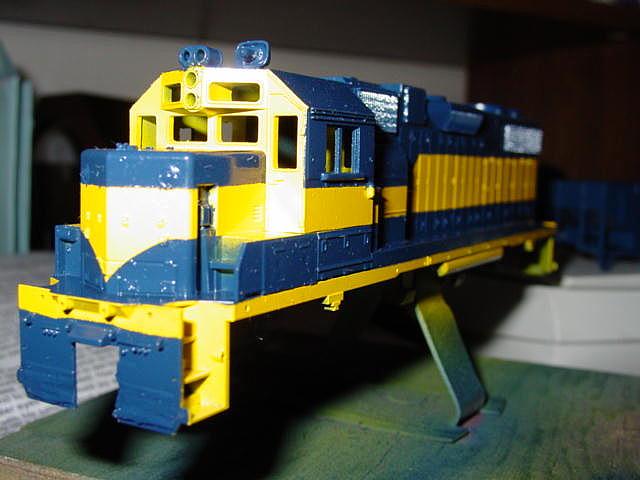
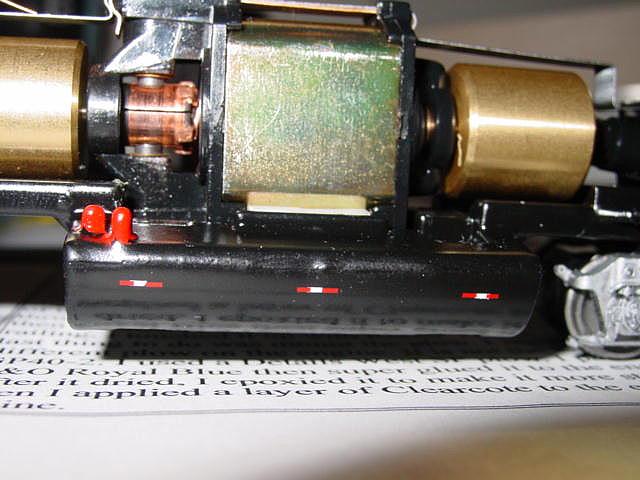
At this stage of the customizing, I took care of all
the detail painting that need to be done to the shell as well as any of
the detail parts that were going to be used. I took Scalecoat II Chinese
Red and painted the nose lights and back end lights. I used masking
tape and a very small punch to use as a guide when painting the small round
lights. I painted the number boards black and then glued them in place.
The couple lift bars and ditch lights were painted Reefer Yellow prior
to being glued to shell. After talking to Mike Ferguson, I decided
to add the anti climber to the front of the shell. I acquired an EMD STD
Dash 2 Anti climber. Then I painted it Reefer Yellow then detail painted
the Royal Blue. Then I used a cutting wheel on my Dremel to cut off the
front details on the shell so the anti climber would fit properly. Before
I did any cutting, I used a fine black marker to mark where the original
railing holes were so I knew where I would have to drill the hole needed
to mount the railing. After gluing the anti climber on to the shell, I
drilled the small holes for the railing and touched up the anti climber
with blue and yellow paint. At this point, I glued the ditch lights onto
the climber and the MU stand unto the back of the locomotive. Also the
coupler lift bars were glued onto the shell. The MU stand on the front
was left off the model until after decaling. The five chime horn, antenna,
railing , and plow were painted their appropriate colors. As a last task
in this stage was drilling the holes for the horn and antenna. |
 |
 |
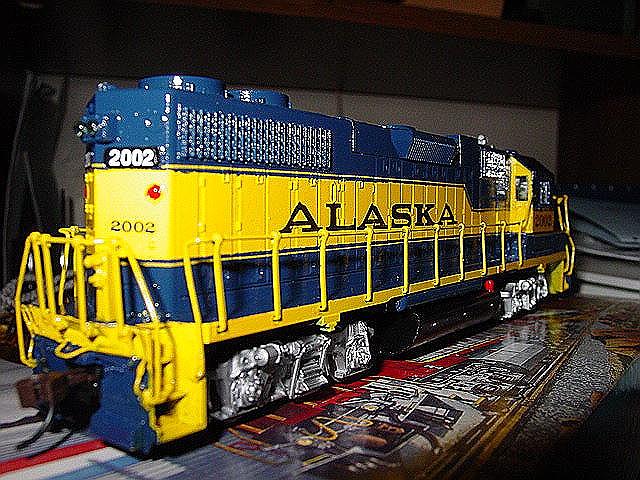
In this stage I applied the decals to the shell starting
with the pin stripes. They were applied above and below the yellow painted
stripe. This was a time consuming job as the decals are so small and delicate.
Next the ALASKA decal was applied to the sides. Using pictures
and landmarks on the shell to get the right placement. Then the nose circular
logo was applied to the front of the shell. All of these decals
came from a set of decals I had made for the GP40 new paint scheme. I took
the cab off in this stage while I was decaling the loco. Again it made
for an easier job. I applied the cab numbers (I had to piece together the
numbers and the cab numbers also were from the decal set I had made). The
final decals to be placed on the engine shell were the number
boards and engine numbers. These decals came from Randy Thompson's
GP38-2 decal set. The fuel tank needed decals that came from the
Microscale Preston Truck trailer decal set. I used the red
and white safety stripe piecing it together to get the right look.
After the decals dried I sprayed the shell and fuel tank with several coats
of Clear Cote to seal the decals. The MU stand also was glued to the front
behind the one ditch light. |
 |
 |
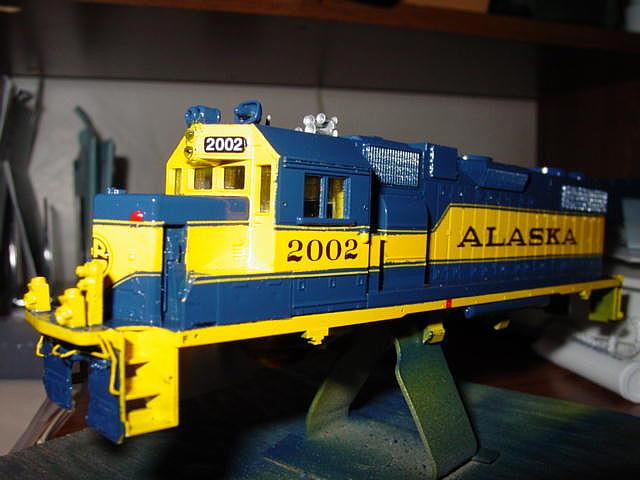
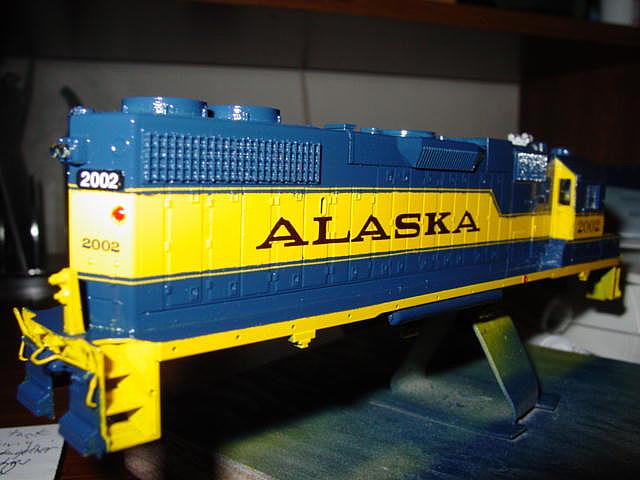
The final stage of the project was to mount the railing,
the five chime air horn, antenna, and the plow to the shell. The railing
was prepainted Reefer Yellow, the plow was prepainted Royal Blue and the
antenna and air horn were also prepainted. The air horn and antenna were
glued in place (where I drilled the holes in the one of the previous stage).
The railing was next. I used my hobby knife to open the holes on the shell
to make it easier to push the railing in the the factory drilled holes
when mounting the railing on the locomotive. Before I started to assemble
the hand railing, I pried open the end of the vertical railing where it
would attach to the horizontal railing. This made it easier to to
mount. I used a pair of hemostats to clamp them tightly on to the long
railing and also to push the other ends into the shell holes. The front
railing was different due to the anti climber. I had to first clip off
the end of the railing that would have attached to the shell. The right
angle part needed to be cut off. Once that was done I amounted the
railing and then super glued the parts of the railing that went down into
the anti climber. However, I found it wasn't strong enough so I epoxied
them in place. That anchored them quite nicely. After the entire
railing was assembled, I went around and touched them up. The final detail
to be added to the locomotive was the plow. It is not the same as the GP40
plow. I using a Details West SP Plow. I had prepainted the plow B&O
Royal Blue then super glued the plow into place. After it was dry, I epoxied
it to make it more stable. Then another coat of Clearcotte to the entire
engine to complete the project. |
 |
|
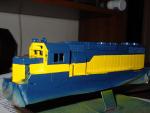
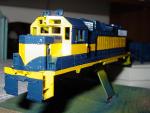
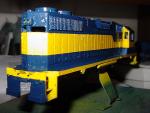
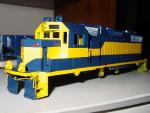
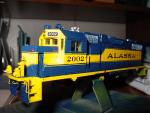
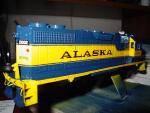
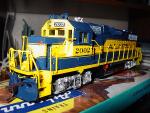
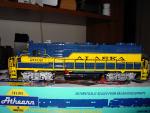
The finished project! |


