 |
 |
 |
 |
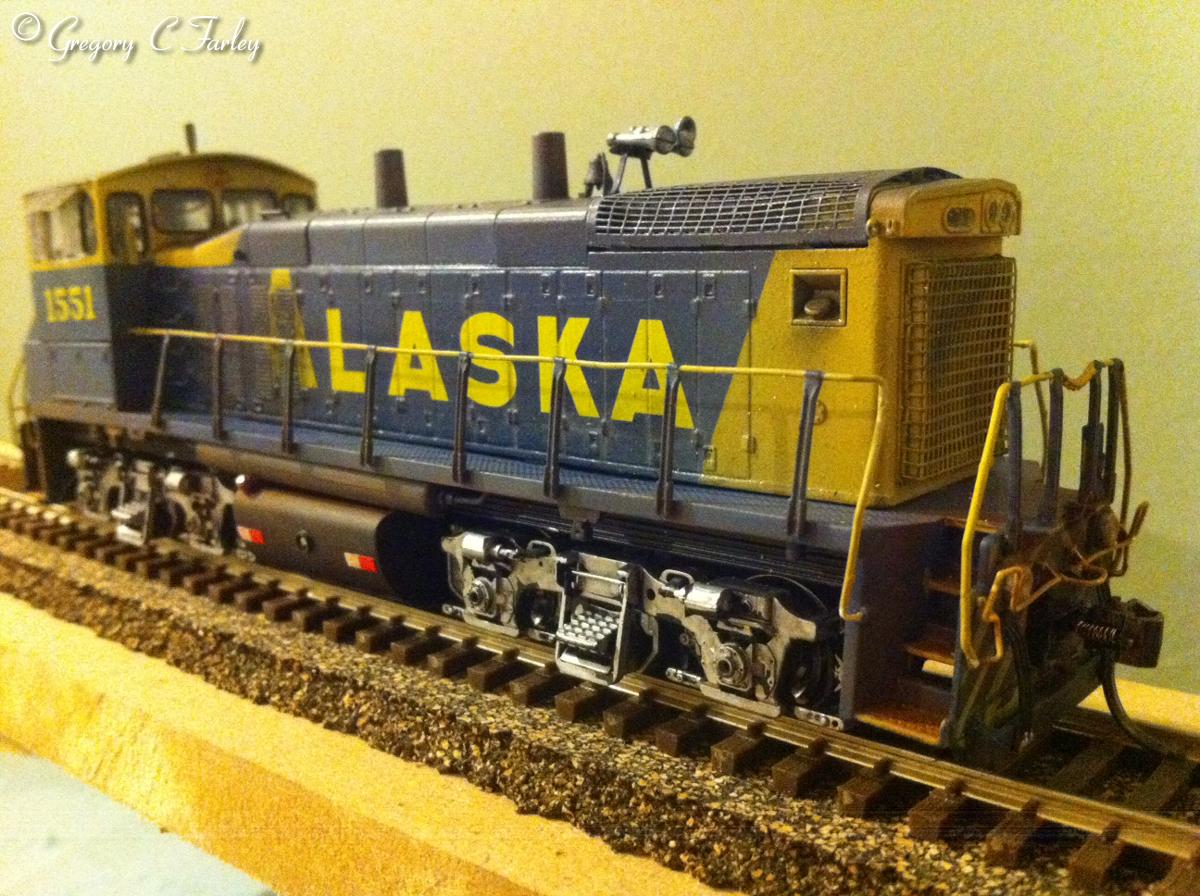
Atlas MP15DC Project
After combing through John's website and Railpictures.net I settled on modeling road number 1551. I chose this loco for two reasons. First, I liked the sloped air intake hood and second, there were some great prototype pictures of 1551. I purchased an Atlas MP15DC Silver series locomotive in Birmingham Southern colors from my local hobby shop.
One of the things I have learned through error, is I now have bins that I put each project in while I am working on it. If I have a lot of parts, I might use one bin for the locomotive and its original parts and the second for the extra parts. So my first step was to break down the loco into individual parts. I knew how much detail I was wanting to impart on my finished project and the Atlas had most of the detail parts I wanted. My next step was to order a set of decals from Curt Fortenberry. While those were in the mail, I stripped the decals off using decal and paint remover. I only let it set on for about an hour. I found sometimes the plastics starts to get soft if I leave for too long. Needless to say, I couldn't get all the previous markings completely off, but enough to work with.
Painting
I started off with several coats of SP Lettering gray. I got Curt's
decals in the mail and I tried to mix up the yellow to match the yellow in
the decals. For me this was mostly CNW Yellow mixed with Reefer Yellow
and SP Lettering Gray. I let that dry over night then masked off the
areas that I wanted to keep yellow. I use a combination of 3M Magic
Tape and green auto masking tape (I buy this at the local AutoZone.
It leaves a cleaner line that the stuff at the hardware store). My preference
is the Magic tape, but I find it only works well on straight smooth surfaces.
For my blue mix (I mis-read Pat's page) I used mostly CSX Blue with
SP Lettering gray. That was too dark so I added some B&O Royal Blue.
Once it was on, I realized I should have started with the B&O Blue.
As you can see, it wasn't too bad, but it wasn't the blue I was
looking for in the prototype picture. However, I botched my first set
of decal application and had to remove them (also evident in the picture).
A lot of my paint came off so I had to repaint the locomotive. This
time I used mostly B&O Royal Blue, with a little CSX blue. I left
out the SP Lettering gray for my practice of painting it new, then weathering
it out.
Decals
To prep for the decals I gave the locomotive two coasts of clear gloss finish.
At Curt's suggestion I purchased some Walther Solvaset, instead of the
Micro Sol that I was using. I diluted with it with tap water (he recommends
Distilled water, which I now have on hand) to about 50%. Following his
guide that comes with the decals I set them in position. After about
an hour, I really wanted the decasl to set down in the crevices and louvers,
so I lightly applied some full strength Solvaset. The decals set beautifully.
Reassembly
I put the frame pieces back together so I could apply my first round of weather
equally among the parts. I used SP Lettering gray to fade of the paint.
To get the dirty roof and hood look I used Tarnished Black. This was
the first time I used Tarnished black for this I really like the result.
I decided that I was going to put a Sound decoder in the locomotive while I was taking it apart. It already had a board and the speaker mount. I bought a Tsunami AT1000 EMD 645 non turbo sound decoder and a 1" oval speaker. I had to build a little speaker box on top of the speaker stand. NOTE- If I have to do this again, I would try for a smaller speaker, so I could have more of a box around the back of the speaker. I measured out my box and it was going to fit perfectly, until I went to put the hood grill piece back on. That piece takes up a lot of room from inside the hood. I had to cut the box down quite a bit and file away at the inside of the hood piece to get a fit.
Outside of the speaker, reassembly went good except for putting the windows back in. I am not sure if I didn't pay close enough attention to the order which they came out, but in the end I had to cut eh rear window section into three pieces and file the outside edges. I had to cut the front window into two sections and file the outside edges, all to make room for the side window sections.
Details and Weathering
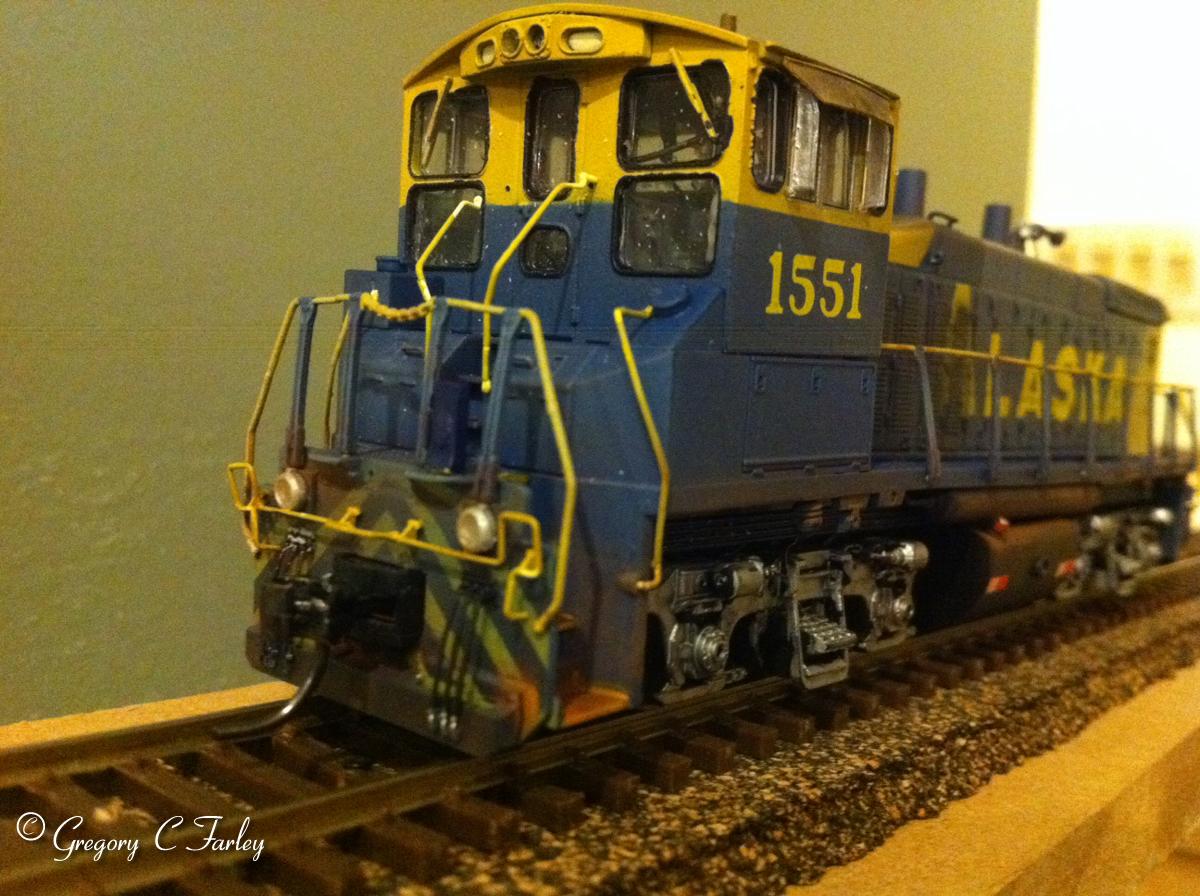
The Atlas came most of the detail parts that I would have added. I moved
and built the horn mount using .01x.03 brass. The horn I fabricated
using some spare horns that I had lying around. I cut and added trumpets
to an old Athearn horn. For the old mount (bell, or horn?) on the forward
cab above the window I used .02x.1 Styrene cut to slightly less than .25".
I used .02x.04 styrene cut to a 45 degree angle. I couldn't get
a good picture of the actual mount, so I kind of guessed and I could have
worked with much smaller pieces, without lots of headache. I am not
sure what kind of antennae is on the roof (a Sinclair type), but I measured
out the protype photo and cut to length. I used .02" thick Styrene.
The only part I purchased was Details Associates Ditch lights 1022.
The mount in this packages was a little more rectangular and hit fit issues,
so I had to square up the mount. I also drilled out the right side fuel
tank and placed a Fuel gauge.
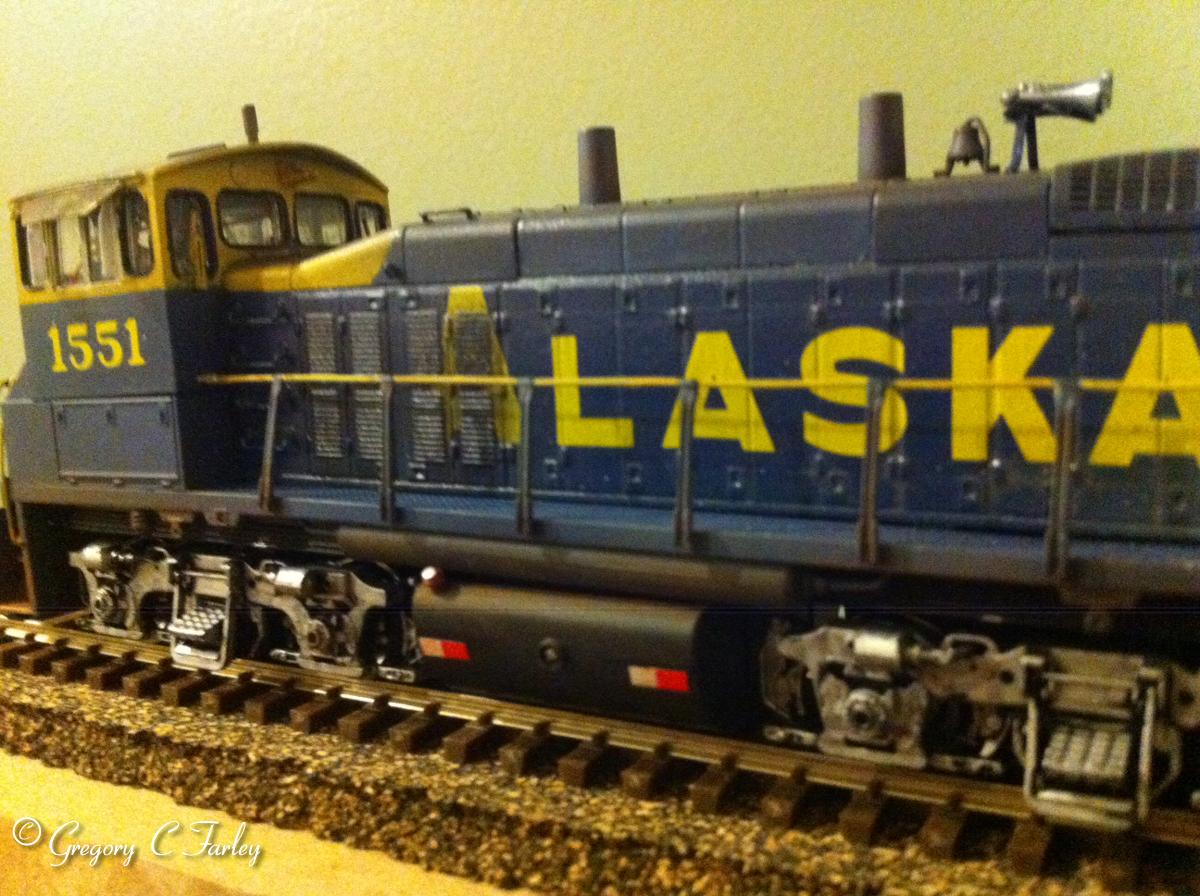
The rest of the weathering was done with AIM
chalks, I used Medium Earth for the dirt, grimy black to fill in some spots
on the cab roof and the louvers on the long hood. I painted the Trucks
with a silver Sharpie marker. I like using this for he trucks, because
it can't quite fill all the nooks and the silver has a dirty appearance.
I think it imparts a weathered 3D look, since some of the nooks stay black.
Finally, I gave a final coat of dull clear finish. In the prototype
picture I thought the sides of the long hood have a little shine left on the
then, so I gave the sides a light coating of gloss clear finish.
Parts/Paint List (All paints are Pollyscale and chalks are AIM)
Please send me an email if you have any questions, or know want to make suggestion on how I could done things better or differently. I welcome all feedback. Gregory Farley gregorycfarley@gmail.com
|
|
|
|