
You'll find the lastest layout status at Rebirth of a Dynasty here.
In the Beginning
My parents gave me an O27 gauge train set when I was just knee high
to a grasshopper. As a teenager, I sold this and invested the meager proceeds
into the world of HO modeling. My brother-in-law Rick did most of the track
laying and electrical work on a two tiered T-shaped layout comprised of
two 4' x 8' sheets of plywood. I became skilled at running two trains at
a time on a single power pack and delighted audiences with my dramatic
train wrecks. In my later teen years, perfume and petrol took its toll
and the layout became a collection of oxidation and cobwebs.
The Salad Days
In 1978 I began the excruciating pain of college. No time for a layout!
In 1980 I married Terry and we moved into a small home. No room for a layout! A further blow was
dealt when Mom and Dad decided to move to a smaller home. "Remove thou
train layout from our basement!", they cried. I boxed up the cobweb covered
buildings, oxidized track, and dusty locomotives and rolling stock. The
plywood, frame and legs became firewood. My entire layout was now reduced
to three milk crate sized boxes. We both graduated from college in 1983
and the following year we moved into (what seemed at the time) an enormous
house. With good jobs and free time, we traveled the country and relished
in each other's company.
Up From the Ashes Grow the Roses of Success
Dozens of years down the road those boxes would have eventually become
auction fodder at my estate sale had it not been for Terry. Wives have
a way of looking deep inside their husbands and seeing a young boy's heart.
"Rebuild your train layout.", she said as if it were as easy as whipping
up a batch of chocolate chip cookies. This simple statement put the train
in motion. I spent several years diligently searching for just the right
layout that would meet my desires. I love to just sit and run my trains.
I don't want to run realistic operations or scratch build a lot of structures.
I just want to run my trains. I finally found an almost ideal layout
diagram in a hobby store in Atlanta, Georgia. My fate was sealed the
following Christmas, when my father-in-law gave me plywood and lumber for
a train layout. The seeds had fallen on fertile soil.
I Ain't Made of Time
Before I go any further, I must remind you that like most of us, I have
very limited free time. Wife, kids, church, job and home carve out a large
percentage of my pie. Plus, I play guitar (including recording my own music),
am totally addicted to the computer and have a wide variety of other hobbies.
But the true free time killer is my job as Scoutmaster of a Boy Scout troop.
It can eat up three to four evenings a week plus several weekends a month.
However, this job tapers off dramatically in early December and doesn't
get back into full swing until mid January. This is when I work on my train
layout. I realize it will take me many, many years to have a presentable
layout, but that's okay. Just so long as I can run the trains!
Alaska!
 Now
back to my story. Few places I visited have a lifelong effect on me. Alaska
was one of these. Our 1986 excursion etched countless wonderful memories
and landscapes into my brain cells. Wildlife was everywhere! Our Alaska
Railroad trip was fantastic and it started me down the road to becoming
a railfan. Not long after returning home, I began preparing a room in the
basement for the future layout. Drywall, paint, carpet, cove base, lighting,
suspended ceiling, and a large wooden storage cabinet made the dreary room
come alive. Father-in-law Doug (with minimal help from me) built the four
tables that would be the foundation for the layout. Learning from my previous
teenage experience, we built the tables for easy disassembly. One small
detail plagued my thoughts: What railroad should I model? Asking friends
and family produced a rainbow of ideas. Terry's idea was unquestionably
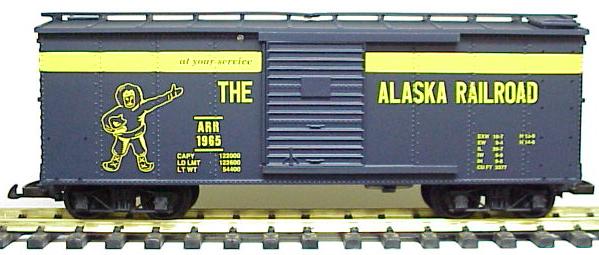
the best: the Alaska Railroad. I thought this was an excellent idea. Hey,
we had bought an Alaska Railroad boxcar from a hobby store in Anchorage.
That was start! How hard could it be to find other Alaska train items? Now
back to my story. Few places I visited have a lifelong effect on me. Alaska
was one of these. Our 1986 excursion etched countless wonderful memories
and landscapes into my brain cells. Wildlife was everywhere! Our Alaska
Railroad trip was fantastic and it started me down the road to becoming
a railfan. Not long after returning home, I began preparing a room in the
basement for the future layout. Drywall, paint, carpet, cove base, lighting,
suspended ceiling, and a large wooden storage cabinet made the dreary room
come alive. Father-in-law Doug (with minimal help from me) built the four
tables that would be the foundation for the layout. Learning from my previous
teenage experience, we built the tables for easy disassembly. One small
detail plagued my thoughts: What railroad should I model? Asking friends
and family produced a rainbow of ideas. Terry's idea was unquestionably
the best: the Alaska Railroad. I thought this was an excellent idea. Hey,
we had bought an Alaska Railroad boxcar from a hobby store in Anchorage.
That was start! How hard could it be to find other Alaska train items?
The Rescuers
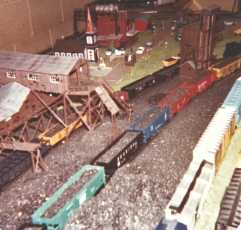
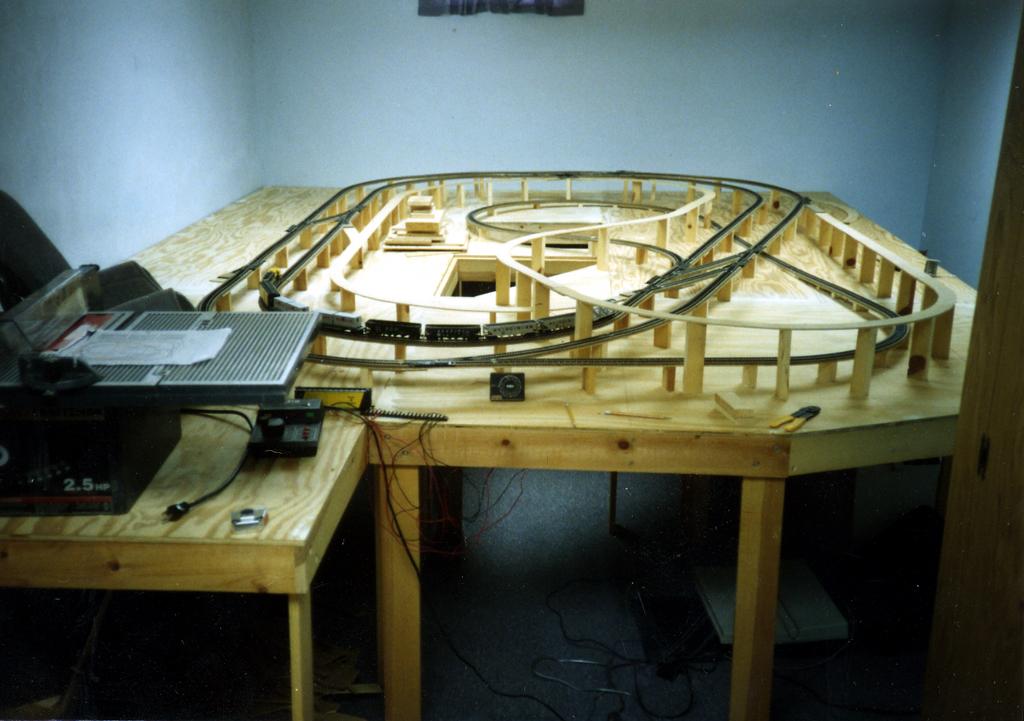
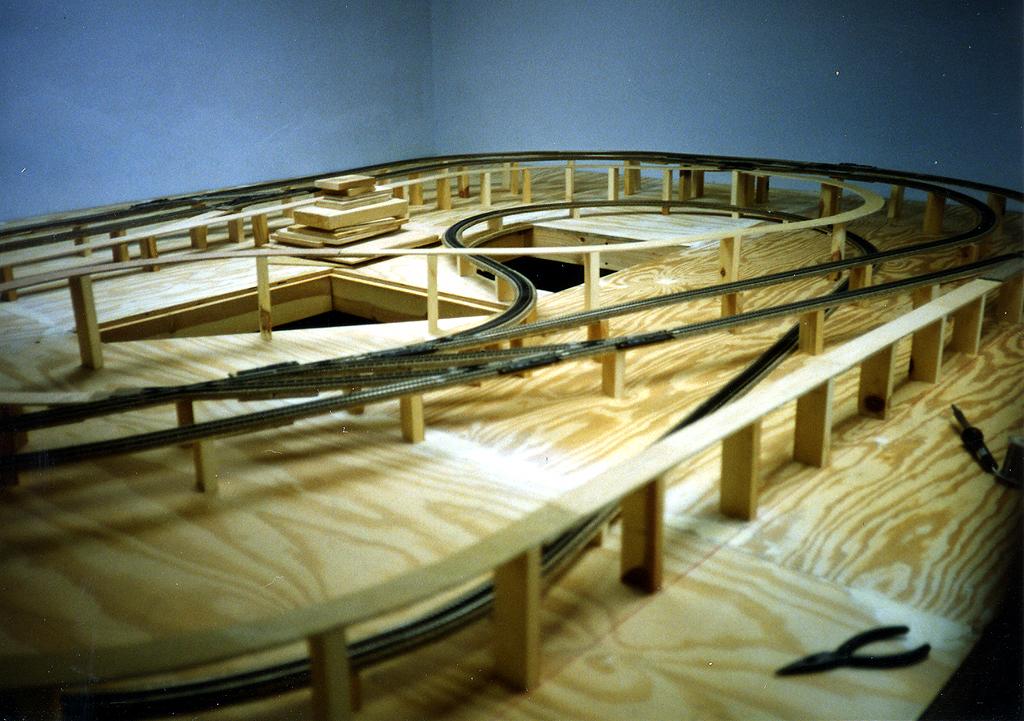
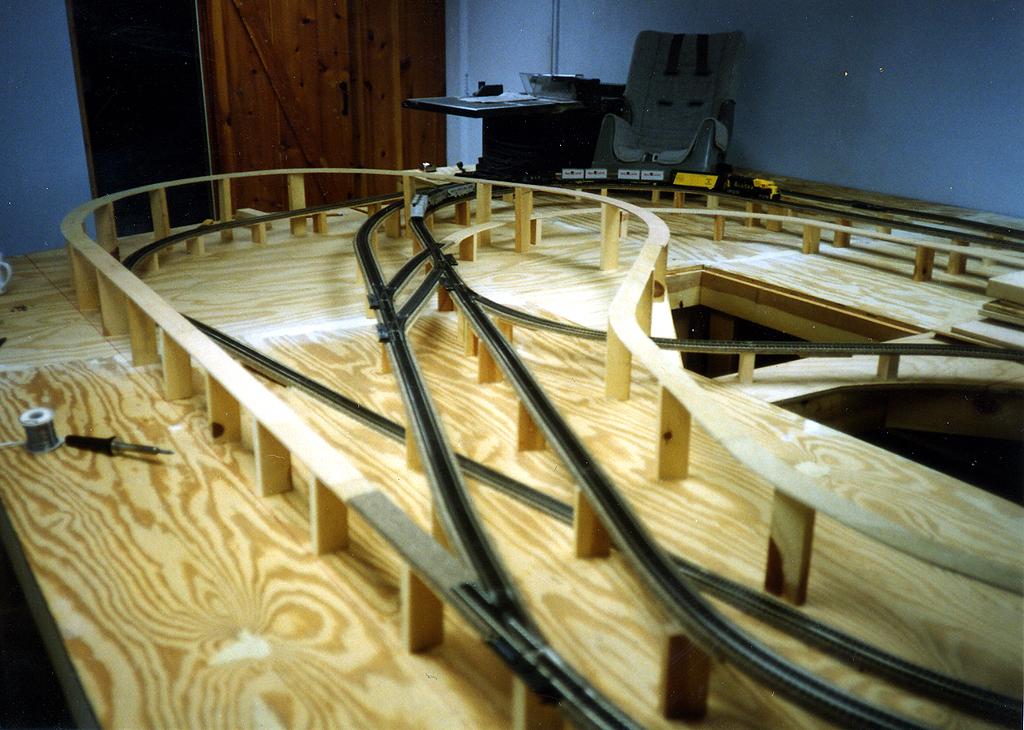
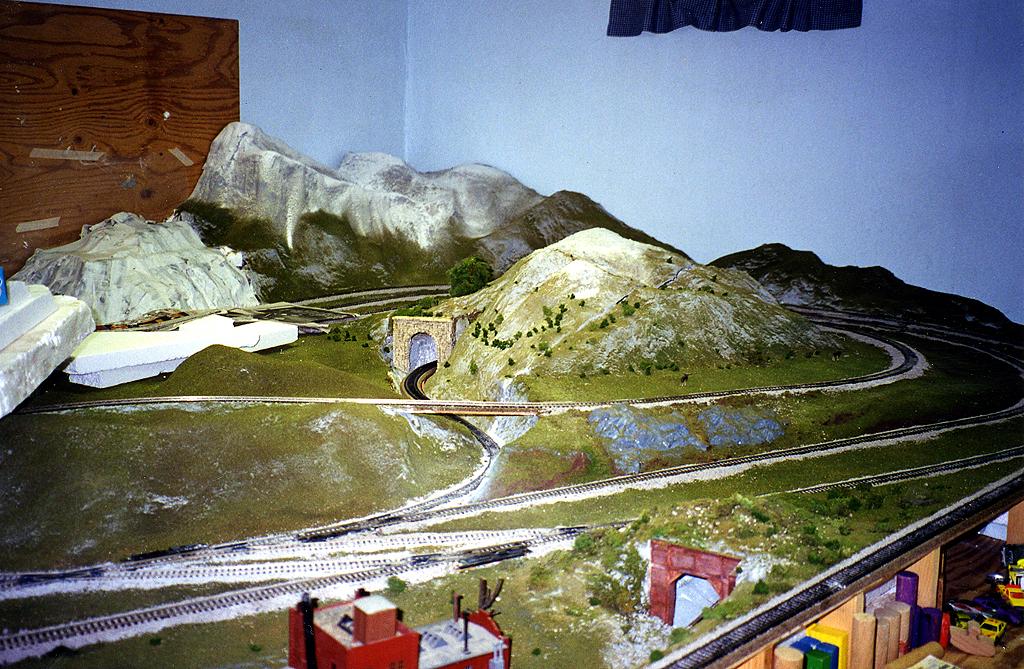
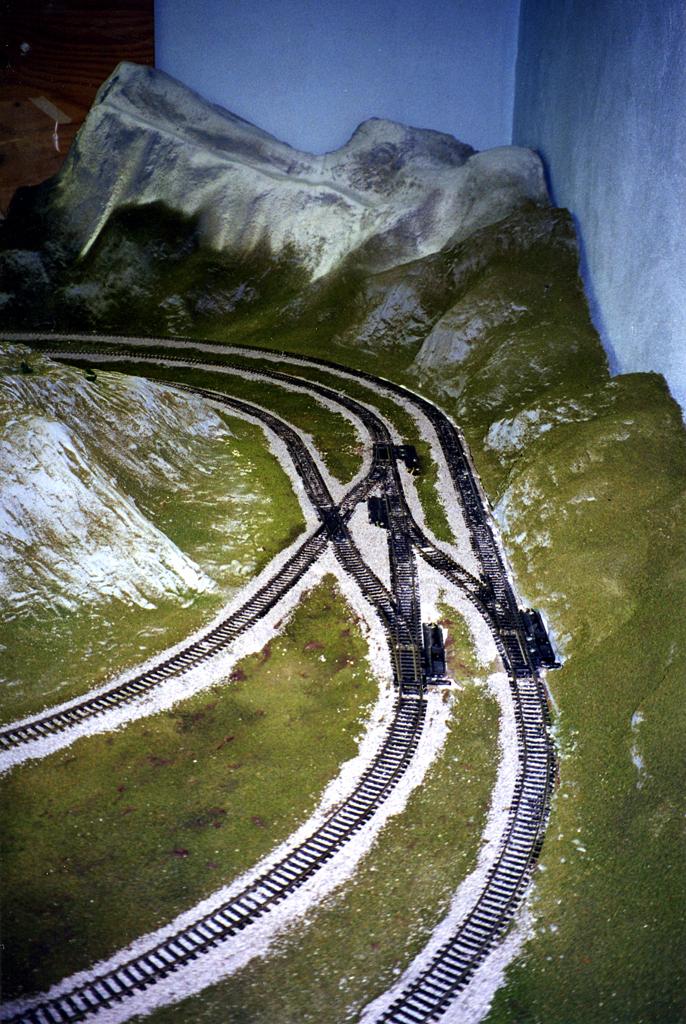
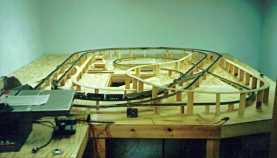 In 1987 I began the toilsome journey of slappin' down the track. This is a fairly
difficult task since 99% of it is above the board! (1, 2, 3) This means
creating tons of risers, gluing them to the board, nailing wooded roadbed strips
to the risers and then laying down the cork board and track. This may
be pretty easy for an average Joe, but to a three toed sloth like me, it is
an excruciating process full of wailing and gnashing of teeth. I can't tell
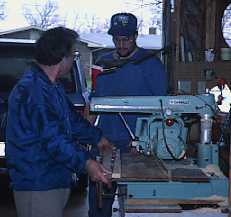
you how many times I threatened to quit during the track laying process. Father-in-law
Doug came to my rescue by cutting almost 100 risers to exact lengths. Eagle
Scout Steve came to my rescue by assisting in the cutting of the various shapes
and sizes of roadbed with a jigsaw. What a mess sawdust creates! Not until after
all the track was in place did I remember that part of the plan was to have
track joints where two tables came together. In this way, the layout would be
modular in case we ever thought of moving to another home. This almost came
back to haunt me when we went house shopping in 1997 and 1998. Ultimately, we
stayed put, but if we hadn't, I am sure someone (Rick?) would have come to my
rescue and helped me to cut things apart. In 1987 I began the toilsome journey of slappin' down the track. This is a fairly
difficult task since 99% of it is above the board! (1, 2, 3) This means
creating tons of risers, gluing them to the board, nailing wooded roadbed strips
to the risers and then laying down the cork board and track. This may
be pretty easy for an average Joe, but to a three toed sloth like me, it is
an excruciating process full of wailing and gnashing of teeth. I can't tell
you how many times I threatened to quit during the track laying process. Father-in-law
Doug came to my rescue by cutting almost 100 risers to exact lengths. Eagle
Scout Steve came to my rescue by assisting in the cutting of the various shapes
and sizes of roadbed with a jigsaw. What a mess sawdust creates! Not until after
all the track was in place did I remember that part of the plan was to have
track joints where two tables came together. In this way, the layout would be
modular in case we ever thought of moving to another home. This almost came
back to haunt me when we went house shopping in 1997 and 1998. Ultimately, we
stayed put, but if we hadn't, I am sure someone (Rick?) would have come to my
rescue and helped me to cut things apart.
The electrical work began in 1989 and was not completed until 1993.
I will never forget the rapt fascination with which my one year old daughter
Laura (strapped in her pumpkin seat and seating on the train table) watched
the train weave its way around the layout. I didn't think she would ever
grow tired of it! I have left a 1' x 12' side section of the layout totally
void of anything so my three children have a place to play while I am there
botching up (oh, I mean working on) the layout. It really warms my heart
when one of my kids asks, "You going to work on the train tonight?" An
affirmative answer never fails to draw a crowd of jabbering kids clustered
around that 1' x 12' section playing with blocks, Matchbox cars, Polly
Pockets and yes, my old train cars and buildings. Sure glad I hung onto
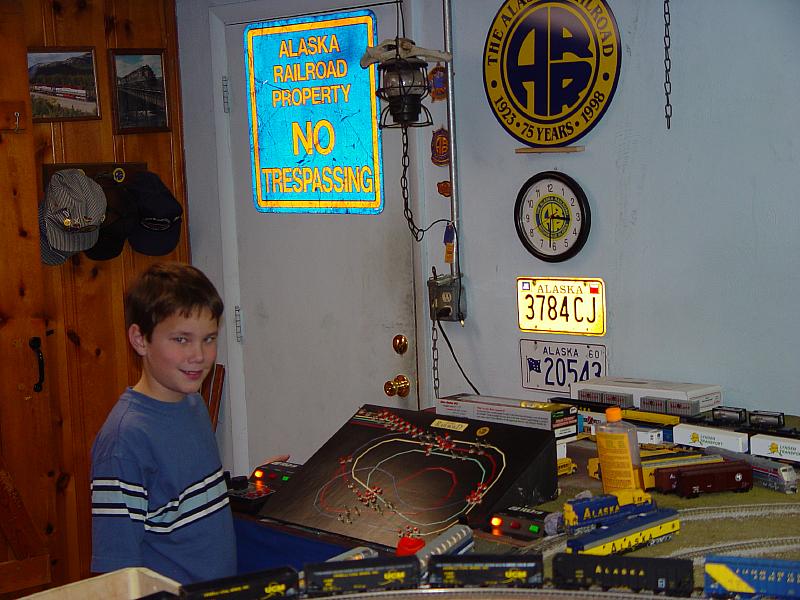
them! By the end of 1993, I had completed the control panel, hooked up
all the switch machines and had the layout working under cab control. Brother-in-law
Rick came to my rescue several days before New Year's when the soldering
work got too intense for my limited patience.
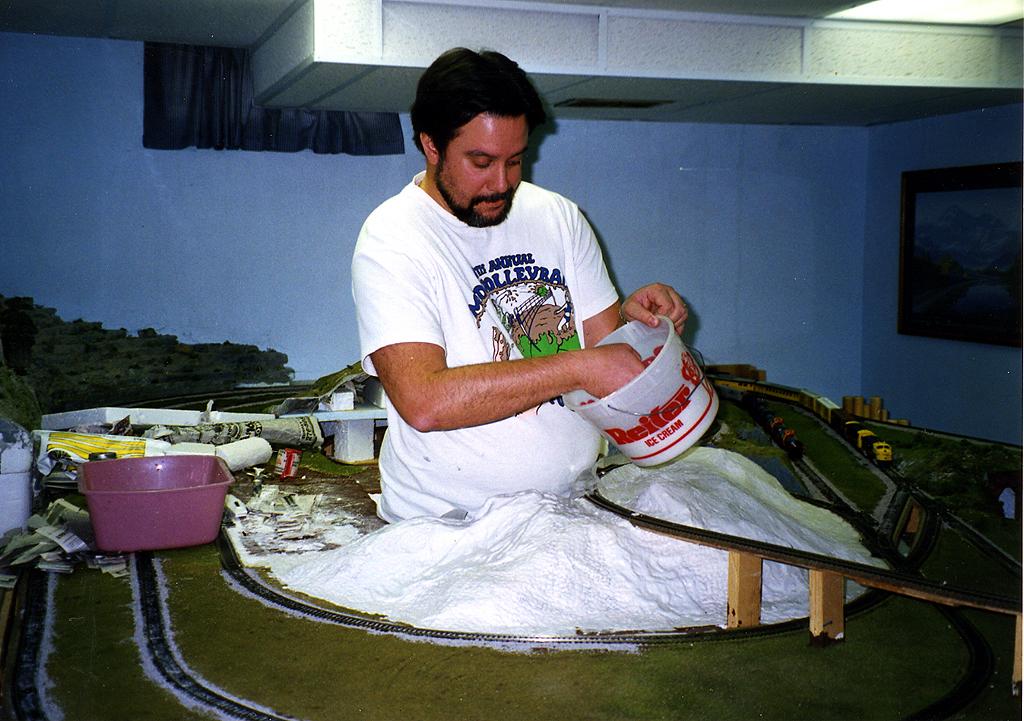
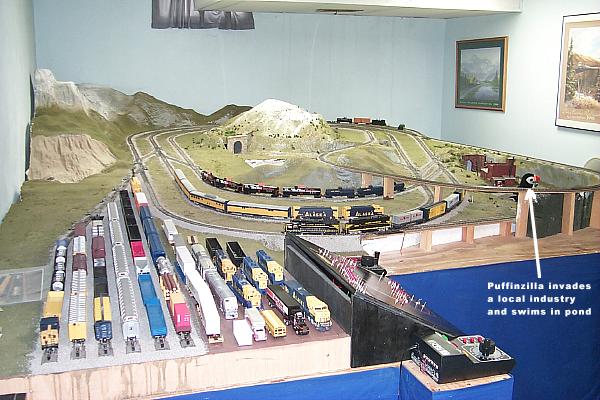
 The basic scenery work finally began in 1994. Styrofoam had to be cut and put
in place between tracks to act as a foundation for the plaster base and scenery.
This was a very nasty task! The foam had to fit tightly between the two tracks
and match the incline. Terry came to my rescue and did most of the tracing for
the foam cuts. Once the foam was cut, it was wedged into place and the tops
painted brown. You can't imagine the mess created by cutting Styrofoam. Via
the gift of static, it sticks to arms, legs, walls and even the vacuum cleaner.
Like a loyal puppy, it follows you wherever you go! Now, the Dayton division
of the Alaska Railroad was ready for realistic scenery. One person came to my
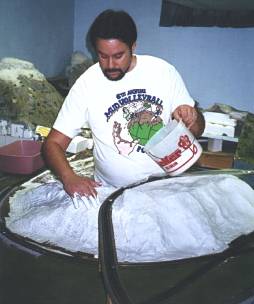
rescue in 1996 to lend assistance with mountains and ground cover. (5, 6) His mountains look like mountains while mine
look like funky, squatting blobs. We tore out my feeble attempts and started
anew. This person laid down crumpled newspaper and masking tape the way a sculptor
molds clay. With acute visualization, he applied plaster gauze, primping and
pinching it to produce the desired effect. I would then follow with plaster
and paint (i.e. the unskilled tasks). With an artist's heart, he then sprinkled
on five shades of Woodland Scenics ground cover followed by a light dusting
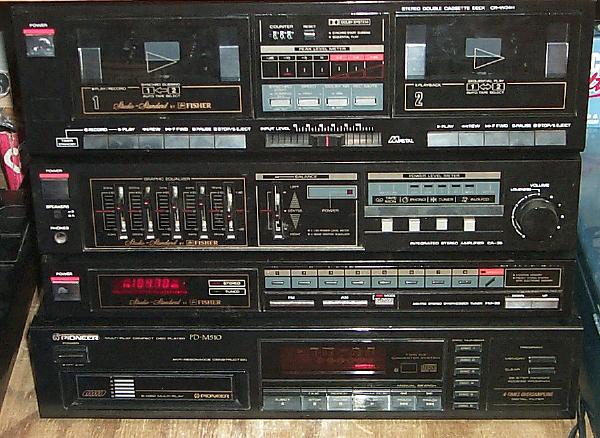
of sand. The work became even more pleasant when we purchased a home theater
system thus causing the transfer of our 100 watt stereo
system into the basement and into the train room. Yowza! The basic scenery work finally began in 1994. Styrofoam had to be cut and put
in place between tracks to act as a foundation for the plaster base and scenery.
This was a very nasty task! The foam had to fit tightly between the two tracks
and match the incline. Terry came to my rescue and did most of the tracing for
the foam cuts. Once the foam was cut, it was wedged into place and the tops
painted brown. You can't imagine the mess created by cutting Styrofoam. Via
the gift of static, it sticks to arms, legs, walls and even the vacuum cleaner.
Like a loyal puppy, it follows you wherever you go! Now, the Dayton division
of the Alaska Railroad was ready for realistic scenery. One person came to my
rescue in 1996 to lend assistance with mountains and ground cover. (5, 6) His mountains look like mountains while mine
look like funky, squatting blobs. We tore out my feeble attempts and started
anew. This person laid down crumpled newspaper and masking tape the way a sculptor
molds clay. With acute visualization, he applied plaster gauze, primping and
pinching it to produce the desired effect. I would then follow with plaster
and paint (i.e. the unskilled tasks). With an artist's heart, he then sprinkled
on five shades of Woodland Scenics ground cover followed by a light dusting
of sand. The work became even more pleasant when we purchased a home theater
system thus causing the transfer of our 100 watt stereo
system into the basement and into the train room. Yowza!
Seek and Ye Shall Find
With the tables built, the electrical connected, the control
panel completed and the scenery created, it was time to run the train!
But what about Alaska Railroad HO scale locomotives and rolling stock for
my layout? I quickly discovered that you can't find it in hobby stores.
What to do? Why I need someone to come to my rescue, of course! Weren't
you paying attention to the above theme? I helped fund an airbrush for
brother-in-law Rick. Beginning in 1993, he began custom painting Alaska
Railroad stuff for me as Christmas presents. A GP40-2 (#3015 which took
Terry and I to Denali N.P. and back), GP7A and B, RDC unit, passenger cars,
flats, tanks and a MOW crane and caboose. What will this year bring?
But being an American, I want more! What to do? Why the power of the Internet,
of course! And the rest, as they say, is history. I won't bore you with the
many paths I went down, the rocks I uncovered and the treasure I found. Let's
just cut to the chase. In November of 1996, I began encountering fellow Alaska
Railroad enthusiasts (via the Internet) who shared their great databases of
knowledge with me. When I decided to share this information with the world
in
April of 1997 by creating an unofficial Alaska Railroad site, the resources
started coming out of the woodwork. All Alaska Railroad hobbyists have benefited
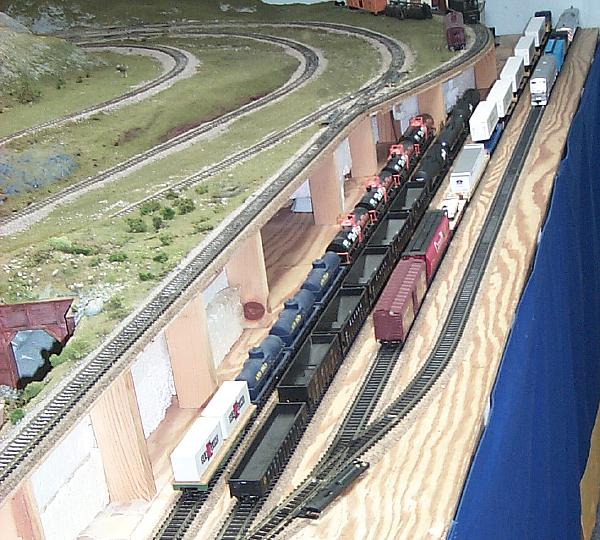
from this, but not to the degree that I have! Today I have 283 items
on my HO scale ARR roster, 55 items on my N
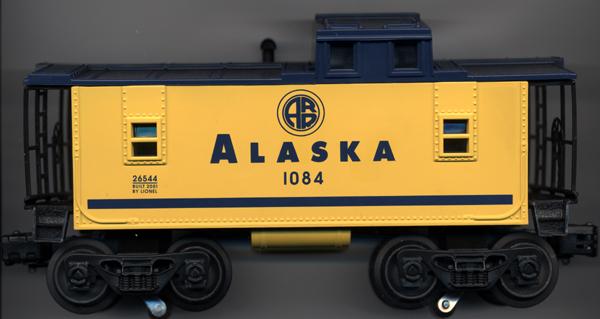
scale ARR roster and have one token car in G,
two in O (1 , 2)
and two in Z (1, 2)
scale. As a matter of fact, I have acquired so many HO scale items
that I had to build a second yard to park them.
I have also begun collecting Alaska Railroad memorabilia. My email pals have
spoiled me rotten in this area, but I continue to look for even more in other
places such as Ebay. Whatever I have is not
for sale (as it also has sentimental value), but I would consider swapping it
all for locomotive #3015 delivered to my back yard. <grin>
Death of a Dynasty
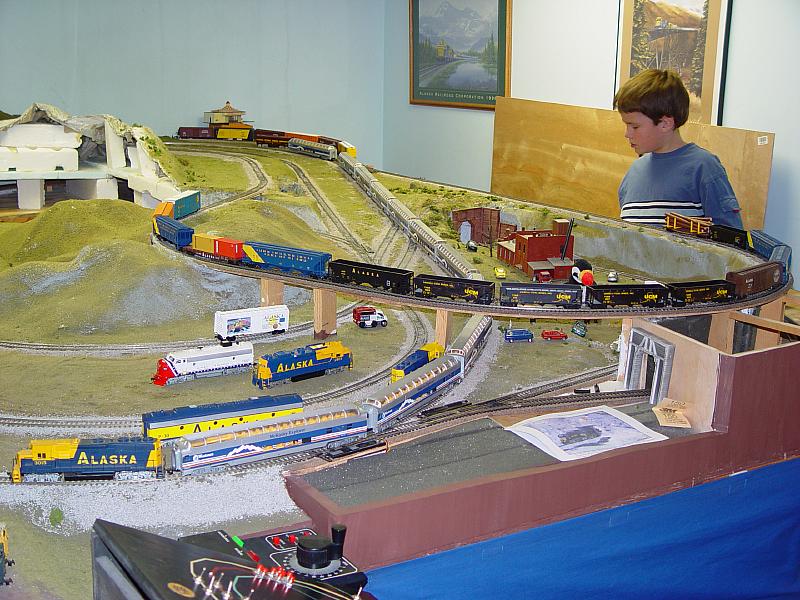
I ran Alaska Railroad trains on this layout for over 12 years. There were many magical moments including the longest
passenger train in history - eleven McKinley Explorer railcars pass under
the afternoon freight and the day my son John
took over operations on the layout. However, all good things must come to
an end. On April 20, 2004 we bought a home and I realized that my layout would
not fit into any of the rooms. On July 28, 2004 I ended my current stint as
a model railroader and ran the trains one last time before getting out the wrecking
crane. Although it took 18 years to build up the layout, it only took one evening
to tear it down. How depressing! I
kept the switches and tables to (hopefully) use on a future layout.
I never did get around to using Casey and Pat Durand's Alaska Trees for Dummies
kit, Randy Thompson's old Denali Depot drawings to build an HO scale version,
constructing the Walther's coal mine kit Terry bought me or painting a scenic
backdrop on the basement walls.
As I looked over the new house, I saw a 16' x 22' rec room that we don't really
have plans for. Maybe it is time to begin looking at layout plans.
A New Dream!
On 3/4/16 the 27' x 27' room above the garage has become avavilable. Oh joy! Rapture! You'll find the Rebirth of a Dynasty here.
Feel free to contact me at john@alaskarails.org
Page created 12/11/97 and last updated 2/6/25
|