 |
 |
 |
TwentyMile bridge update from Mikel Levine: The stiffener plates have been added to the bottom of the bridge and near the ends of each section. The plates on the bottom will probably never be seen but they are there. There are many hours in this little detail. It took about three hours to cut and rivet the plates for each bridge section. I will begin gluing the track to the bridge ties and building the handrail and fiber optic cable along the walkway. I can then paint the bridge. |
I am also working on the design for the piers and pilings. I have come up with a plan to make the install of your bridge fairly simple. I believe you or someone from your crew has a miter saw. The piling will be a long, hollow piece that can be cut match the grade on your layout. The piers will then fit into the pilings. |
What scenery should John do next? John decided to work on the canyon next to the newly added mountains. First, John spent two hours covering the entire area with Woodland Scenics plaster cloth. |
 |
 |
|
| After another four hours of work John had the southeast canyon wall half covered in rock plaster molds and the northwest wall a four covered. | Terry began her work on the black table skirt. As it turned out I miscommunicated the height requirement for the cloth and Terry had to go back and rip out the seams to shorten it. Once the modification were complete she used a staple gun to mount the cloth to the bench work. | Here is the first panel in place. It is amazing how much it changes the appearance! Before leaving she takes measurements for the next panel. |
 |
 |
 |
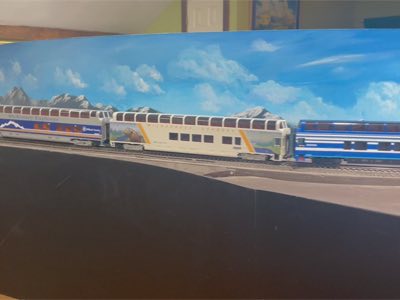
Our first train night since completion sees business as usual. Rick and Jackie stop in for dinner and then the crew goes to work. Rick returns the Wilderness Express to the layout. New metal wheels were added. The coupler box was modified to allow a wider coupler swing. A test run of the system shows no derailments anywhere on the layout. Rick also ran his Alaska Railroad locomotive for a bit. |
Rick and John discuss plans for adding water to the area surrounding the barge. Due to the method the barge is mounted to the motors and mechanisms there isn't a way to put water under the barge. One idea is to attach blue plastic sheets to each side of the barge. These sheets would disappear into the sides of the layout. Next, they would run over rollers and head to the floor. Weights would keep the sheets taut as the barge moves back and forth. | Instead of using a solid blue sheet John looked into purchasing sheets with textures. He found nice looking ocean sheets, but these were too thick to curve over the rollers. He found water textured sheets, but these need painted and there are no guarantees the sheets would still curve over the rollers or not flake off over time. Does anyone have any ideas? If so, please send me a message. |
