While talking to other modelers we sometimes take for granted they have a similar base of knowledge and experience. Not so. Most of us have leaned in isolation, only those skills and information needed to complete a given task. With the benefit of a few NMRA conventions and an SN3 Symposium, I have gleaned information on some of the latest adhesives and soldering techniques for brass and pewter.
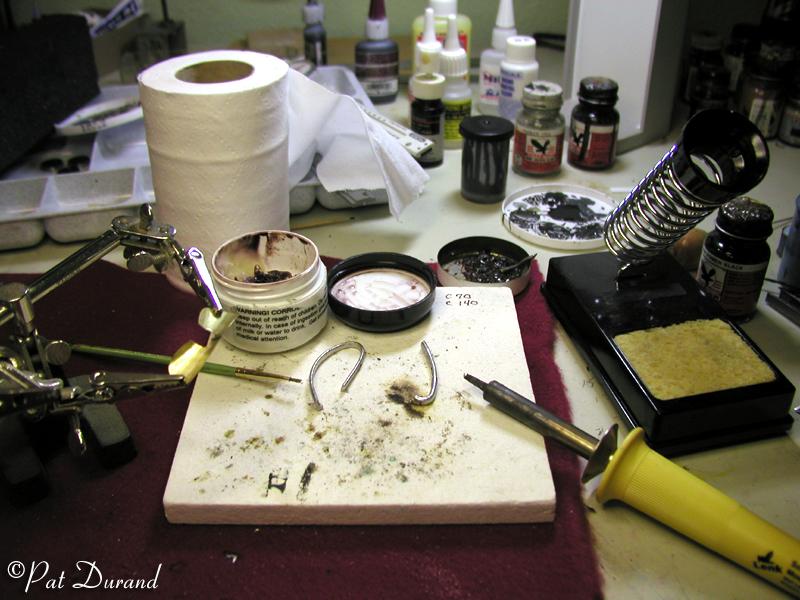
Soldering brass and pewter for the S-160 kit can be mastered with a little practice. I solder all the brass joints but still use adhesives on the pewter as I do not want to take a chance on melting the locomotive castings. For Details and a free instruction sheet go to www.ricketyrails.com. They sell a soldering kit for about $12.00 that will provide materials to build at least 10 S-160 kits. Included is a ceramic layout board, C145° and C70° solder by Carrs and Frys Powerflow Acid Flux.
Flux each part, pick up a small pinpoint drop of solder on the tip of the iron and place it next to the joint. As the flux flashes the solder will fill the joint. Remove the heat. Clean up each soldered joint with a soft tooth brush and a solution of 1 tablespoon baking soda in a quart of water to neutralize all the flux. Remember, the parts must be CLEAN. If you think you used too much flux, add more. If you think you have too little solder, you probably have too much on the tip of the iron. Do not heat the work piece and then try to add stick solder!
A 20 Watt or 30 Watt iron from Sears or Radio Shack with a support base will cost you about $12.00. Use a fine chisel point and keep it tinned. As the tip is heating up wipe it clean on the wet sponge, dip it in flux and as soon as it melts solder it should take on a protective coat of tin. If the tip is corroded and too hot it will not take the tin and will not conduct heat or carry solder. Keep a bowl of water handy, a damp rag and a roll of toilet paper. If you need to protect adjacent joints pack them with wet toilet paper and hold the work piece in the damp rag. Keep the heat localized in the joint where the flux can clean the joint and pull in the hot solder from the tip of the iron. Use aluminum alligator clips or clothes pins to hold parts together while you solder them. I nearly always use a mechanical fastener in addition to the solder. For example all plumbing fittings are drilled to accept the pipe passing through and pipe ends go into holes.
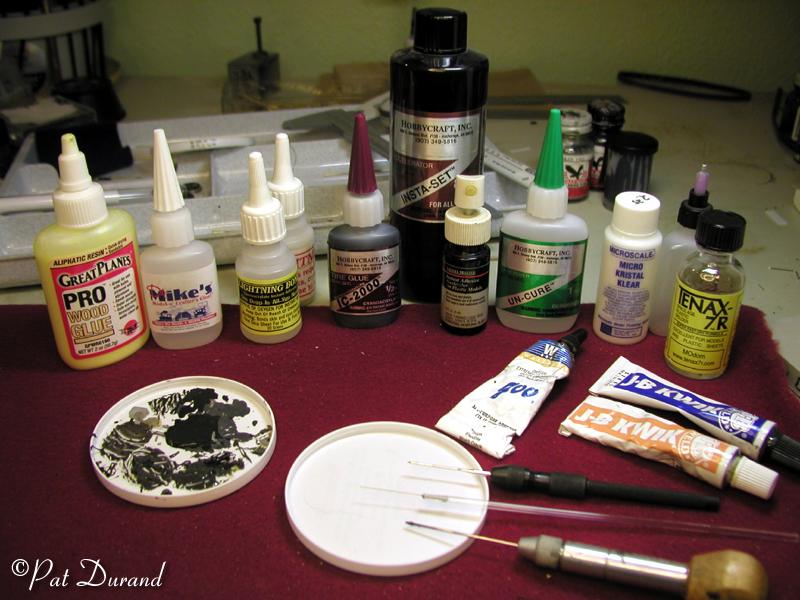
Adhesives I keep all these at hand because each has its place. As the sections roll out I will refer to these often.
Great Planes Pro Wood Glue - Aliphatic Resin
- Use on bulsa, wood, plywood, styrofoam, paper. For details: www.greatplanes.com
Dr. Mikes Model N. Crafters Glue - This stuff cures in absence
of oxygen and will literally glue anything to anything. That includes derlin
plastics to rubber to wood to styrene to brass to acetate to steel to lead.
It is fantastic, instant and hard to control and expensive at the outset.
It will last for over a year though, so it probably is the cheapest ACC type
of adhesive you can purchase. It is clear and I use it very carefully where
two surfaces meet, applied with the tip of a needle. CAUTION If you apply
a drop from the bottle, it will wick along any seam and slope into cracks
where it will cure inches away from where you intended! Works great for fixing
the coal load in the bunker. For details: www.drmikesglue.com
Lightning Bond / Lightning Fill - An instant thin clear ACC packaged with micro glass beads in a dispenser bottle. Very quick adhesive. For making fillets, hole plugs, fixing screws or studs, and reinforcing joints this combination cannot be beat. Apply LB and spray in beads. Follow up with more beads and a drop of LB which will wick up into the beads and bond instantly. You can even fill holes in gas tanks! For details: www.Drmikesglue.com.
Tire Glue IC-2000 - Buy this material in 1/2
oz bottles as it will only last on your bench for a few months. It is black
and thick so you can see where it is and control application. Works best on
non porous surfaces. It will fill gaps, and has a working time of about 10
seconds or longer if in a thick application. It is literally filled with ground
rubber so the joints is more shock resistant than other ACC products. I use
it to fix piano wire grab irons to brass, plastic and pewter models. Any joint
that needs adjusting before the ACC sets will benefit from Tire Glue. For
details: www.bsiadhesives.com.
Instant Accelerator - For all ACC adhesives. Buy this in
an 8 oz bottle and then transfer to a 1/2 oz spray bottle for use. It evaporates
very quickly if left in an uncovered container. It will force cure most any
ACC. To glue something to Styrofoam or rubber, spray the styrofoam or rubber
with the accelerator, and press the mating part which has an application of
Tire Glue in place for an instant bond. For details www.bsiadhesives.com.
Uncure-CA Remover, Debonder - Keep it handy as you will need
it when you glue your fingers together. Also use it to disassemble previously
built plastic, wood or metal kits. It will dissolve cured Cyanoacrylic as
well as most other adhesives and paint. To remove parts apply sparingly with
a small brush. For details www.bsiadhesives.com.
Micro Krystal Klear by Microscale - Have clean water handy
and apply the material with a small paint brush or toothpick. After the model
is painted, test fit your glazing, and then apply the Krystal Klear around
the opening. Set the glazing in place and wick excess adhesive away from the
window surface both front and back with a damp brush.. The universal solvent,
human saliva, on the brush will provide the final window cleaning. This material
does not discolor or gas off damaging the surface of the glazing. It will
bridge small openings and cracks with capillary action. Use it on the tender
deck to indicate a water spill. Use it to add paper window shades in your
loco cabs and passenger cars. Use it to attach the glass lenses to headlights
and markers.
Walthers Goo - Yes it is a mess but there are certain jobs it does best. Affixing the etched stainless grills to a locomotive body is one. Small amounts on each surface and then bringing them together when nearly cured provides on contact results. Goo provides a flexible strong joint between any two surfaces. Let any excess cure and cut it away after 4 or 5 days. It does not gas off so it makes adding crew members to previously painted loco cabs possible.
J-B Kwik - Get it from the hardware or auto parts store. Mix the two part epoxy in equal parts and work fast. It sets in 4 minutes. Fill large voids and fix dissimilar materials. I use if for adding lead weights in the boiler. Speaker enclosures for DCC sound can easily be built from sheet lead and glued with J-B Quick. It can be machined like plastic after cure.
Tenax 7R Plastic Welder - is the clear choice for making styrene joints quickly. The material flows into joints by capillary action and evaporates quickly. An open bottle will disappear over night so make use of an applicator system such as the Touch N Flow or a small bottle with a stainless applicator tip. A pint can of MEK Methyl Ethyl Keytone sold as a solvent and paint thinner at the hardware will provide you a lifetime supply to transfer to your one oz. bottle.
Got any other favorite adhesives we should know about?