October 1, 2020
Dairy Queen
Dairy Queen Dairy Queen
As teenagers Terry and I met at the Englewood Dairy Queen. After dating two years, being engaged one year and married for forty years we sat down at our kitchen table and assembled an HO scale Dairy Queen. I hadn't assembled a model in 25 years so together we watched a couple of YouTube videos to learn the basics. After a couple of hours we had the finished product. Soon after being added to the layout it became the hot spot in town. Mike Gerenday arrived in the blue company van while Rick Eppley made a brief lunch stop during his shift at Fed Ex.
Screaming through the tunnel
Shane and Cody
Dinner
Terry asked for photos of the Dairy Queen to share with her coworkers. I also sent her this brief video as well. Twin grandsons had a slumber party with us the night before as well as spending the day with us today. Tonight they joined us for train night dinner dressed in their favorite T-shirt.

Terry is a whirlwind in the kitchen cooking roast, mashed potatoes, carrots, pink fluff salad, homemade bread and hot apple pie. Once again she put us in a fine food coma.

Latest acquistions
Tortoise install
North double track finished
This is my fourth train layout over the years and it seems every rebirth is better than the last. One of the bonuses is manufacturers put out even more fun stuff which I find irresistible. Here are the latest acquisitions. The main task this evening is installing and testing the north double track Tortoise switch machine as part of the reverse curve elimination. While John holds a light under the table Rick finishes the installation. Rick runs trains in all directions and finds everything operating smooth as glass. If I had to do this all over I would have purchased high speed switches for all locations along the mainline.
Adding ties Filling the gap Gluing fascia
As Rick works on the Tortoise switch machine John scans the entire layout for missing ties and adds as necessary. Surprisingly, a total of 28 ties are added. While looking for missing ties John spots a gap between two rails. Rick cuts a small piece of rail to fill the gap, solders everything into place and files the joint smooth.

Part of the fascia at the "Smooth as Glass" curve didn't get glued into place. Rick adds wood glue and then uses wooden braces to push the fascia into position.

Done and done!

Almost three years to the day the CEO declares construction is finished!
Anyone is welcome to stop by for dinner and operating sessions on Wednesday night.
Rick stated he will be here indefinitely Wednesday nights to run trains and work out any newly discovered bugs.


October 8, 2020
"To do" list
Triangle warning symbol
Princess car truck repair

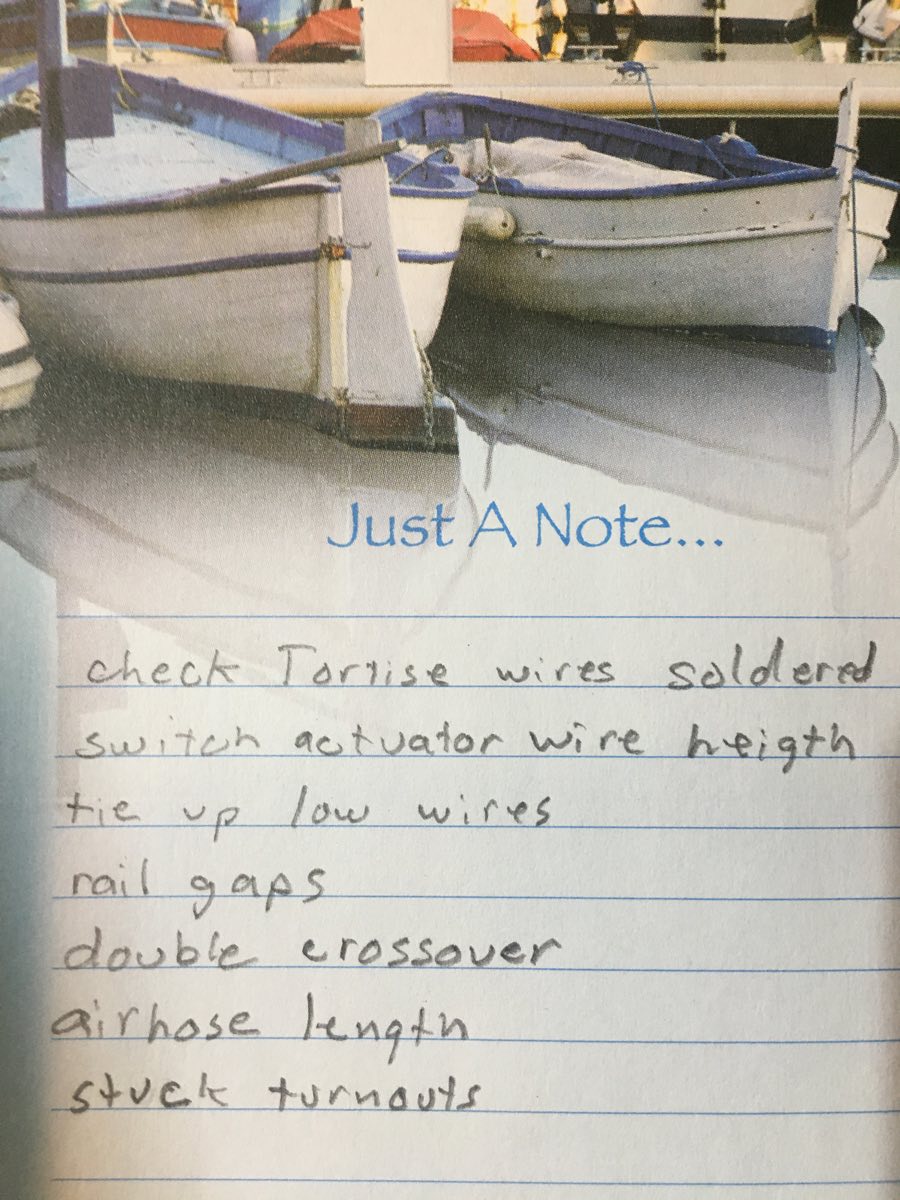
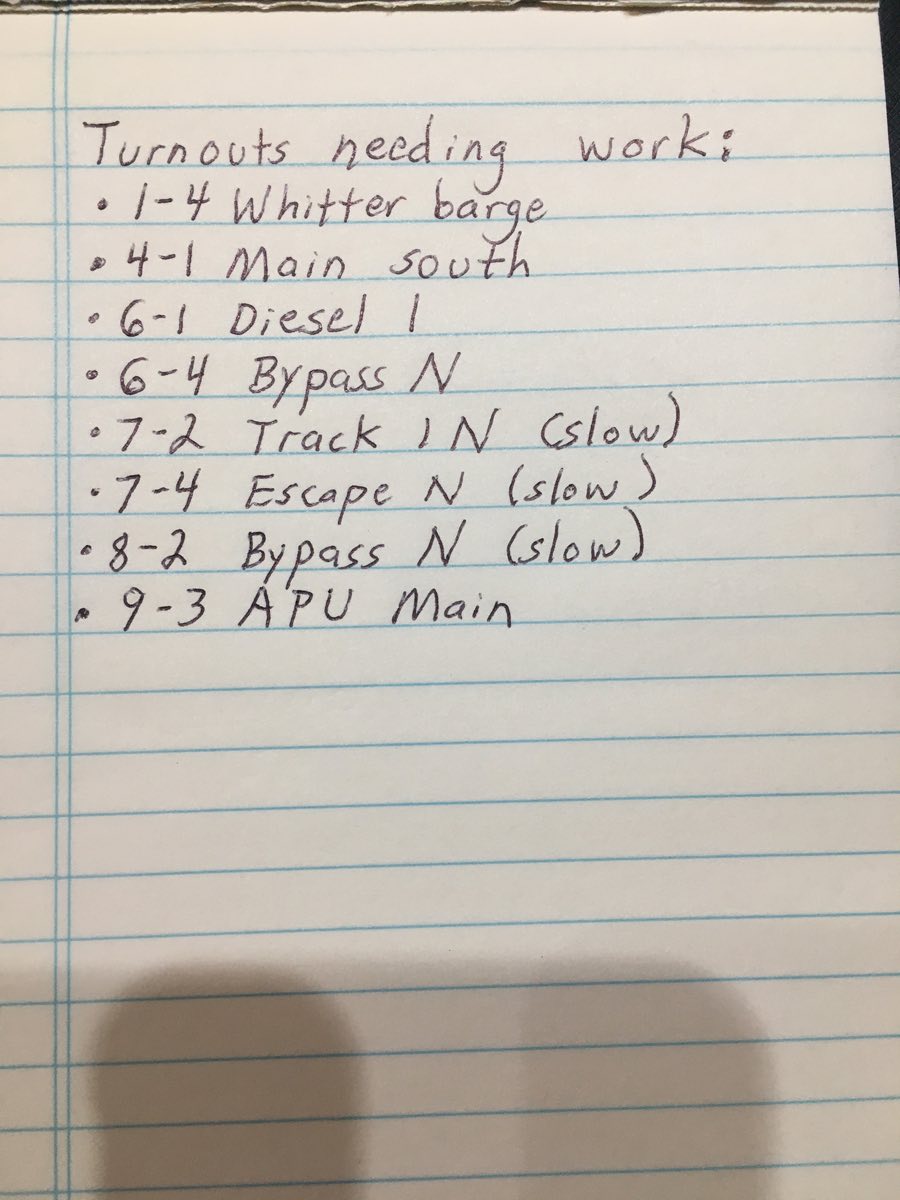
Rick arrives tonight with a "to do" list. We will continue to add to this list as other problems are discovered during operations.

1. check Tortoise wires are soldered - we found some weren't soldered so let's check them all.

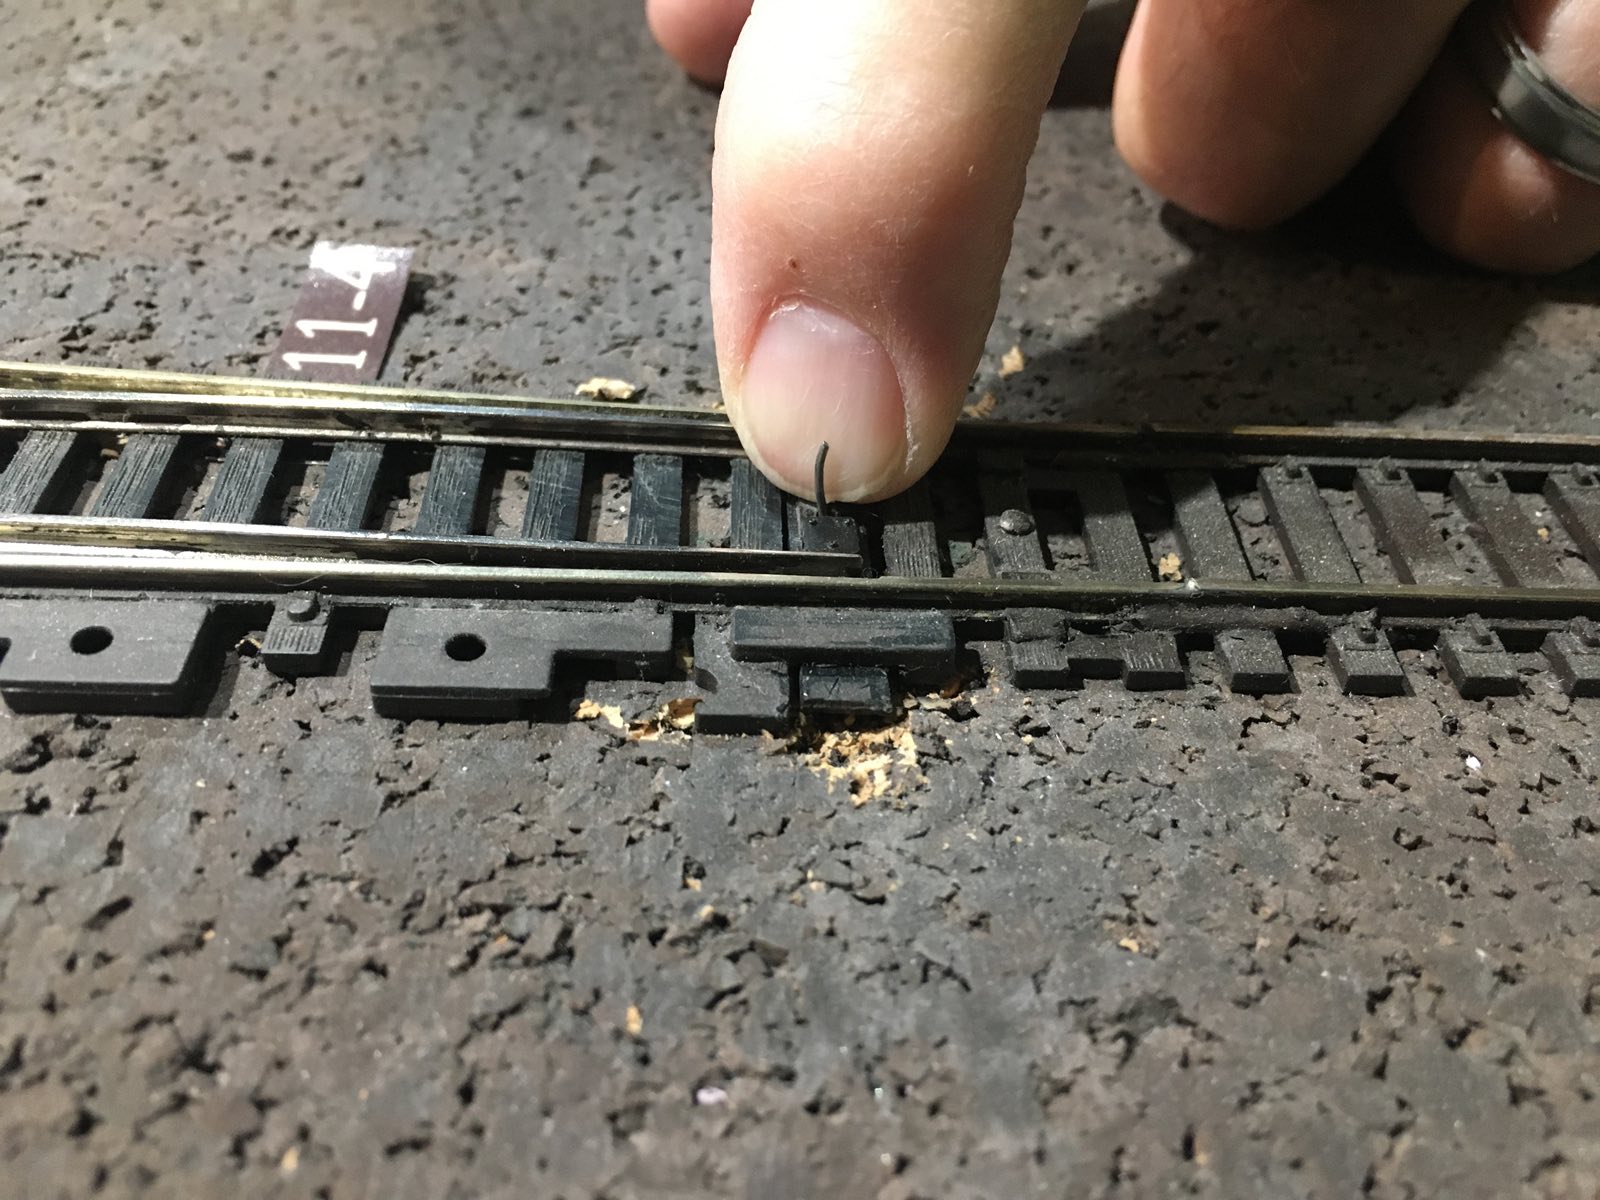
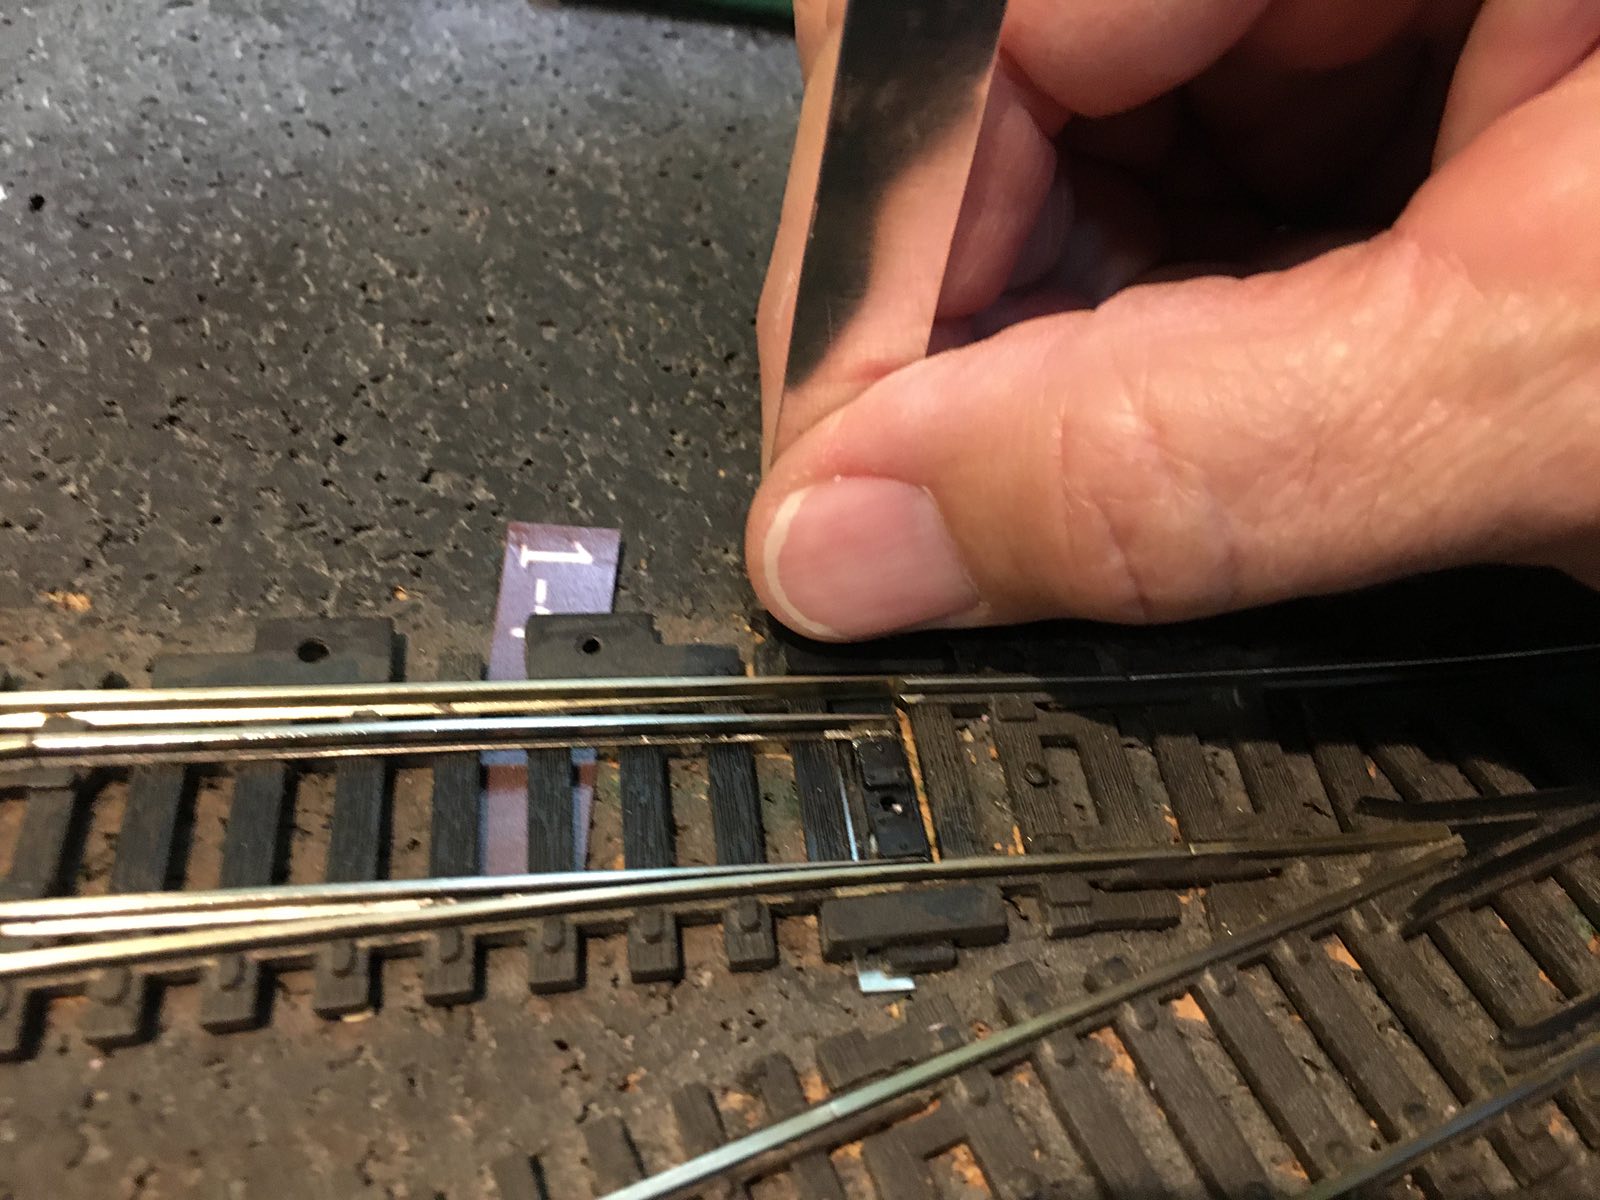
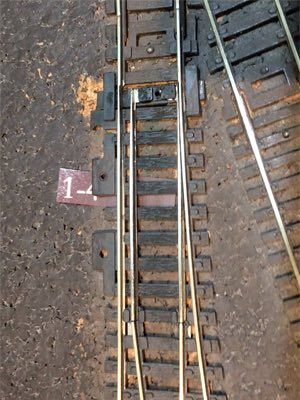
2. Switch spring wire height - one of the wires was not bent downward as it popped above the turnout. Let's check them all.

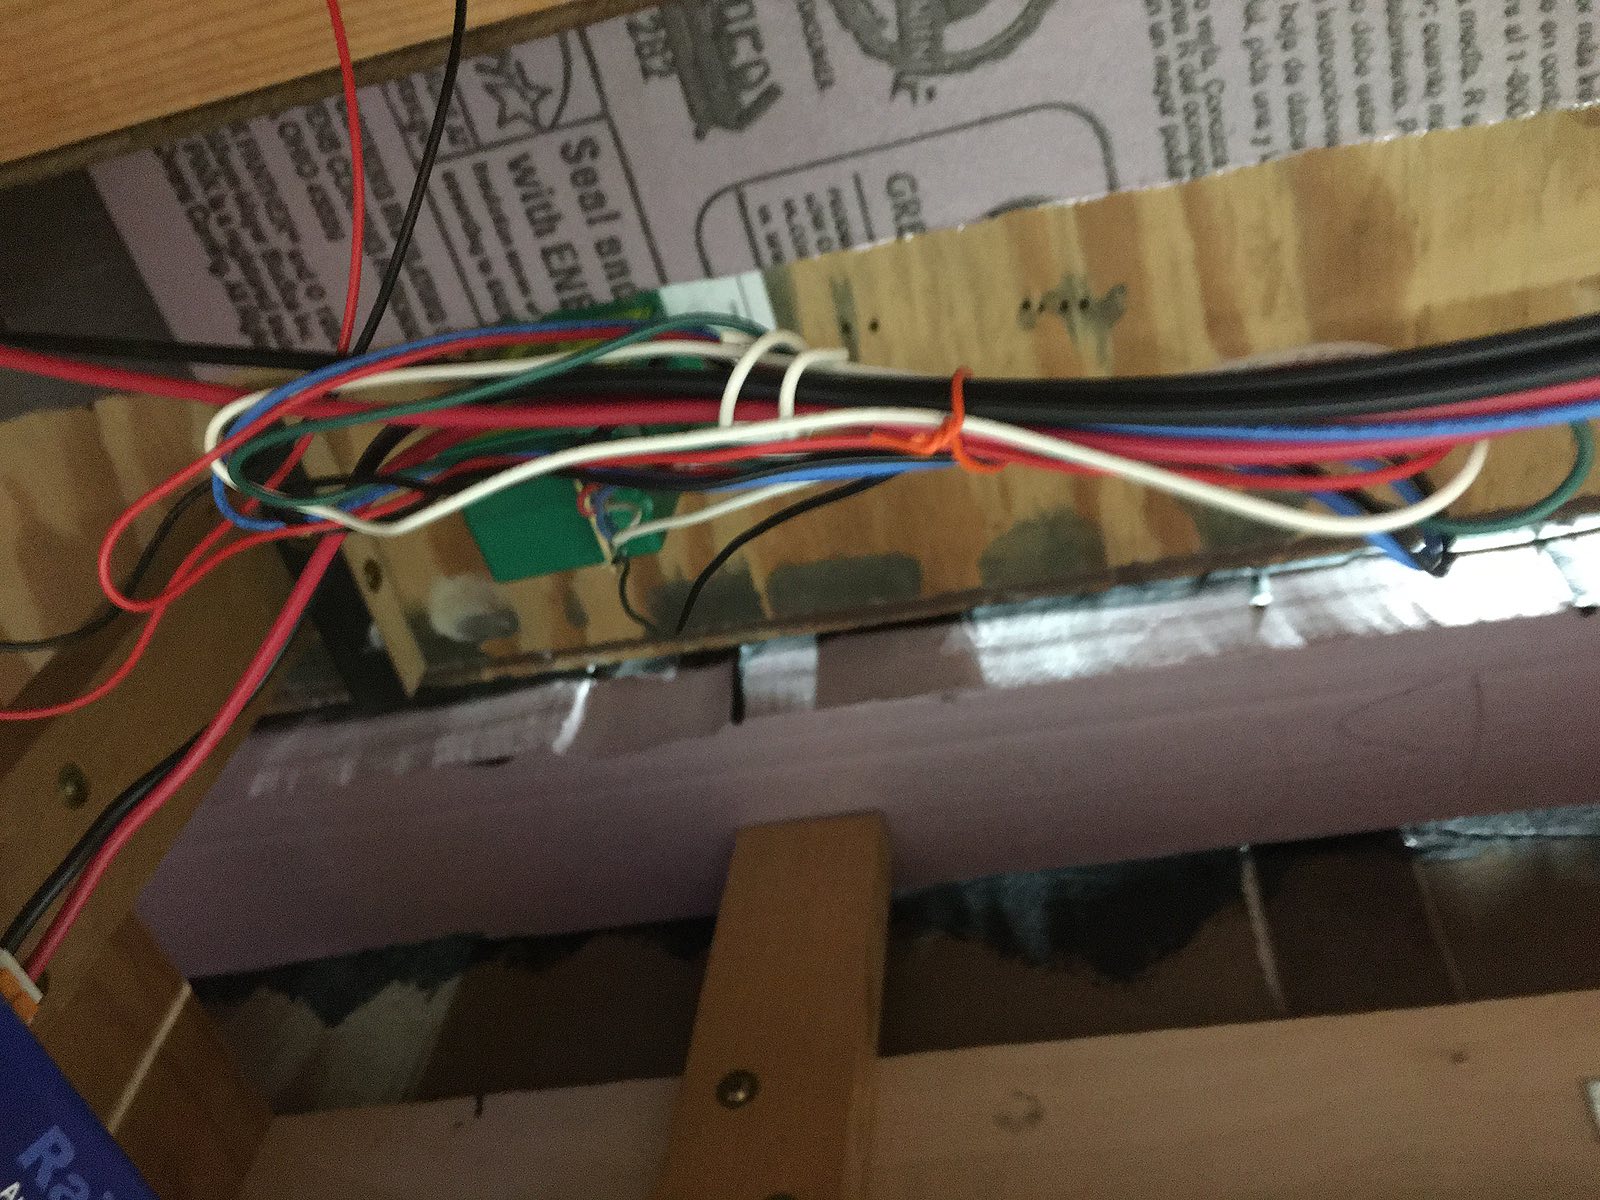
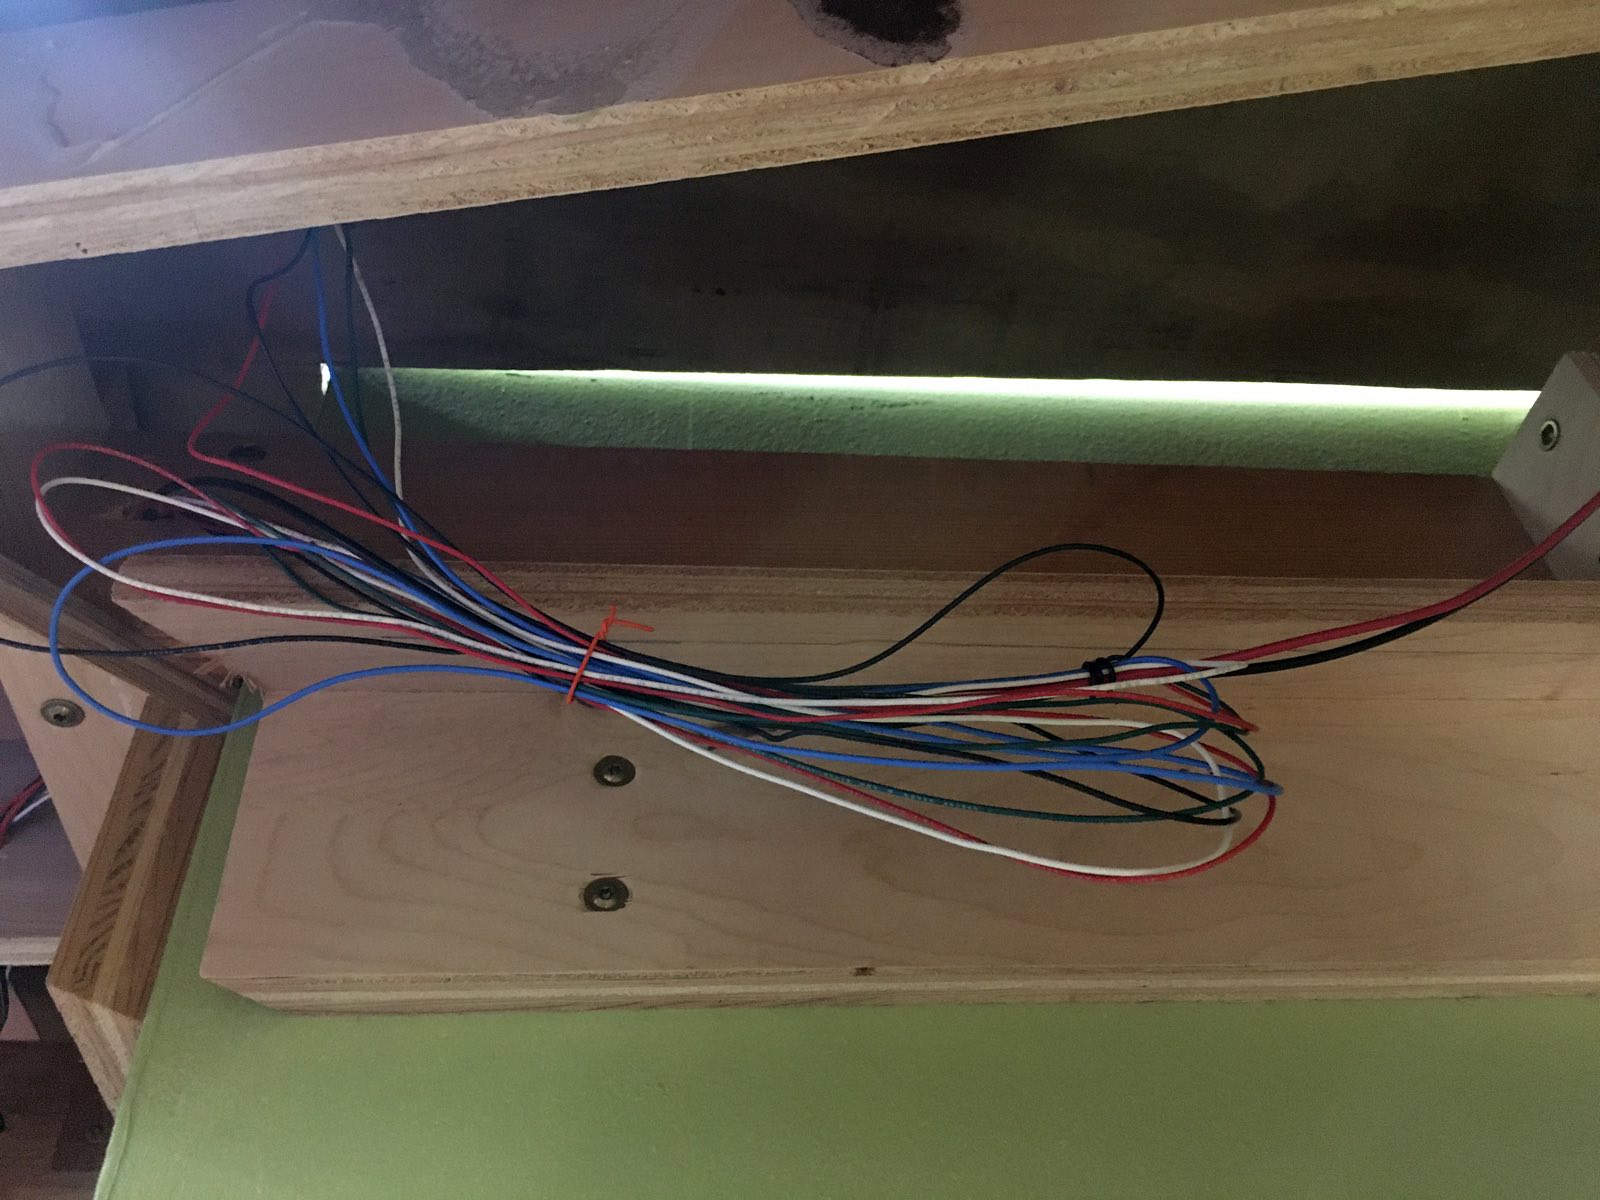
3. Tie up low wires - this will focus mainly on the reverse curve elimination areas.

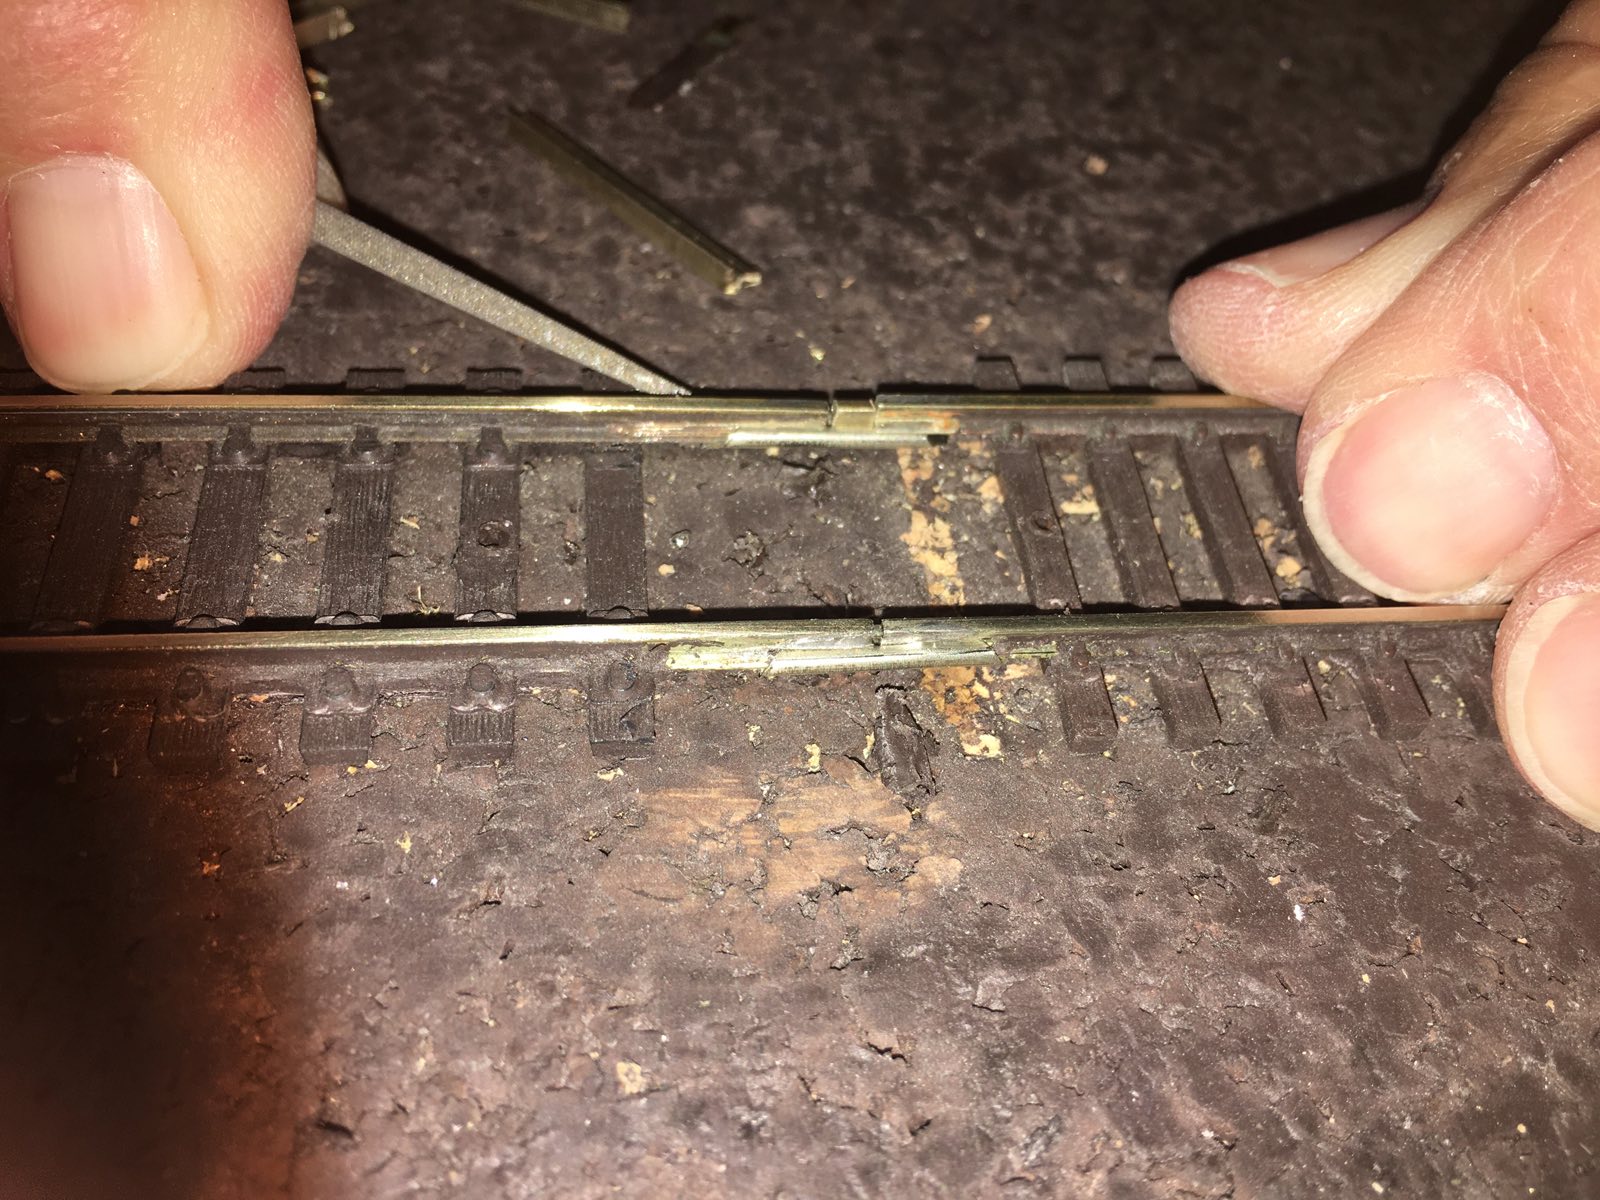
4. Gaps between rails - we found a few so let's check them all.

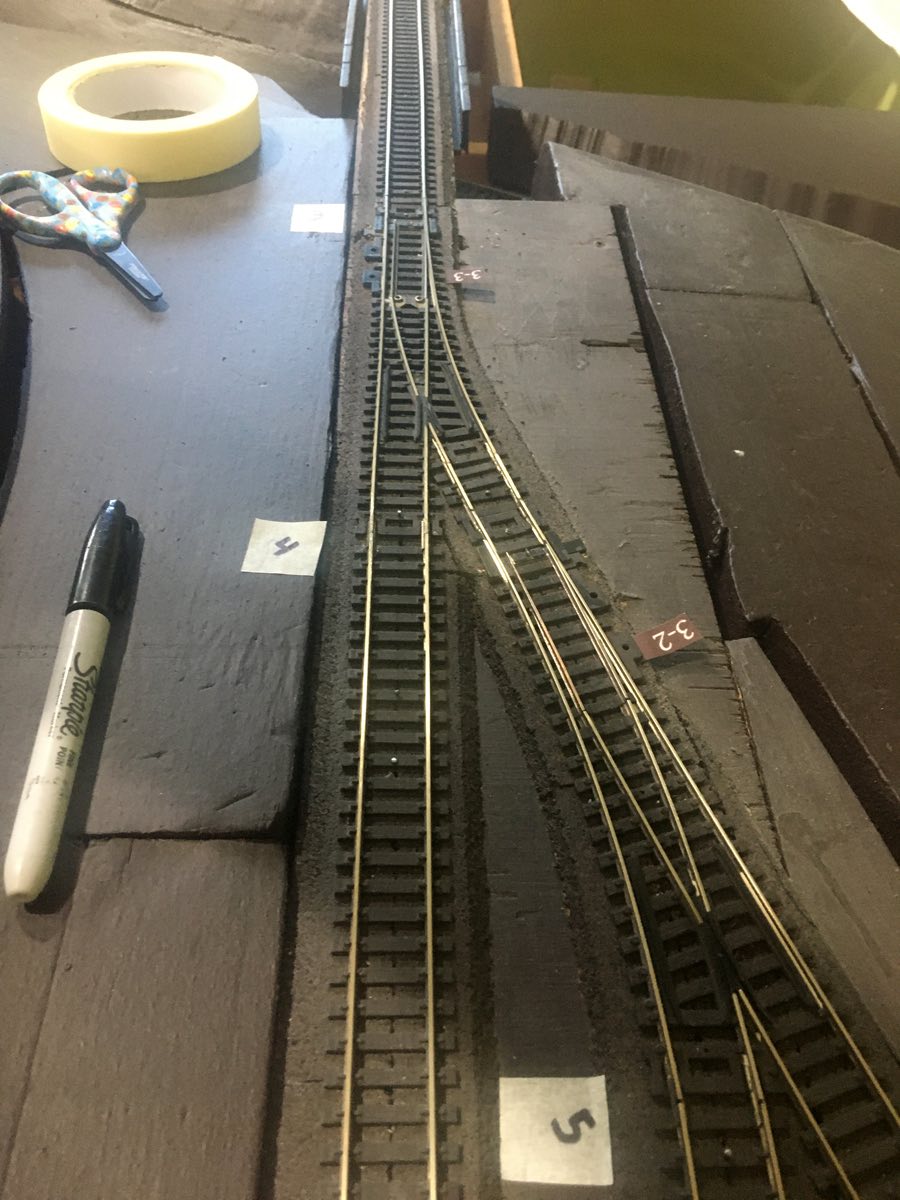
5. Double crossover - an occasional derailment occurs so let's figure out the cause.

6. Air hose length - these are too long on the passenger cars so let's curve them upward more using the Kaydee tool I purchased.

7. Stuck turnouts - a few of them stick due to paint issues

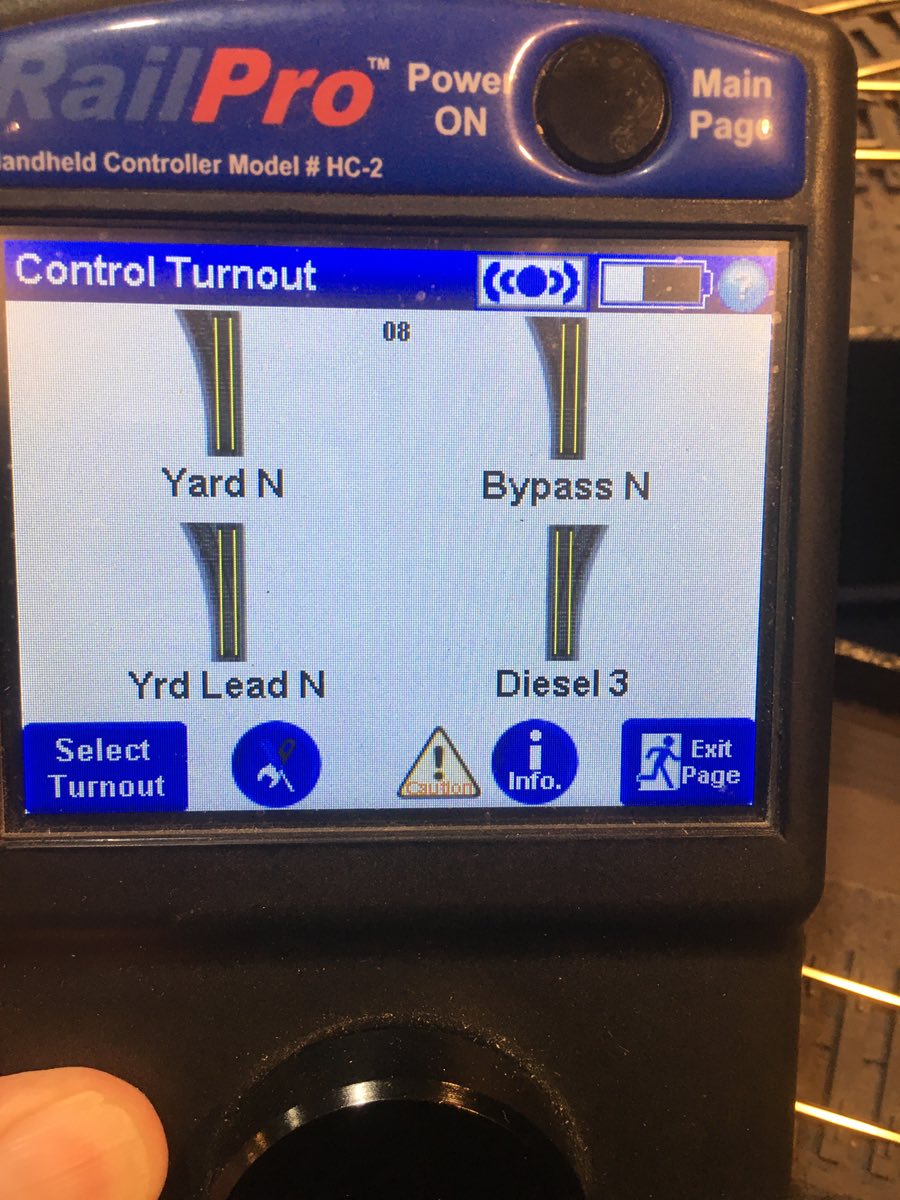
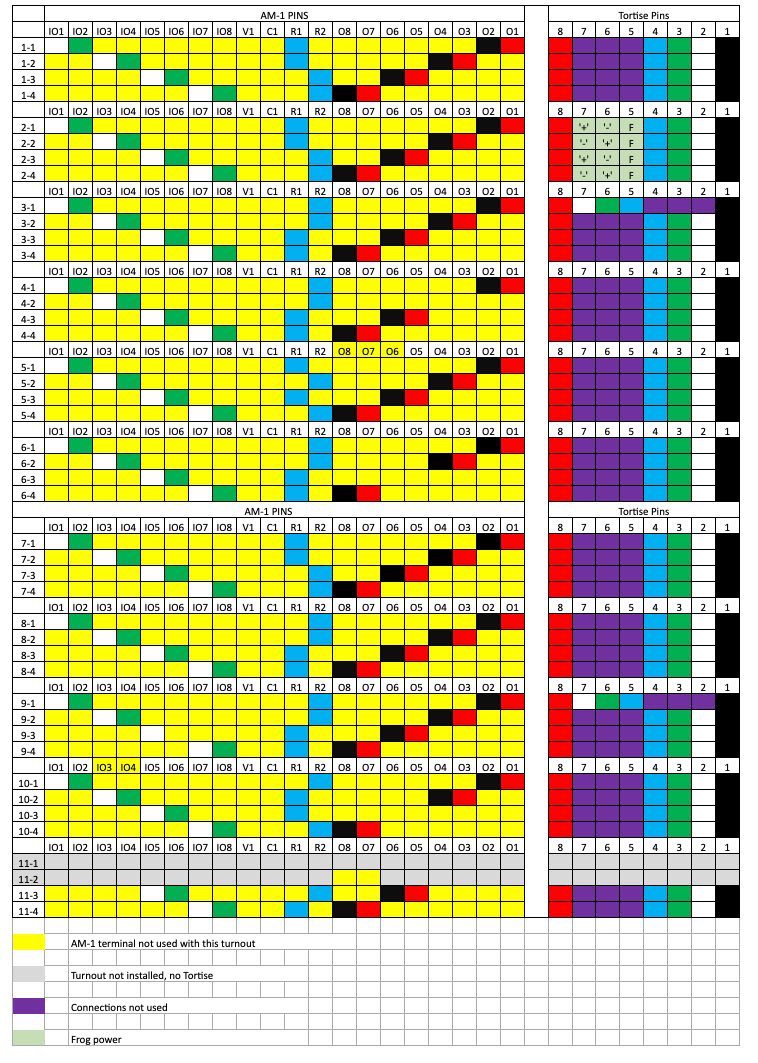
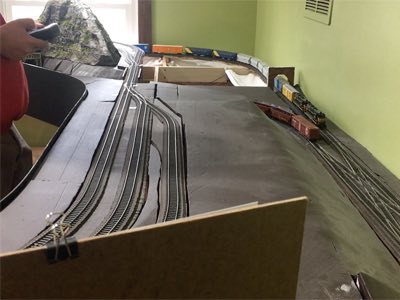
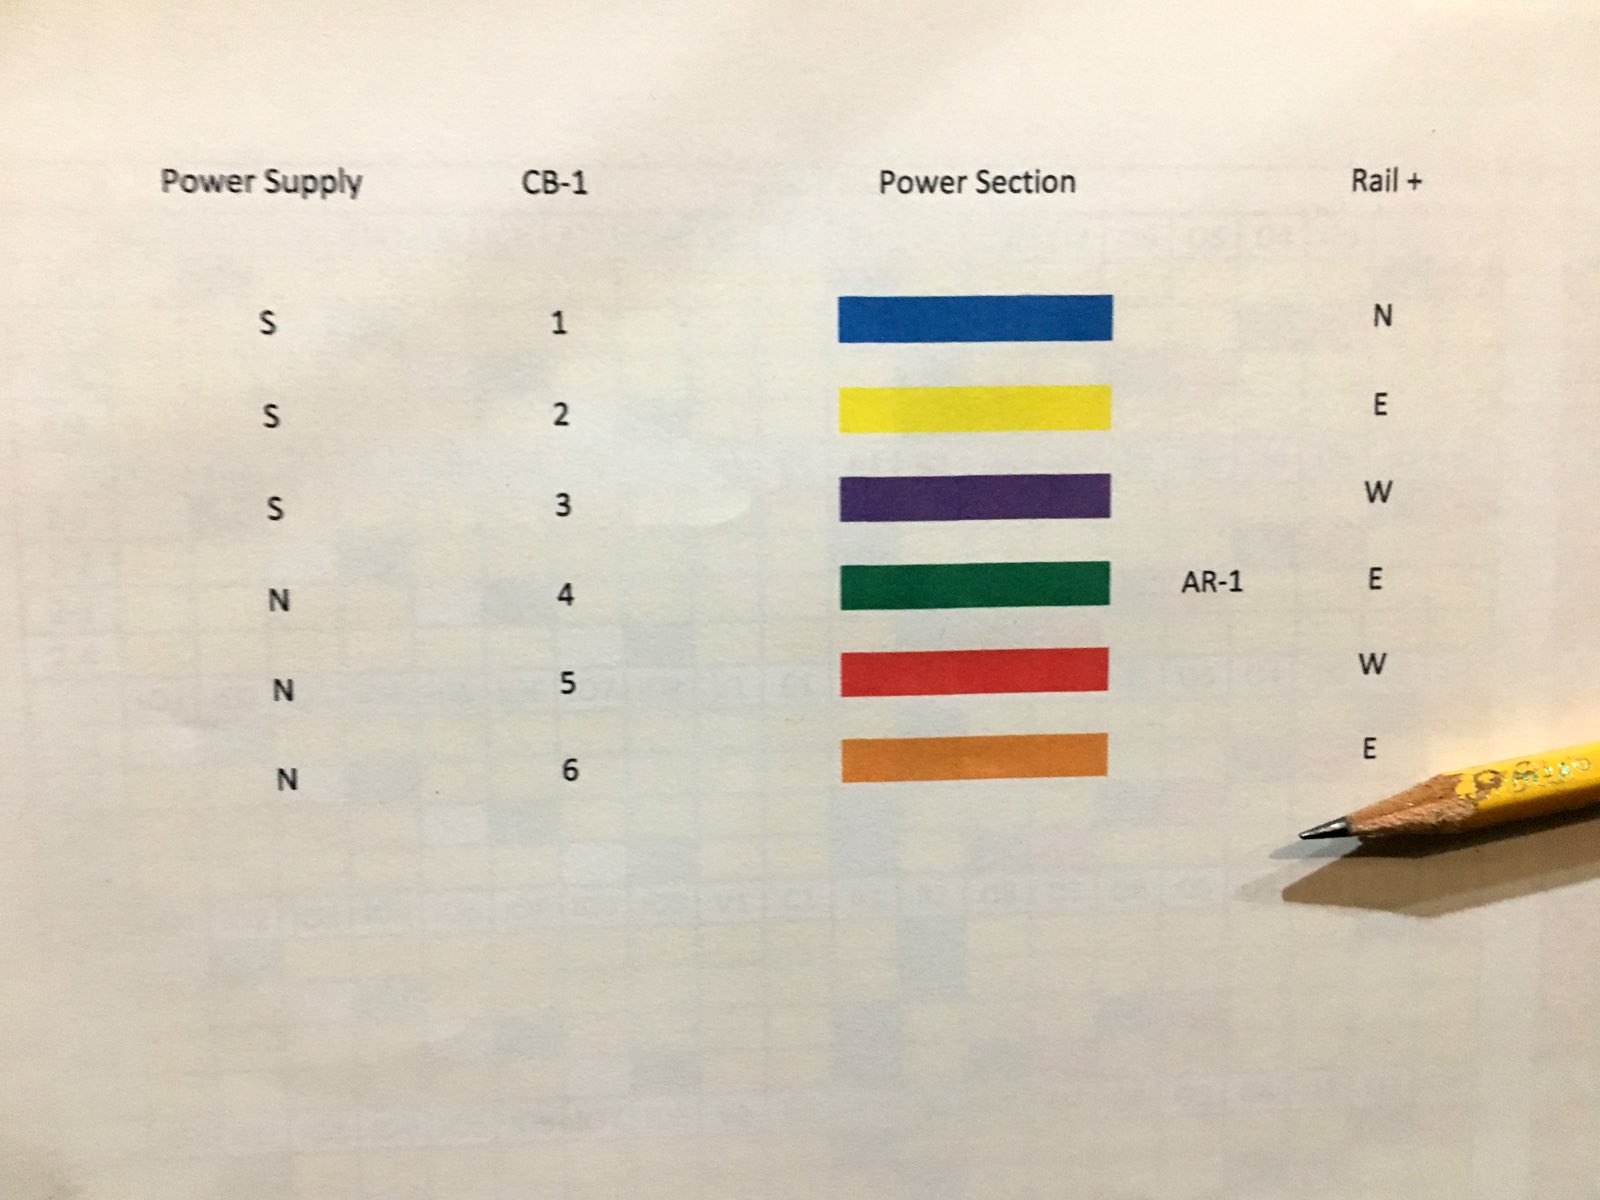
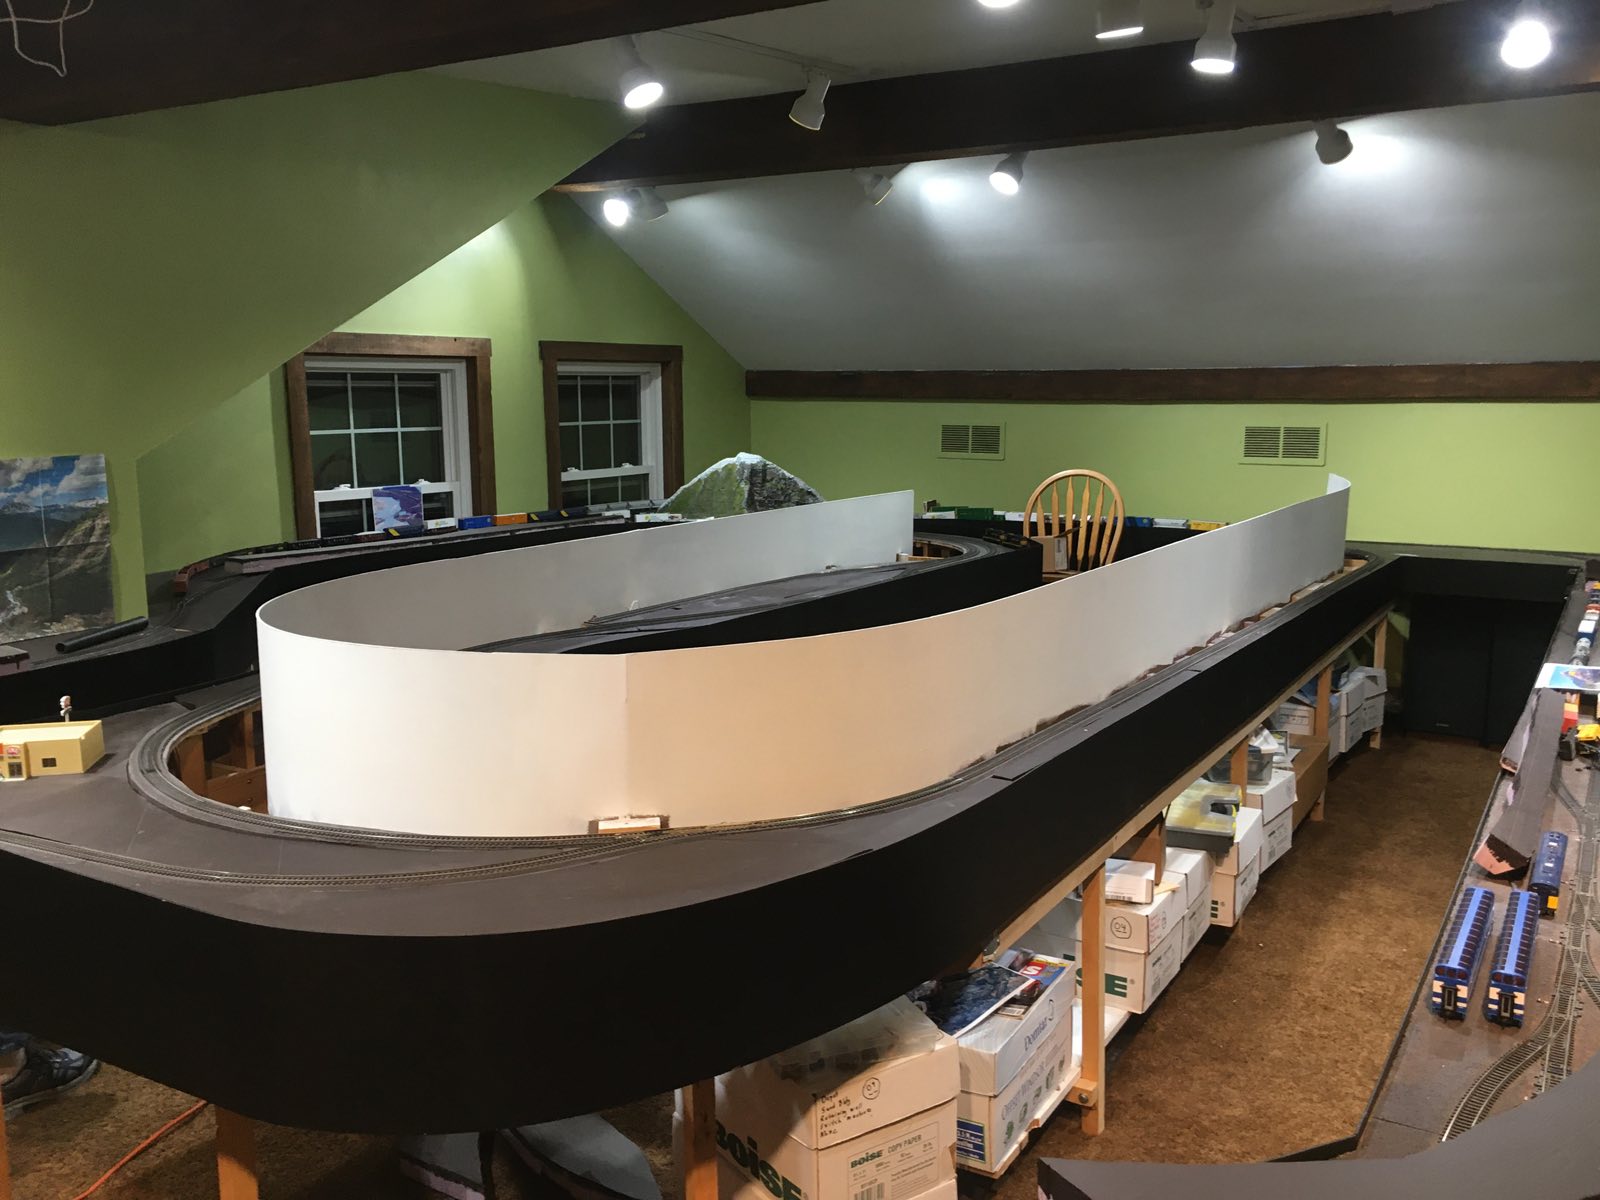
One item not on the list which has plagued us for well over a year is a warning light we see whenever the north yard entrance switch is thrown. Once the warning triangle appears none of the switches in that Accessory Module (shown above) work. We must crawl under the layout to the AM-1 and press the reset switch. Rick is determined to find the cause. He spent an hour and a half checking voltages, wiring configurations and Tortoise solder connections. Finally, when re-connecting the wires for the north yard Tortoise at the AM-1 the problem went away. We surmises on of the wires was not completely plugged in. Rick is now very determined to check wiring for every Tortoise switch machine and AM-1. This will take several Wednesday night sessions.

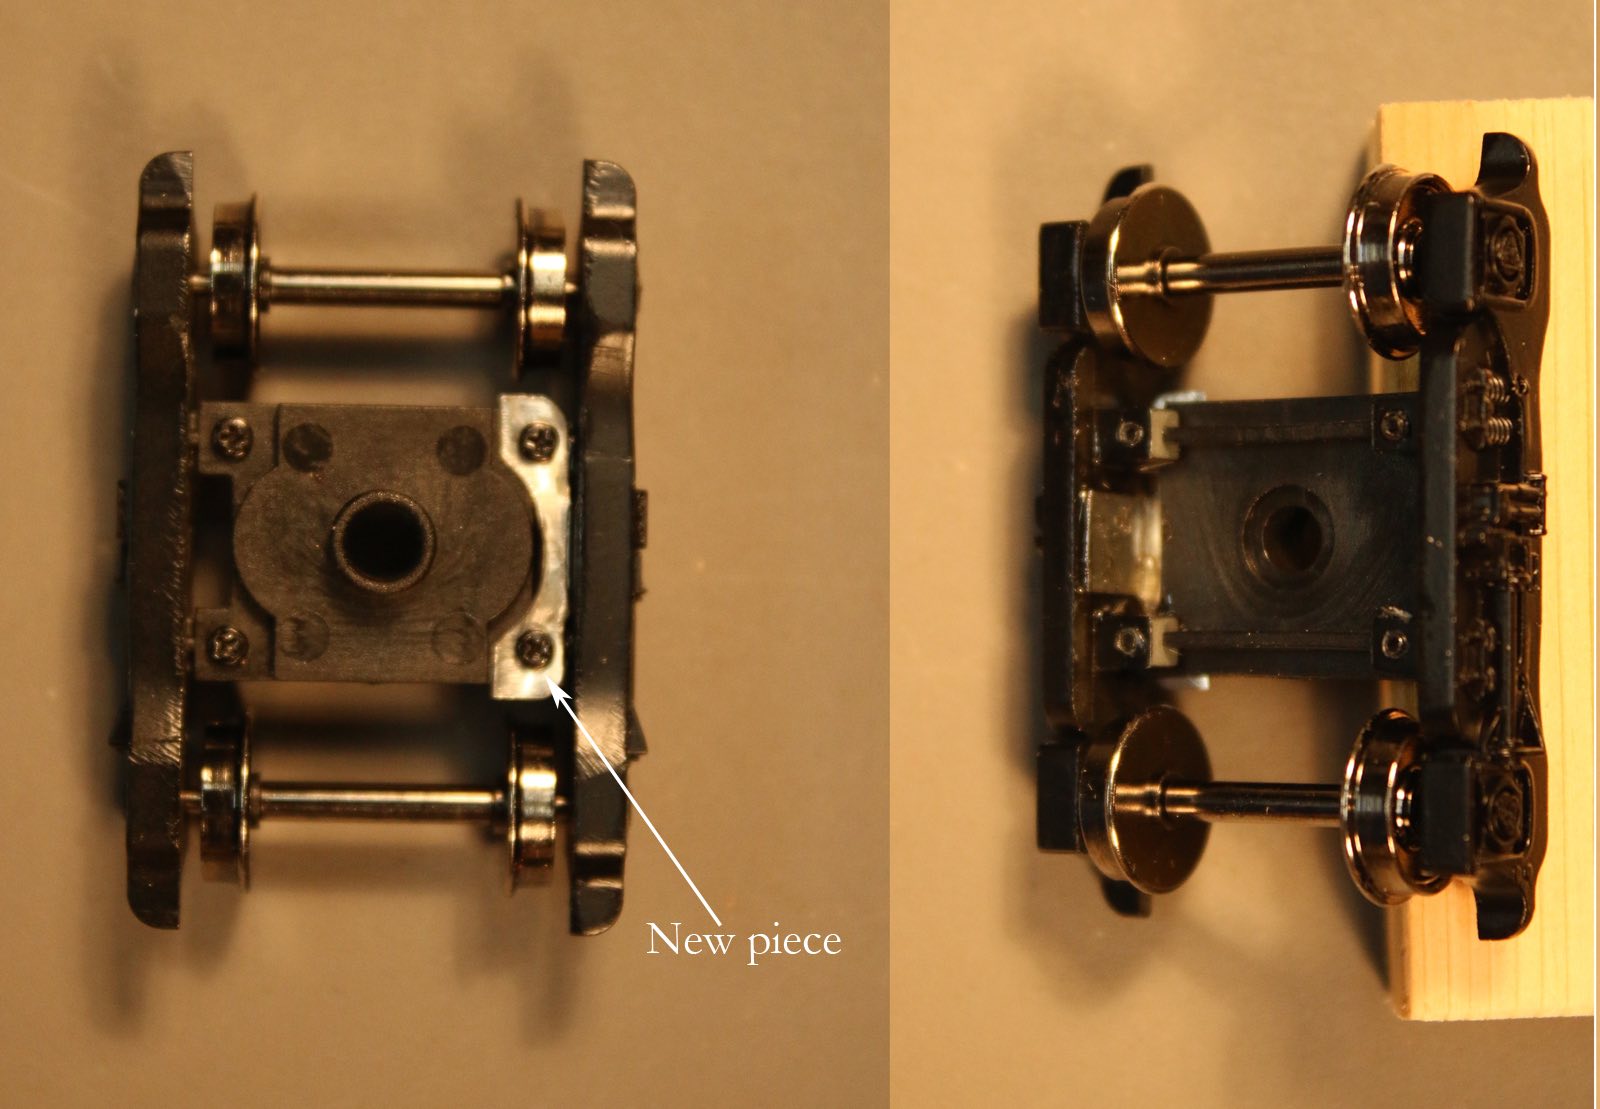
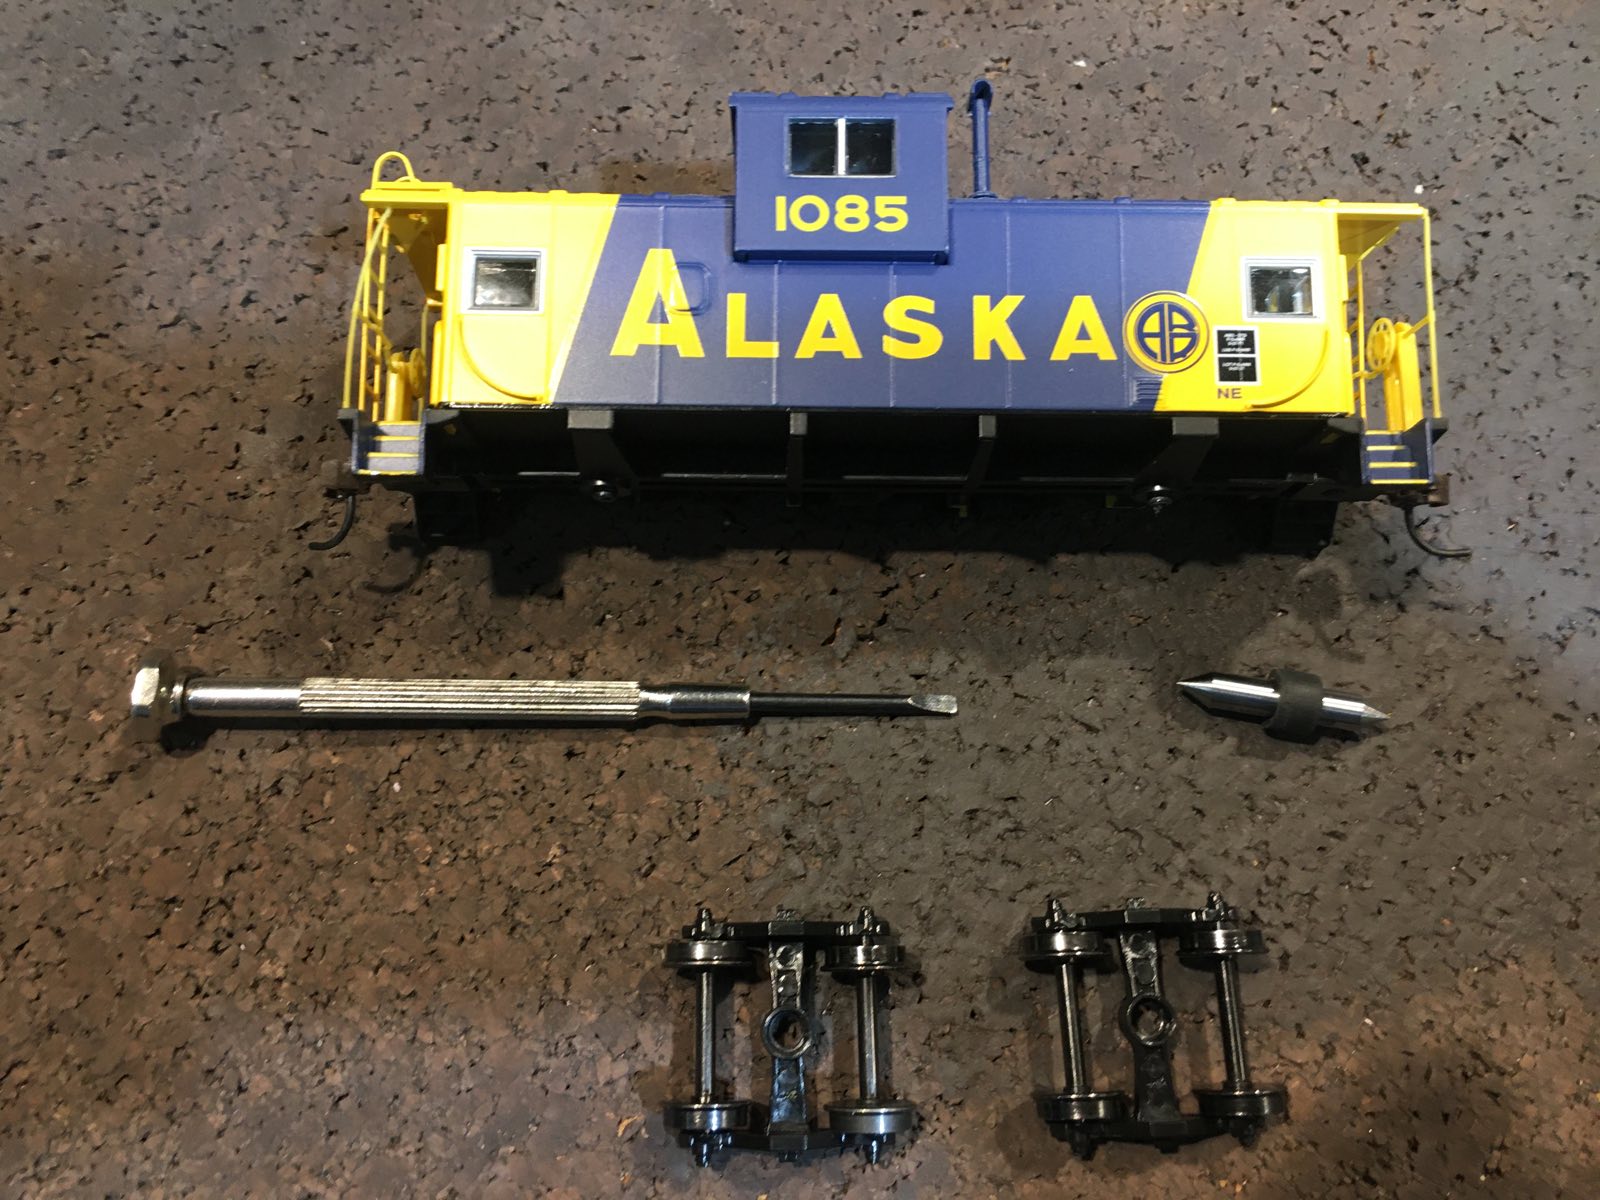
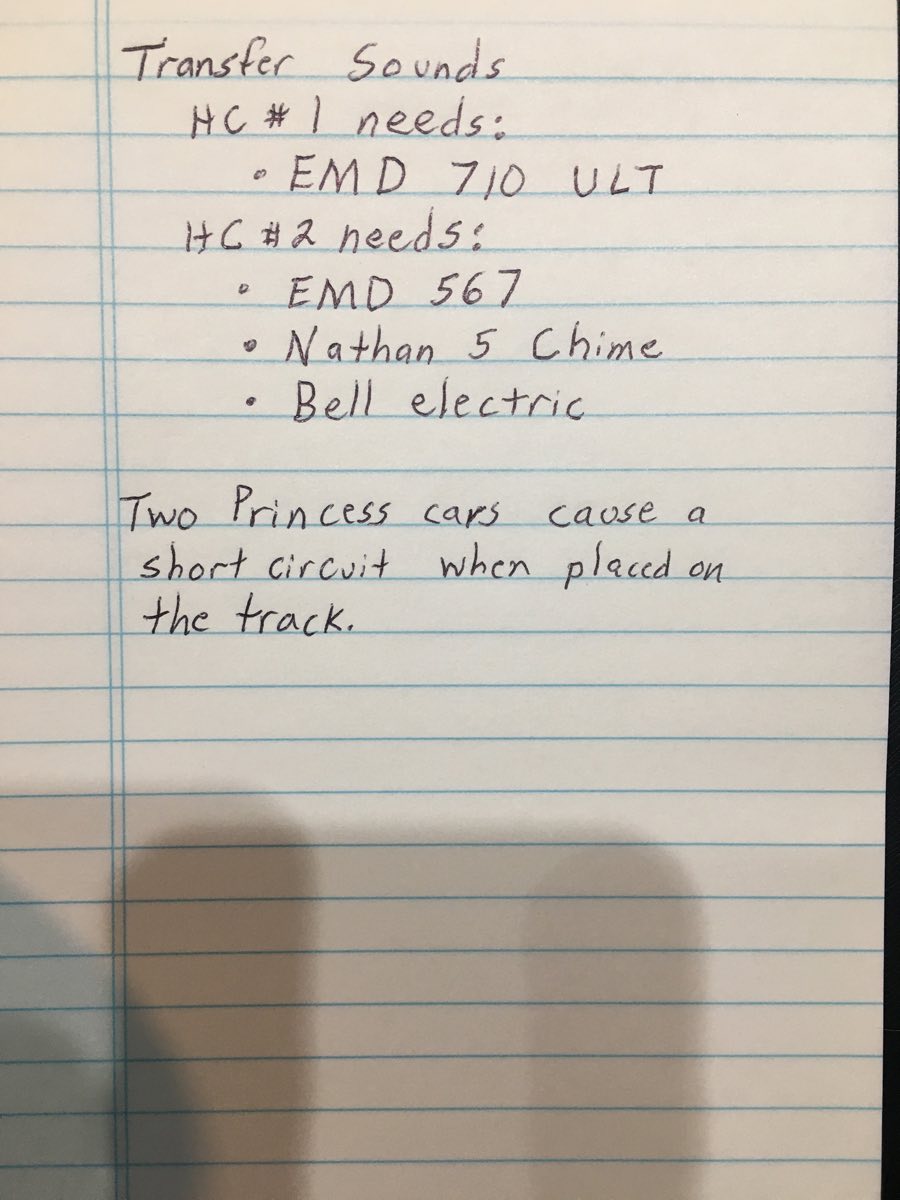
Almost every Wednesday night I show Rick something I've broken over the past week. Typically, he will take my boo-boo home and do some very meticulous repair work. Well, this week I was trying to fit my Princess passenger cars with new metal wheels. I thought the trucks were plastic and would easily prior open. When this didn't happen I applied some additional force and broke the side of the truck from its mounting screws. Whoops! Those trucks were metal. Who would have thought? He took it home and fabricated a new mounting piece. After taking the photo he painted this piece black and it blends in perfectly.

Additionally, the new axles were a smidge too long and refused to turn. Rick took them home, filed the ends slightly and mounted them in the metals trucks. Now all three of Robert Krol's Princess passenger cars roll smooth as glass on the rails.


October 14, 2020
Wiring matrix
wiring tie up wiring tie up

Rick stopped by on Sunday to do some additional work on the layout. He developed a check sheet for assuring all Tortoise switch machines and AM-1s were wired correctly. He finished almost half the list.


He also finished #3 on the checklist consisting of tying up low hanging wires from the reverse curve eliminations. The above photo shows the lassoing of wires at the Smooth As Glass curve.

This photo shows newly secured wires at the high speed switch at the north end of the double track.

metal wheels spring wire check  

Tonight while Rick finished his Tortoise switch machines and AM-1 checklist I converted more rail cars from plastic to metal wheels. Twenty cars still need to be converted for an additional $100 cost. This will take place in two smaller orders.

Also we checked all switch spring wire heights. Several were found and Rick cut, bent and sanded them into submission.

Only four checklist items remain unfinished. Over the next few days I will check for gaps between rails and stuck turnouts. Next Wednesday we will work on derails on the double crossover's northeast turnout as well as check the air hose length on approximately 440 couplers.


October 21, 2020
To do list
To do list
Labeling gaps

I spent a great deal of time in the train room following our last work session. One task was to make a list of turnouts that needed a little bit of Tender Loving Care. They might be switching slow or not opening/closing completely.


I also made a list of locomotive sound files needed on each of the two handheld controllers. These sound files fall into three categories: engine, horn and bell. RailPro provides actual sound files for most Alaska Railroad locomotives. Once I have all files in each handheld controller I will check each of the 24 locomotives to ensure they have the correct sounds. Also, two of the Princess passenger cars converted to metal wheels are causing short circuits. Rick will take these home to investigate.

Finally, I checked the entire layout, including yards and sidings, for rail gaps. I used masking tape and permanent marker to label each location. Now how many can there be? Oh my gosh! We have 21 rails gaps! Who would have guessed? My arms and fingers ached after this little exercise.

Running trains Running trains Barbara Doster and Jan Reynolds

LJ was home for my father-in-law's memorial service. Of course he had to run trains! He loves pushing the envelope and this time wanted to know how many train cars he could run through the loop without the lead locomotive hitting the last car. Although we don't know the exact answer we can run 2 locomotives plus 27 freight cars with room to spare.

While running the train grandsons Liam and Lincoln came upstairs to watch. LJ taught them how to blow the whistle and ring the bell. It won't be long before these "engineers in training" will be running trains on their own!

We love having visitors! It gives us a chance to share the excitement and show off our work. During train night we were pleased to have my mother in-law Jan and her sister Barbara visit our project. Not only did they enjoy the 27 car train roaming the rails, but asked some very good questions and made some astute observations. A fun visit indeed!

Downloading sound files Filling rail gaps Checking power

Rick brought the laptop and I was able to transfer all needed files to each handheld controller. The transmission of engine sound files takes time so I began doing some cleanup work of each of the turnouts.

Rick spent a big part of the evening filling all the rail gaps with solder and filing them smooth. One particularly pesky gap was big enough that it required an addition of a small piece of rail. Now that all the gaps are filled I will need to go over each one with a vacuum cleaner and touch up paint.

Rick also checked the power system for the entire layout. There are seven blocks (segments) to the layout which are controlled by CB-1s and an AR-1. Two power supplies feed 3-4 segments. After much crawling on the floor Rick confirmed all power is connected correctly. This exercise also helped him have an in depth understanding of the power system including connection with AM-1s.


October 28, 2020
Power Spackle

Rick stopped by during the week to do some additional power testing. He connected red and green LED lights to the track to help him understand how the AR-1 and CB-1s work together. He now has a thorough understanding of the entire RailPro power system. Note: The AR-1 makes the necessary power changes in conjunction with the reverse loop.


Also during the week I began working on the internal scenery backdrop. The first task was to remove all the foam board from the adjoining areas. Next, I spackled the three joints (six sides total). Painters tape was applied to the joints to help provide stability.

Twenty four hours later each of the joints was sanded with high grit paper and then with 220 grit. Additional spackle was applied as necessary. Once the sanding was finished the carpet underneath was vacuumed.

Primer Primer complete Fixing switches

When the joints were dry a coat of Kilz primer was applied with a 3 inch paint roller brush. Is a second coat necessary? I believe not. Several days prior I did some testing on a small scrap of fiber board and found a single coat of primer held fast against its slick surface.

Here is a photo of the finished product. What a difference it makes! Now its time to clean up the roller, pan and brush.

Temperatures are dropping here in Clayton, Ohio so Terry made chili and corn bread for our train night dinner. Rick returns two Princess cars which no longer cause short circuits. It seems the wheels were mounted with isolation points on the wrong side. Next, Rick begins to work on pesky turnouts. Here he uses a special tool he created to free up movement on the underside of the switch rod.

Fixed switch Sky painting Sky painting

The above video shows proper movement of a "repaired" turnout. Various culprits affecting a turnouts operation include paint, dust, misaligned spring rods and gremlins. Before train night ends Rick is successful in fixing all turnouts.

The next day I purchase blue paint for the internal scenery backdrop. Although the color seems light it is a near perfect match with the purchased exterior scenery backdrops. Again, one coat seems more than adequate. Now its time to clean up the roller, pan and brush.

A few brown foam board pieces need touched up due to accidental swipes. Next, all foam board pieces are replaced (not shown above). Finally, the entire room is vacuumed. Man, am I ever tired!


Feel free to contact me at john@alaskarails.org
Page created 9/4/17 and last updated 11/1
/20