October 1, 2019
|
 |
 |
October 1st marks the beginning of the month of ghosts, goblins and all things Halloween. Tonight we are graced with the presence of Sylvia who although is slightly anorexic confesses at least she is not bulimic. |
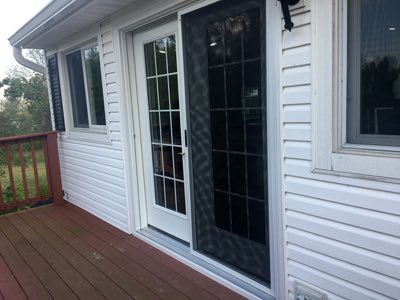
Tornado repair continues here at the homestead. Just prior to our train night the damaged balcony doors were removed and replaced. Screen doors are an added bonus for the crew while glass UV protection will protect buildings, scenery and models. |
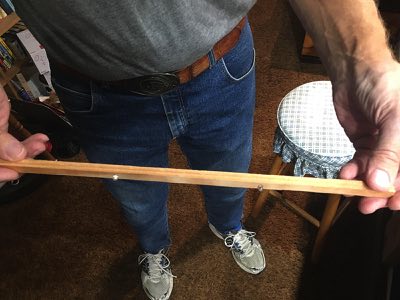
Power to the diesel shop and passenger car tracks now can be turned on and off by rotating a small magnetic located in the base of a storage shed. Click on the above thumbnail photo to view the demonstration video. |
 |
|
|
Settling occurred between the swing gate and the Port of Whittier causing a dip in the tracks. Rick installs a shim under the cork bed and the dip is eliminated. Click on the above thumbnail photo to view the demonstration video. |
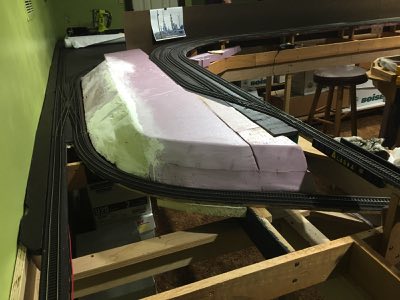
LJ continues to work on the Flint Hill Refinery and double track foam board. Tonight he focuses on the slope between the refinery and the double track. This section requires angled cuts on both sides. |
The Flint Hills Refinery and two six inch storage tanks will sit upon this piece of foam board. The near end will be sloped to simulate a "cut" in the hillside. |
October 8, 2019
 |
 |
 |
Rick is tackling diesel shop lighting by placing two LEDs in a wooden cable channel which will be mounted in the roof. RailPro's AM-1 controls four switch machines, but also has a 5 volt accessory port, which, in this case, will power the diesel shop lighting. |
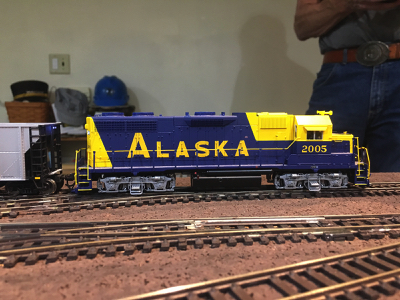
Rick finished RailPro implementation of GP38 #2005 and brought it tonight for her maiden voyage. |
Here is a brief video of #2005. |
 |
|
 |
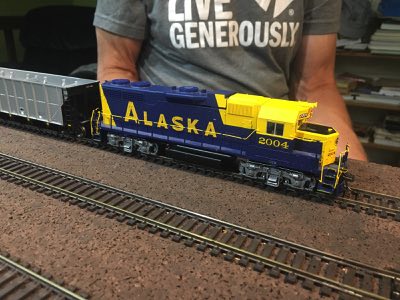
Rick also finished GP38 #2004 and ran her successfully tonight. This brings the total locomotive count to fifteen. Remaining conversations are two SD70s. |
Over the week John added foam board to LJ's Flint Hills Refinery platform. After the Liquid Nails dries John will work on rounding corners and creating land forms. |
LJ adds foam board to the area near Portage depot. No other foam board was added as a fair amount of the evening was spent on fascia board planning. |
October 16, 2019
 |
 |
 |
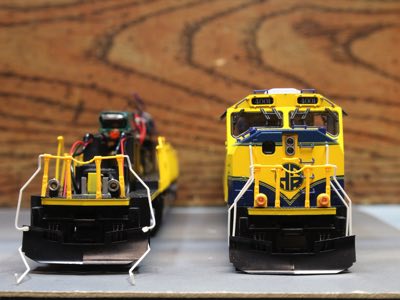
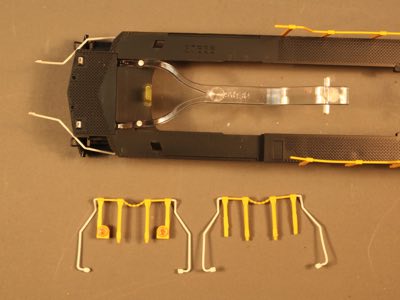
Rick is fitting the SD70MACs with LED lighting. On the right is non-functioning "imitation" ditch lights. The left MAC has RailPro functioning LED ditch lights. |
The old lighting system worked with a crude fiber optic "band". |
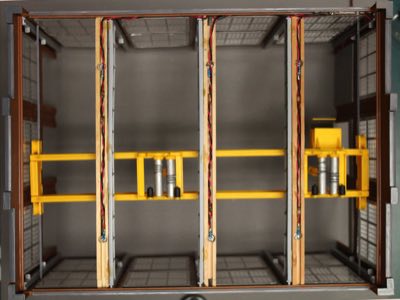
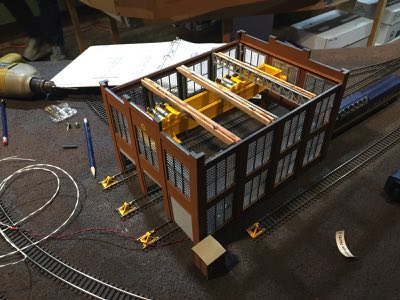
A top view of the LED lighting Rick installed in the diesel shop. The wooden support trough is not visible through the roof of the building. |
 |
 |
 |
A floor view reveals six LEDs peeking through industrial gray "girder" supports. |
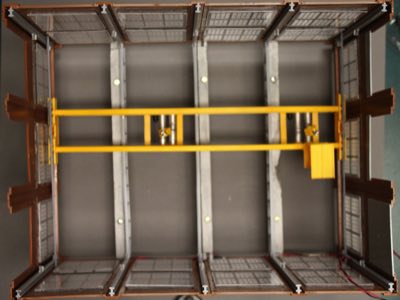
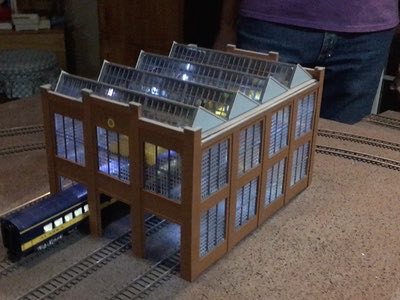
A view of the diesel shop on the layout with the roof removed. |
The LEDS are controlled magnetically via reed switches. Click on the thumbnail above to view the video. |
 |
 |
 |
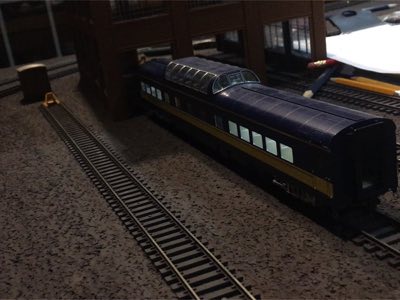
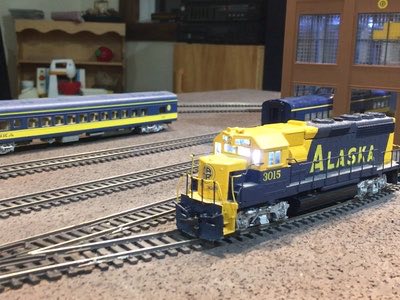
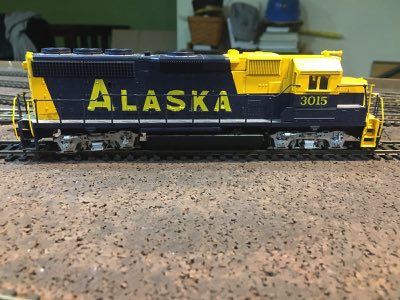
Charter member GP40 #3015 emerges from the diesel shop. The windows in the locomotive need to be painted so the LED does not shine through brightly. |
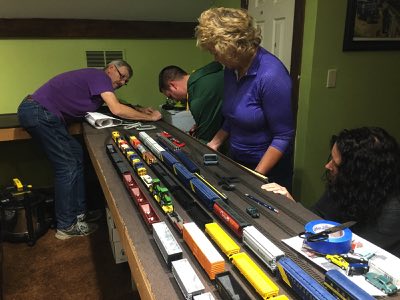
All hands on deck for the mounting of the first fascia board. It is a good way to work off tonight's special turf and surf dinner of top sirloin, shrimp cocktails, homemade bread and French fries. |
John spent several weekday sessions on the Flint Hills Refinery foam board. Tonight LJ finishes all the riser/cleat supports for the land form. |
October 23, 2019
<  |
|
 |
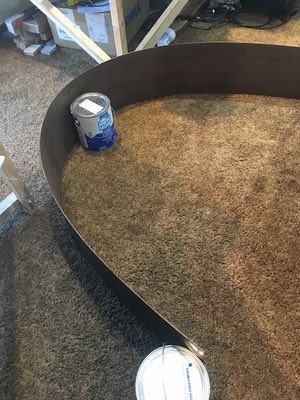
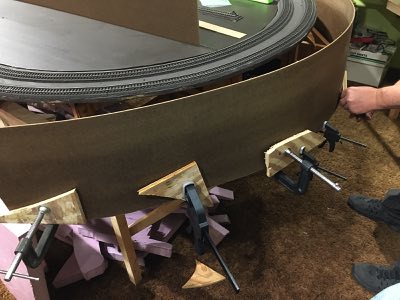
While using brute force to curve the fiber board fascia around the APU several weeks ago the board snapped in half. Therefore, we knew we needed to find a better method. Over the next week I repetitively wet down both sides and made small bends in the fiber board. Half gallon paint cans held everything in place. |
Within several days I reached the desired curve radius. However, I decided to curve the fascia board even more in hopes that when released it might retain the desired shape. I did not get a final photo, but was able to have the fascia curve 180 degrees. |
During the week I removed the clamps from the Anchorage siding fascia and hand sanded off the slick finish. Should I use primer or not? I decided to apply two coats of paint without using primer. Our crew reached a unanimous agreement that the paint adhered strongly and covered completely. |
|
|
 |
LJ is smarter than I and uses a power hand sander to remove the slick finish from the fiber board. All sanding is done on the outside balcony to keep the dust off the layout. |
LJ applies liquid nails to the layout table. The fiber board fascia will then be put into place. Approximately 1/2 inch will rise above the layout surface to catch derailments as well as prevent people from bushing up against the scenery. |
I made a trip earlier in the week to Harbor Freight and picked up eight new clamps. This turns out to be a good thing as the Rick and LJ install fascia at the speed of a jack rabbit. Shown here is installation of fascia in the middle of the Anchorage yard. |
|
|
|
We note the corner end of the Anchorage yard is floating. First, Rick uses a large drill bit to countersink the spot. He now runs the screw into place and secures the corner. I will return later with wood putty and paint to conceal the screw head. |
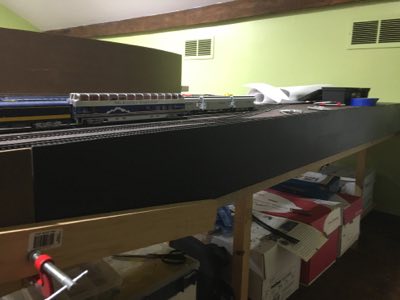
After smoothing out several small plywood humps with a belt sander LJ and Rick install the final fascia piece on the western side of the Anchorage yard. I must admit I was super excited to see all the fascia board in place. |
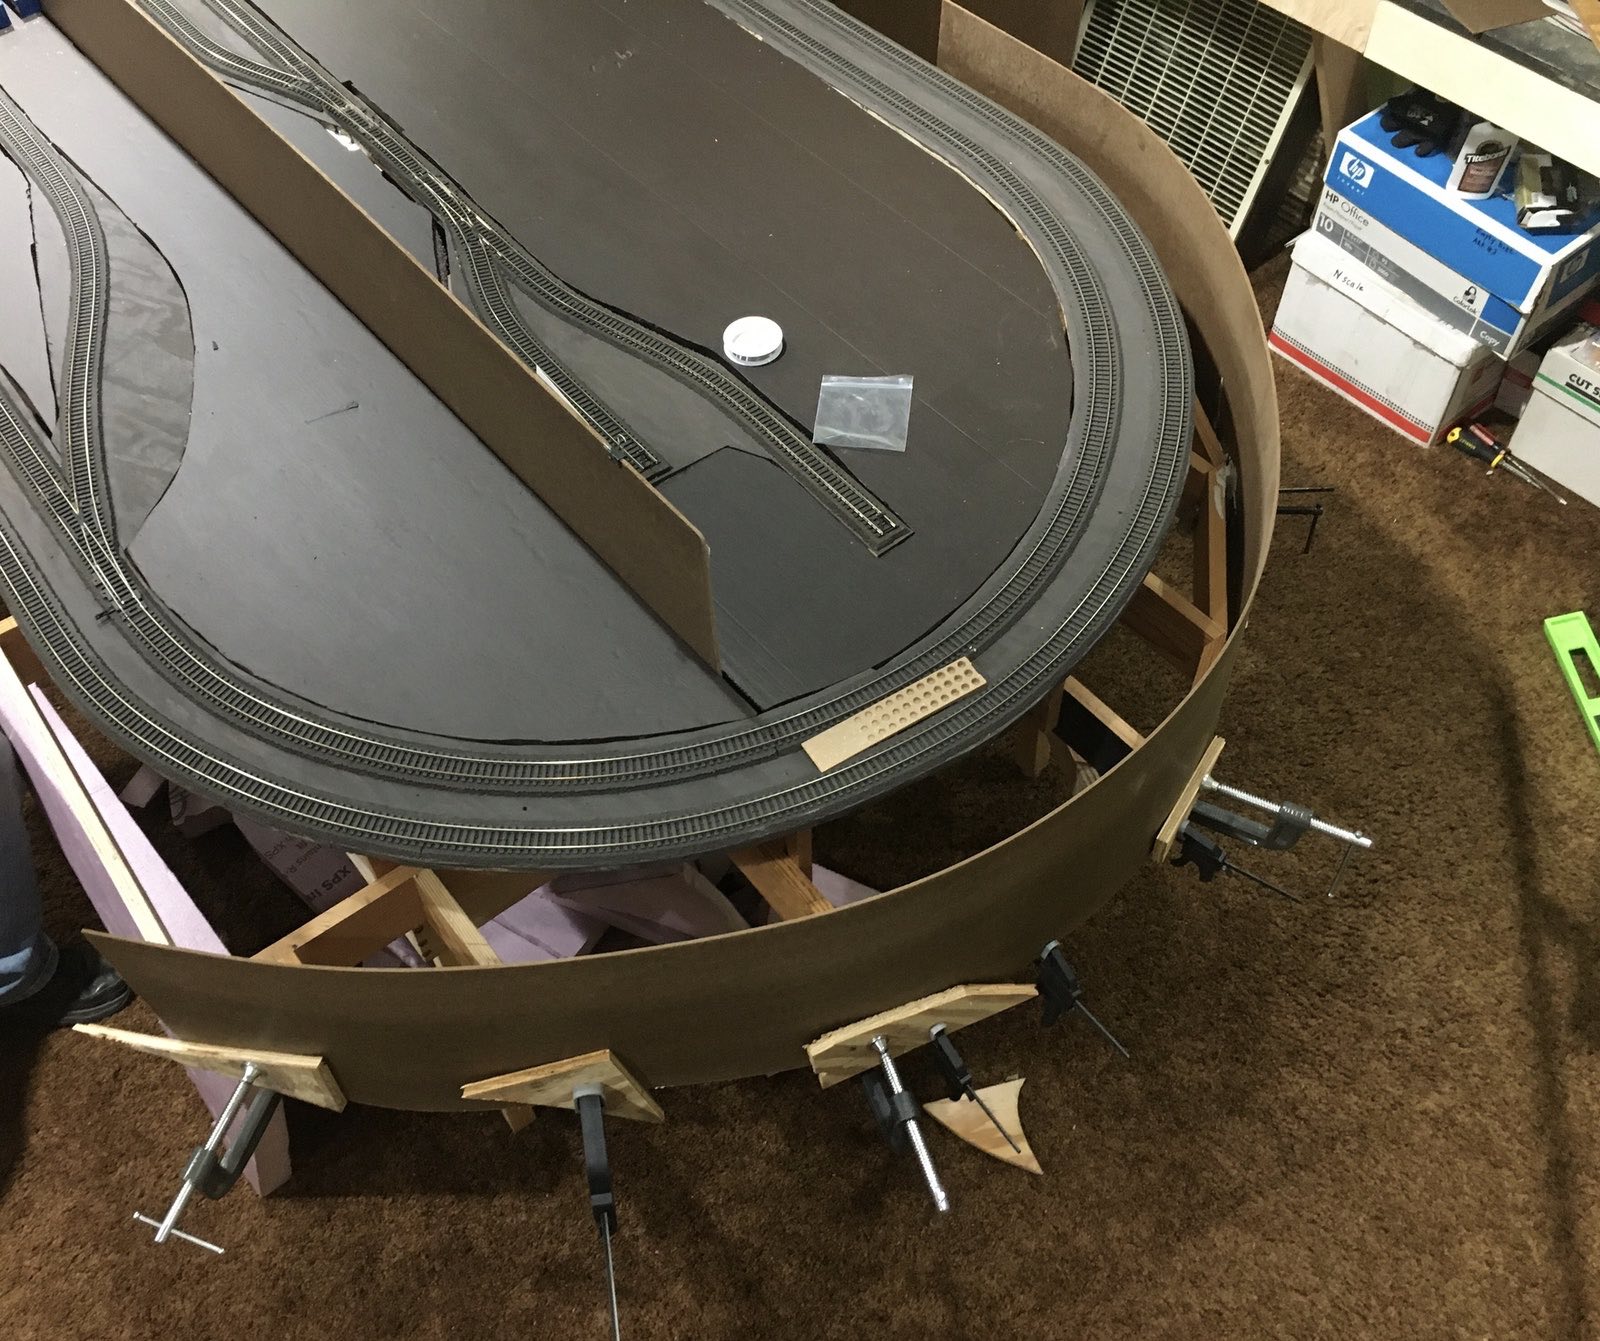
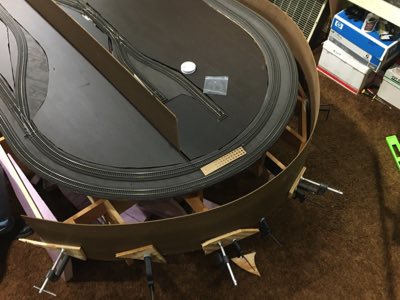
LJ and Rick release the fascia board from the paint buckets and delight in the fact it retained its curved shape. After spending some time making a test fit they apply Liquid Nails and clamp the curved fascia board in place. This is so exciting! |
 |
 |
 |
Rick adds Liquid Nails to the inside of the support of the fascia board using a paint stirring stick. Next week we will use Great Stuff expanding foam to building up the support structure. |
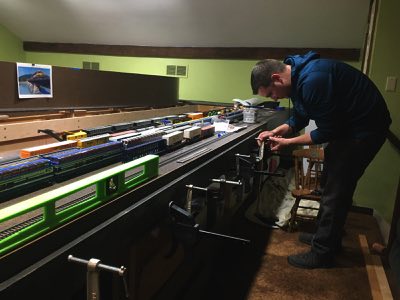
LJ gets up on a bar stool to capture an elevated view of the curved fascia. At let this Alaska Marine Lines while the right side is the APU and Anchorage depot. |
Last week GP40 #3015 was making whirring noises while running. Rick removed the shell and applied lubrication to the various mechanical locations. This week #3015 is purring like a kitten. |
October 30, 2019
 |
 |
 |
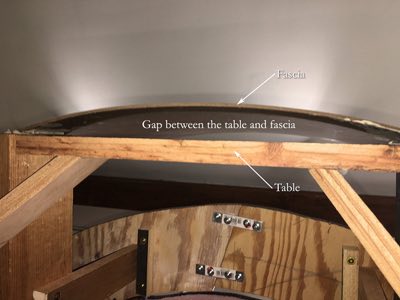
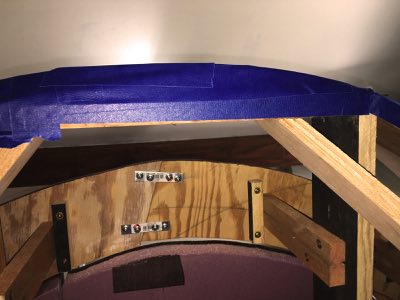
| Four days after our last session I removed all the clamps from the fascia. I was thrilled the fascia stayed in place on the APU/AML section as contact points were at a minimum. I crawled under the table and prepared for the next phase. This view from beneath the table shows one of the gaps between fascia and table. |
Painter's tape was placed over the gap to create a pocket. The tape was curled around the fascia and table to ensure it held firmly in place. |
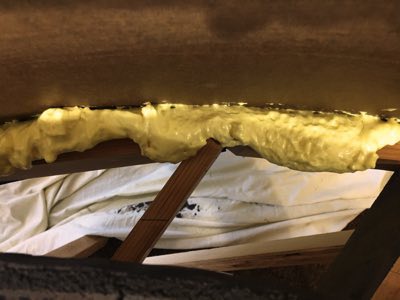
Great stuff expanding foam was squirted into all the pockets along the curved fascia. This will ensure a solid surface plus provide adhesion between the fascia and table. Note to self: Next time use half the quantity of expanding foam as it enlarges greatly over time! I was thankful to have placed a drop cloth under the table. Even though I did not experience spillage it gave me piece of mind. (top down view) |
|
|
 |
| Also during the week I took all cut fascia boards out to the balcony and removed the slick surfaces with a palm sander. I am so sore! |
Terry's theme for tonight's dinner is Octoberfest and features bratwurst, sauerkraut, German beer and homemade pretzels. Everyone had fun making their own pretzel including twin grandson Cody who sported a festive steam locomotive train shirt. |
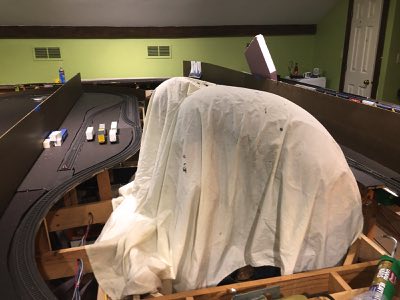
As it is the night before Halloween it should come as no surprise that we had ghosts in attendance. Actually, LJ is using a bed sheet to serve as a poor man's sanding booth to contain the dust as he uses a belt sander to smooth the side table surface in preparation for the fascia. Rick is also under the sheet with a vacuum cleaner to assist in capturing the dust. |
|
|
|
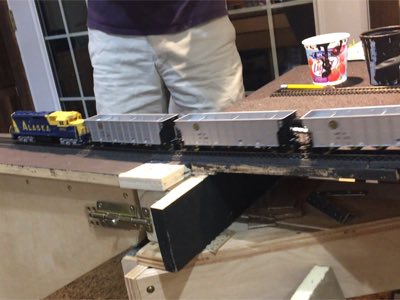
| Next, LJ applies Liquid Nails to the bench work surface at Alaska Marine Lines. We banish Zeus from the room as his face and tail tend to get into the glue. |
Rick and LJ use clamps to secure the fascia to the table. Wood strips and blocks are used between the clamps and fascia to prevent indentation marks. |
LJ applies Liquid Nails to the table at the Anchorage depot. The group decides to use a short piece of fascia as opposed to a longer curved one which would create an unwanted large fascia/table pocket. |
|
|
|
| Rick and LJ apply clamps to the Anchorage depot fascia. |
LJ applies Liquid Nails to the north end of the Anchorage yard.... |
...and continues on into the curve leading to the Portage depot. |
|
|
|
| It is a good thing I bought four more tubes of Liquid Nails this week as LJ needs a refill to finish the stretch into Portage depot. |
It took every remaining clamp in our inventory to finish attaching the fascia in this long stretch. |
Rick brought in two SD70MACs for a trial run. Two minor issues observed are switching the shells between the units plus troubleshooting one unit's ditch lights. |